AOC AGON Pro AG344UXM
Introduction
As AOC like to promote, their new AGON Pro AG344UXM monitor is the World’s first 21:9 aspect ratio Mini LED monitor, designed to offer significantly improved HDR capabilities and performance in the LCD monitor market. We’ve seen plenty of ultrawide screens over the years in 34″, 35″ and 37.5″ but high end HDR capabilities have largely been limited and focused on the 16:9 aspect ratio models, with 27″ and 32″ models offering 4K resolutions and high-end backlights. These have included FALD (Full Array Local Dimming) backlights and later, Mini LED backlights with increasing numbers of smaller dimming zones for better performance and content control.
In the ultrawide market we’ve only seen a couple of monitors which we would consider to offer decent high end HDR capabilities. There was the 35″ ultrawide Asus ROG Swift PG35VQ all the way back in mid-2019 which had a 512-zone FALD backlight. Competing models from Acer and AOC were also released using the same panel. There’s a 49″ super ultrawide (32:9 aspect ratio) from Samsung with their Odyssey Neo G9, and then more recently OLED technology has made its way in to the desktop monitor market as well, with the 34″ ultrawide Dell Alienware AW3423DW offering an impressive option for HDR gaming and multimedia.
Now AOC are looking to enhance the LCD options in this ultrawide market with a high-end HDR backlight option. The AG344UXM has an impressive 1,152 zone Mini LED backlight, which should offer excellent content control, dimming and contrast, while also helping to reduce blooming and halos in content. Speaking of HDR, the screen is also certified to the VESA DisplayHDR 1000 standard, including a 1000 nits+ peak brightness, and the required wide colour gamut and 10-bit colour depth.
The AG344UXM is a versatile monitor, offering features and capabilities suited to gaming as well as for more general, office and productivity uses. There is a 170Hz refresh rate, supported by adaptive-sync for variable refresh rates. The screen is based on an IPS panel with a 3440 x 1440 resolution for a large desktop area, and there’s a good range of input options including DisplayPort, HDMI 2.1 and even USB Type-C (with DP Alt mode and 90W power delivery) for single cable connectivity. The screen also includes a USB hub, KVM function and Picture by Picture (PbP) support, a handy ‘Quick Switch’ accessory is provided and there are integrated 2x 8W DTS sound speakers, making it a very capable all-round monitor.
We will put the screen through our usual testing to see how it performs.

Key Specs and Features
- 34″ ultrawide, 21:9 aspect ratio with a rare flat format (not curved)
- 3440 x 1440 resolution IPS technology panel
- 170Hz refresh rate
- 99% DCI-P3 wide colour gamut
- Adaptive-sync VRR support (certifications TBC)
- Mini LED backlight with 1,152 local dimming zones
- VESA DisplayHDR 1000 certification
- 1x DisplayPort 1.4, 2x HDMI 2.1 and 1x USB type-C (DP Alt mode and 90W PD) inputs
- 4 port USB hub and KVM function
- LightFX RGB lighting and LED logo projector
- 2x 8W DTS sound speakers
- Stand with tilt, height and swivel adjustments
- Useful ‘Quick Switch’ accessory provided
Design and Features
The AG344UXM has a 3 side borderless design panel, with a thin 8mm total black edge along the sides and top. There’s then a much thicker ~28mm black edge along the bottom which is a traditional bezel. There’s a red ‘AGON’ logo in the middle of the bottom bezel and a small white power LED in the bottom right hand corner. One key feature of this ultrawide screen is that it is a rare flat format, instead of curved. We will talk about that more a bit later, but for those who don’t like curved screens, this is an interesting option.
The stand is a chunky metal design with a wide and deep metal foot. This provides a sturdy and stable base for the panel which is large in itself, and also particularly heavy given the Mini LED backlight. This stand is very deep though (~40cm) so make sure you have a suitably sized desk for it. The wide legs can also be a little annoying depending on your mouse/keyboard setup. There is an AGON logo projection built in to the stand which projects on to your desk surface, but can also be turned off if you’d rather.

The back of the screen is encased in a matte black plastic with some red sections in places. Note that in the manufacturer image above, the red AGON logo at the top, and red sections on the back of the stand are actually more of a maroon colour than bright red. The red line sections on the left and right hand side of this image are actually the ‘LightFX’ RGB lighting system, here showing a red colour to match the screen’s design. If you turn those off they are a dark grey colour. The RGB lighting can be customised via the menu with a range of modes and colours to choose from. There’s also a light strip along the bottom edge of the screen to shine a light on to your desktop. The lights don’t get super bright so only provide a subtle glow to your desk and surrounding area, but they are reasonable.

The top section on the stand provides a useful carry handle. On the image above you can also see the OSD controller joystick on the left hand side (when viewed from behind). This is actually in quite a tricky place to reach, being tucked quite a long way behind the screen and not easy to use as a result.

We prefer to use the provided ‘Quick Switch’ accessory instead which is a small puck which connects in to the monitor via USB. It even has a glowing LED ring around it, although this can only be turned on (red in colour) or off, it can’t be customised to sync with the RGB lighting. This is much easier to use to make adjustments to the settings than trying to reach around the back of the monitor and find the controller joystick.


Speaking of the OSD, it can be slow and sluggish to navigate, even with the Quick Switch accessory. There is a fair lag when pressing buttons before the menu responds in some places, mostly when you are within a setting, and then often delays as you switch settings in many places. Rather than being able to navigate through to a setting and then activate it, each setting is enabled as you scroll through them. For instance, scrolling through the ECO mode menu while it slowly activates each mode before you get to the one you want can be very annoying. The menu offers a decent range of settings although the software could probably do with an update we think in design and ease of use.

The stand provides a good range of ergonomic adjustments with tilt, height and swivel offered, all of which are smooth and pretty easy to use. The screen does have a bit of a wobble to it as you re-position it though, despite it’s large and heavy stand.
Connections are all on the back underside of the screen with 1x DisplayPort 1.4, 2x HDMI 2.1, 1x USB type-C (with DP Alt mode and 90W power delivery), 4x USB data ports (plus upstream port), mic input and headphone output. It might have been useful to have some USB and headphone ports available as easy access on the side of the screen or something for quick use.
Default Setup
The AG344UXM offers a wide colour gamut backlight which provides vivid and saturated colours well suited to a lot of gaming and to modern multimedia and HDR content. If you like that more colourful appearance then the screen does nicely here with a wide colour space. However, for a lot of normal desktop uses actually you want to work with a smaller SDR / sRGB colour space and that can be more difficult on a wide gamut screen. We will see how this screen handles that usage scenario shortly.
We first want to measure the accuracy of the default out-of-the-box setup relative to typical sRGB content, while also examining the screen’s suitability and accuracy for common wider colour gamut spaces such as DCI-P3, or for Adobe RGB which is used in the professional and photography markets quite often.
Note that the screen does carry a factory calibration, but that is relevant only in the sRGB emulation mode which we will test in a moment. We disabled local dimming to ensure the backlight would not impact measurements in this area. Local dimming can of course help to improve black depth and contrast, but is really best suited to HDR mode, although it can be enabled in SDR if you want on this screen.

The first thing you notice about the screen is that it is very bright. At the default 70% brightness level we recorded a high 343 nits. We measured the full backlight range in SDR mode and found that the screen could reach an incredibly high, and totally unnecessary, 700 nits! This is thanks to the Mini LED backlight but surely no one will want to run the screen at such a high SDR brightness?! Unfortunately with the max brightness being so high, even a 0% brightness setting cannot deliver a very dim experience, only reaching a minimum of 184 nits. This is a problem for anyone who wants a darker screen, for example at common 120 or 150 nit brightness levels. The screen is not well suited to darker room conditions unfortunately as the backlight adjustment range is just too limited. Contrast ratio was IPS-like at 941:1 – remember we have local dimming disabled here, we will test how contrast is improved with that in the HDR section later.
In other areas we saw a decent average gamma at 2.26 but a fair variance across the grey scale, being too low in the darker tones, and too high in lighter tones. This can result in a little lost shadow detail near black, not something an IPS panel is very good at in SDR mode anyway, and some washing out of lighter grey shades. White point was a bit too warm although to be fair the screen is set in the ‘warm’ mode out of the box. We measured 5977K white point and 6074k average across the greyscale. This led to a poor greyscale accuracy overall with dE 3.7 average measured.

From a colour point of view you can see from the top left CIE diagram that the colour space of the monitor extends considerably beyond the sRGB reference space, mostly in green and red shades and this results in a 129.9% relative coverage (along with excellent absolute coverage of sRGB at 99.7%). Accuracy of sRGB colours is therefore poor with a dE 3.8 average, but this is typical of wide gamut screens. We will test the sRGB emulation mode in a moment.
If we compare the native colour space against other wide gamut references you can see a decent and close match to DCI-P3 is achieved (103.5% relative coverage). The screen doesn’t handle the Adobe RGB space as well unfortunately with only a 93.7% absolute coverage, and some large over-coverage in red shades leading to 111.3% relative coverage. The screens native colour space is very close to DCI-P3 and therefore more suited to HDR content creation and consumption, than it is for photography and professional use which you would probably need Adobe RGB for. Accuracy of DCI-P3 colours is much better with average dE of 1.8 in this default mode which was good.
sRGB Emulation Mode
The screen comes factory calibrated in the sRGB colour temperature mode which also triggers the emulation of this smaller colour space. There is a provided factory calibration report with each unit, and on ours it says the screen has an average dE of 0.58. There’s also calibration of luminance uniformity in this mode, but there’s no mention of what gamma or colour temperature targets have been selected.
We went ahead and measured the sRGB mode ourselves:

The immediately obvious issue with this mode is unfortunately that the brightness OSD control is now fully locked, and with that set at a level of 70% the screen is just too bright. We measured 336 nits. Other settings for contrast and RGB levels are also locked in this mode. Why oh why have AOC locked this mode?!
Gamma was again good on average at 2.20, but showed some variation across the greyscale as in the default mode. The white point and colour temp had improved a little in this mode, now being closer to our 6500K target, and with a slightly too warm 4 – 5% deviance now measured. We did have a more accurate greyscale now though with dE 1.9 average. Contrast ratio took a small hit in this mode down to 904:1 which was reasonable for an IPS-type panel.

This mode does provide a very nice and accurate clamping of the native colour gamut back to sRGB as you can see from the above. This then results in a very good colour accuracy, we measured 1.1 dE average. The problem is that with brightness being locked, the mode is basically unusable as it’s too bright. That’s a massive shame as otherwise it could have been very useful, and also very accurate for sRGB content and work.
Calibration


Calibration and profiling can produce very good results if you have a suitable calibration device and software. This was profiled to 2.2 gamma, 6500k colour temp and to the sRGB colour space. The screen was left in its native wide gamut mode, but this profile will be used in colour-aware applications (e.g. Photoshop) to map back to sRGB in this instance. You can see the recommended OSD settings above that go along with this profile. Our calibrated ICC profile for this display is available now for our Patreon supporters.
Targets were all met nicely, with the only issue really being the brightness of the display. Even at a 0% brightness adjustment the screen was measured at a bright 190 nits, which is likely too bright for many users, who might rather calibrate to 120 or 150 nits for instance. It’s a shame there isn’t a lower adjustment range available from the backlight on this screen. Apart from that, the calibrated results were very good.
General Usage
The 3440 x 1440 resolution is a comfortable size on a 34″ ultrawide screen like this and provided a sharp image and comfortable text size without the need to use any operating system scaling (0.23mm pixel pitch, 110 PPI). It’s far better than the 2560 x 1080 resolution options you sometimes see in this widescreen space, giving you a large screen area to work with and a decent real estate for split screen multi-tasking. Unlike the vast majority of ultrawide screens available today, the AG344UXM is flat in format as opposed to being curved. This is rare in this space, and some people may prefer it. Personally having used both options on many occasions, we prefer a curve on an ultrawide screen which helps improve immersion and bring the edges of the screen a little closer to your central viewing position for a more comfortable experience. Flat format may be better for graphical work, or when using content with a lot of straight lines like spreadsheets for instance, so you will have to figure out which you prefer. It’s nice to see AOC providing an option though for those who like flat ultrawide screens.
The contrast ratio is good but not brilliant for an IPS-type panel at around 904:1 after calibration; not as good as VA panels or next generation “IPS Black” panels. The backlight adjustment range (184 – 700 cd/m2) is very wide, probably unnecessarily so at the brighter end of the scale, but very limited at the darker end. This could make the screen unsuitable for darker room conditions or for those who prefer a darker display or even for those who just want to operate a typical 120 or 150 nits. It seems to be more suitable for multimedia and gaming than it might be for office and general use as a result of this limited backlight adjustment range at the bottom end.

The backlight operation is also quite strange. It’s not a flat Direct Current line as we might expect, nor is it an obvious on/off PWM operation (thankfully). There is a low amplitude “wave” to the oscillograph which seems to operate at a 90Hz frequency. We have no idea why this is operating this way, it’s strange, but thankfully this shouldn’t cause any issues in real use and we certainly didn’t experience any problems. If you are super-sensitive to even minute brightness fluctuations this may be a concern though.
Default setup is moderate with a slightly too warm white point and a variable gamma curve. The wide gamut native mode creates issues for sRGB content as normal with these type of backlights, but it is very close to the DCI-P3 colour space and accuracy of DCI-P3 content is therefore very good. To get around the challenges of wide gamut AOC do provide an sRGB emulation mode which provides a very nice clamping of the colour space, and very good colour accuracy as well. The problem with that mode is that the brightness and other settings are locked, and so it’s overly bright and therefore basically unusable. To work more accurately with sRGB / SDR content you will probably need to calibrate and profile the screen for colour aware applications. If you’re wanting to work with P3 colour content, or consume HDR and other multimedia, the wide gamut mode is well suited.

In the OSD menu the ‘ECO mode’ settings are basically just a series of preset brightness levels so don’t offer much practical use. In the ‘color setup’ menu there is a ‘LowBlue mode’ option which gives you access to several pre-defined modes designed to reduce blue light output. The spectral distribution and blue peak wavelength remain unchanged, but the colour temp is changed with each mode, reducing the blue peak a bit and making the image a bit warmer and more yellow in practice.
The spectral distribution at a calibrated 6500k is shown above, with the blue peak measured at 448 nm wavelength. This means it is not part of the Eyesafe certified range of products, as it does not have a blue peak that is outside of the supposed harmful range according to Eyesafe which is 415 – 455nm. The image gets progressively warmer and more yellow as you move through the different settings, getting as far as 4552K in the maximum ‘reading’ LowBlue mode.

There’s a decent range of extra functions provided by AOC for general, office and productivity uses. This includes USB Type-C with 90W power delivery, data and DP Alt mode for single cable connectivity from compatible devices. Also KVM support, a four-port USB hub and Picture by Picture are included. There’s also some fairly decent built-in speakers (2x 8W with DTS sound) along with headphone and mic connections provided. We did find the included Quick Switch accessory useful to control the OSD menu and navigate the settings available, especially with the normal OSD control joystick tucked quite a way back behind the screen and hard to reach. The OSD control and software can be a bit sluggish and cumbersome in places though, especially when you are within certain settings. There are no other features such as card readers, ambient light sensors or motion sensors that can be useful sometimes in office environments.
The stand provides a good range of easy to use ergonomic adjustments to help you get a comfortable viewing position. The stand is pretty deep so make sure you have a suitably deep desk, and the screen can get quite warm at the top we found, especially if you run at higher brightness levels and in HDR content where the Mini LED backlight is being utilised a lot. The profile of the actual panel is also thick and it is heavy too given the Mini LED backlight, in case you were considering mounting the screen. This will also use more power than common W-LED backlight screens too, with AOC quoting 142W typical power consumption in their specs.
Gaming
The AG344UXM is based on an IPS-type panel and has a 1ms G2G rated response time. There is a pretty high 170Hz native panel refresh rate and the screen features adaptive-sync for variable refresh rates (VRR) from both AMD and NVIDIA systems with a range of 48 – 170Hz supported. The screen has yet to be certified under any of AMD’s or NVIDIA’s certification schemes, but may follow at some point.
There are a few gaming settings available in the OSD menu including some game preset modes, also nice and easy to switch between using the ‘Quick Switch’ accessory. There’s are shadow control, game colour and frame counter settings too if you need. There is no blur reduction mode on this screen though in case that’s something you are particularly looking for.
Console Support
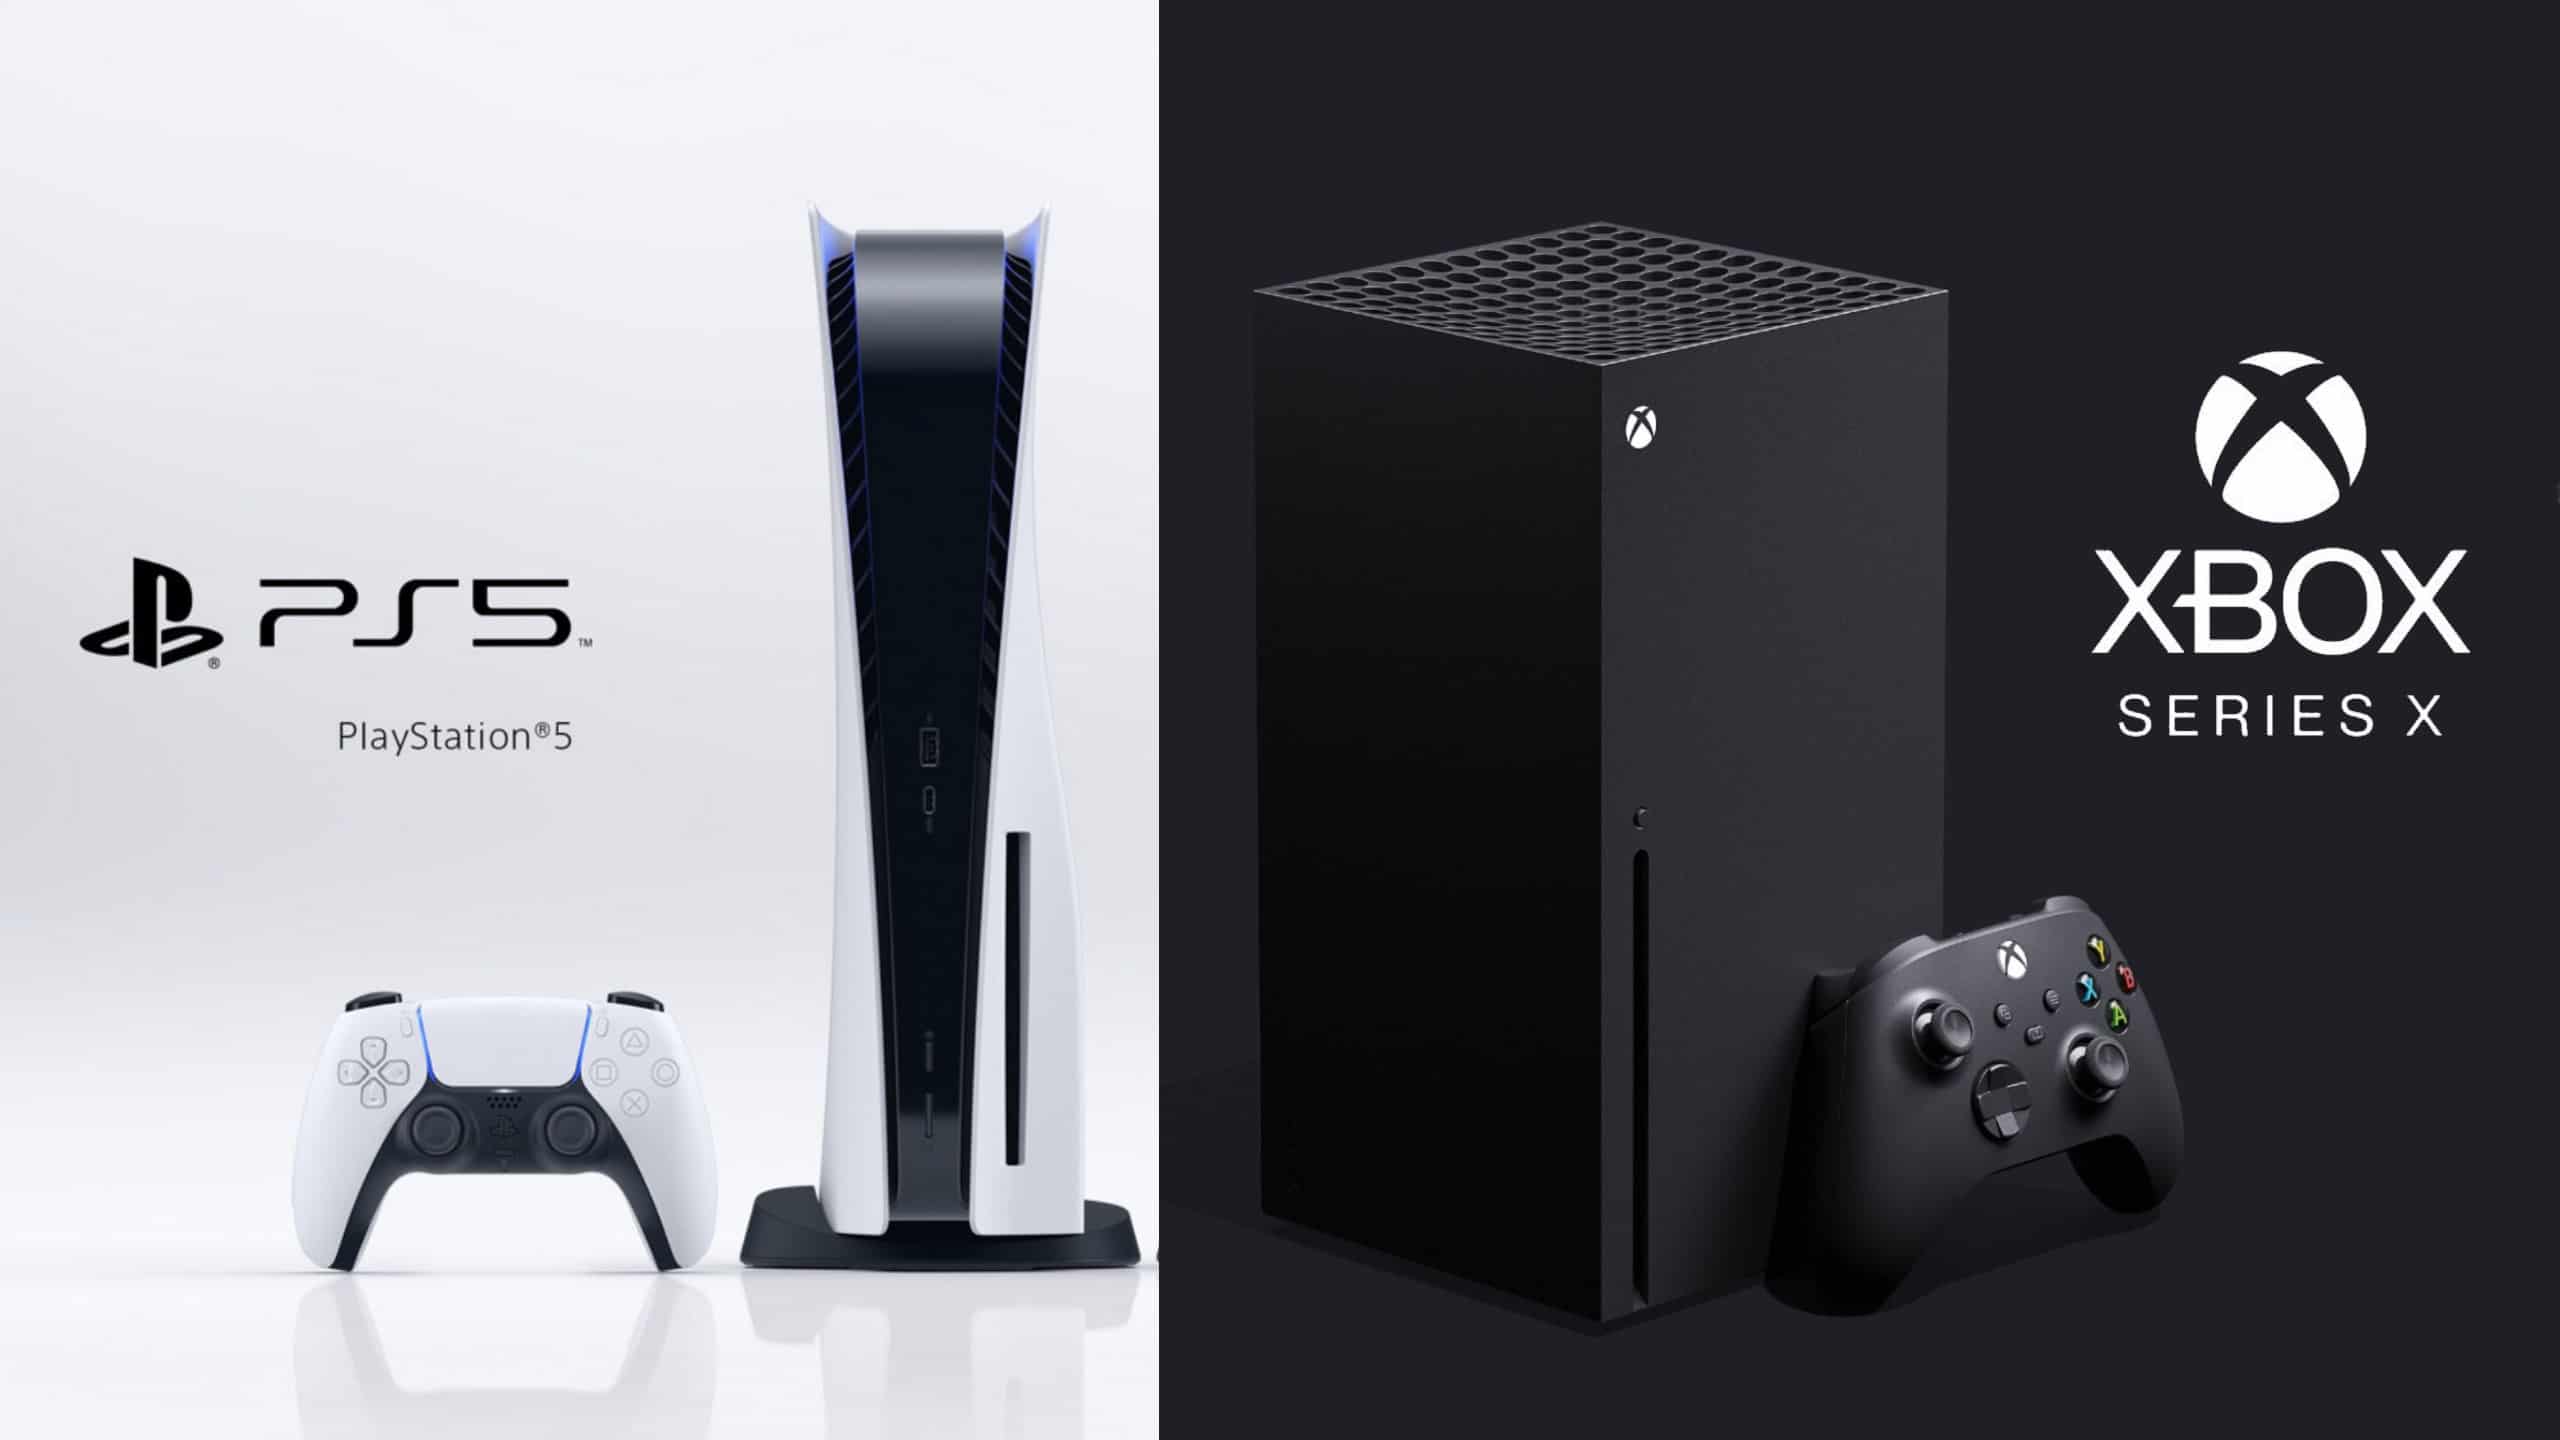
The screen has 2x HDMI 2.1 inputs, although console support is quite strange. We tested the screen with an Xbox Series X and found that the screen would accept input resolutions of 4K (despite not being a 4K res screen), 1080p and 720p only. This means the screen can handle a “virtual 4K” input resolution of 3840 x 2160 and scale it down to the native resolution of the panel, which when maintaining the correct 16:9 aspect ratio for the console, would fill a 2560 x 1440 area. This fits within the panels real 3440 x 1440 resolution, and would put black borders down the sides. For some odd reason the actual 1440p resolution mode was not offered on the console, despite this being the most appropriate option for this display without needing to do any interpolation or scaling. This must be missing from the monitor’s EDID.
On the Xbox Series X, only the 4K mode would allow you to turn on HDR, which is something you’d almost certainly want to take advantage of on this display, given it’s high performing HDR Mini LED backlight – discussed more a bit later. So it’s good that the monitor can at least support a 4K input resolution. On the PS5 you can run HDR mode at 1080p and 4K so it’s less important.
At 4K input the Xbox reports that the maximum refresh rate allowed is only 60Hz, which is strange given the supposed HDMI 2.1 bandwidth here. If you drop to 1080p then you can select 120Hz though fine. It does seem like 4K 120Hz isn’t available here. HDMI-VRR is supported, so you can select VRR on the console even with adaptive-sync disabled in the OSD menu (that would otherwise activate FreeSync over HDMI for Xbox). This means you can get VRR on both Xbox and PS5 consoles.
We noticed an other oddity with the screen in that if you have adaptive-sync enabled in the OSD menu, you cannot change the aspect ratio control on the display (within the ‘extra’ menu), it’s locked on “wide” mode meaning that the console’s 16:9 input gets stretched horizontally. You need to disable adaptive-sync in the OSD menu and then you can change the aspect ratio, with the 27″ (16:9) option being the most appropriate to choose. But it’s a bit of a pain to have to enable adaptive-sync again if you switch back to DisplayPort and PC input. We’d have liked access to the aspect ratio controls when this setting was enabled to cope with console inputs better.
Response Times and Motion Clarity

Due to the oscillation and behaviour of the backlight it was very difficult to accurately measure the response times with our test equipment, particularly when trying to identify overshoot values. Having conducted a range of tests, we felt the best way to represent the responsiveness of the panel was through some pursuit camera photos that will help capture the real-world motion clarity and response time behaviour.

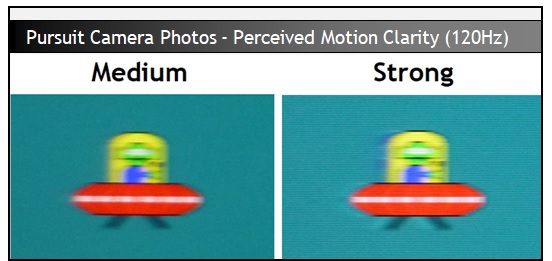
Like other AOC screens we’ve tested in recent time, there are 4 overdrive modes available in the OSD menu – off, weak, medium and strong. First of all we compared each mode at the maximum 170Hz refresh rate and captured the perceived motion clarity as you would see it in real use. We will ignore the ‘off’ mode as there’s no benefit in using that at any refresh rate. At the maximum refresh rate of 170Hz there was only a small visual difference between the weak and medium modes, with the medium showing a small improvement in clarity and sharpness. It was hard to spot and pretty minimal in practice. If you push up to the maximum strong mode at 170Hz you start to see a small amount of pale haloing creep in but it’s quite slight at this max refresh rate. Strong mode would seem viable, but actually the medium mode provides a better overall picture quality, being free from any obvious or no noticeable overshoot artefacts at all we felt. Overall motion clarity was good and the image looked pretty clear for a screen with this refresh rate. Screens that can reached higher like 240Hz+ will offer further improvements in motion clarity.
This display does not feature variable overdrive unfortunately, a feature that is almost exclusively available from Native NVIDIA G-sync module screens and designed to control response times and overshoot across the refresh rate range, being particularly useful for VRR situations. As a result, on the AG344UXM there is the familiar increase in overshoot levels as the refresh rate lowers. This means that the ‘strong’ mode becomes pretty unusable straight away, showing noticeable pale halos and trails at 120Hz, and even more so at lower refresh rates like 60Hz. The ‘medium’ mode is fine at 120Hz, and only when it gets down to around 80 – 100Hz does the overshoot start to become apparent. It’s still a usable mode really until you get down to about 60Hz where the overshoot is a bit too high and you get some distracting pale halos.
‘Weak’ mode is fine all the way down to the lower refresh rates like 60Hz though, and so we would recommend this setting for VRR situations if you’re frame rates are more commonly in the lower range 60 – 120Hz. If you are more commonly running in the 100 – 170Hz range then you could push to the medium mode for some small gains in responsiveness and motion clarity, and in that upper refresh rate range you shouldn’t see any real issues with overshoot. We can’t really call this a “single overdrive mode” experience for VRR but it’s still very usable without too many complications.
We should note here as well that we measured a super low input lag on the AG344UXM. There was a total display lag of only 1.50ms average, so the screen is perfectly fine for fast paced competitive games if you need.
High Dynamic Range (HDR)

One of the key benefits of the AG344UXM is its 1,152 zone Mini LED backlight. This sets it apart from common edge-lit local dimming monitors, which only have a very limited number of dimming zones, commonly 8 or 16. Mini LED backlights like that used here provide a much better control over the image on the screen, being able to dim smaller parts of the image while brightening others to improve the contrast and dynamic range. Dark areas can often be dimmed so low that they are basically being turned off, while bright highlights can often be brightened to very high peak brightness levels. That’s one of the key benefits in using a direct lit backlight with many zones like this.
Each zone is responsible for around 4300 pixels which obviously isn’t as finite in control as something like OLED which has per-pixel level dimming control. 1,152 zones is very good though on a screen this size in the LCD market. This helps reduce blooming and halos in practice relative to screens with fewer zones. There are still challenges on very specific content like star fields for instance, or scenes with very small bright areas, but that’s going to be hard for any FALD screen to handle and you really need something like OLED to avoid all halos. But normal use HDR content looks very impressive indeed, with images that pop, some almost uncomfortably bright areas, and very low levels of blooming and halos from what we could see. The Mini LED backlight does very well here. HDR gaming is excellent, as are HDR movies and videos, although keep in mind the ultrawide 21:9 aspect ratio, which may not be as practical for videos as a 16:9 aspect ratio panel.
| HDR Technical Capabilities | ||
| VESA DisplayHDR certification level | DisplayHDR 1000 | |
| HDR formats supported | HDR 10 only | |
| Local dimming | 1,152 zone Mini LED | |
| High number of local dimming zones | 1,152 zone Mini LED | |
| Increased peak brightness | 1518 nits measured | |
| Reaching advertised peak brightness | Surpassing it by a considerable way | |
| Increased dynamic range (contrast) max | >760,000:1 | |
| Increased “local” HDR contrast ratio max | >3800:1 | |
| Wide colour gamut >90% DCI-P3 | 99.3% absolute coverage 103.5% relative coverage | |
| 10-bit colour depth support | Supported | |
When you enable HDR in Windows the screen switches automatically in to the HDR preset mode. Most of the picture and colour settings are now unavailable or greyed out, so you don’t have many settings you can change. We will be reliant on the manufacturer’s factory setup here. There are 4 HDR modes available to choose from, the default is called “DisplayHDR” and then there are modes for HDR Picture, HDR Movie and HDR Game. Visually they all look pretty similar colour and brightness wise, but the sharpness is accentuated in the Picture, Movie and Game modes.
We tested the screen’s performance in the default ‘DisplayHDR’ mode:

The default mode has a nice accurate PQ curve and the colour temp is also pretty good across the greyscale. It gets a little too cool in the lightest grey shades and with white, resulting in a 6774K white point and 4% deviance from the 6500K target.

Colour accuracy of HDR Rec.2020 colours is very good overall, with the only issues being where you need to generate colours outside of the colour space possible from the monitors backlight. There is a good 99.3% DCI-P3 coverage supported here, and about 75.4% of the very large Rec.2020 space that HDR content is mastered in which is what we are considering here on the above CIE diagram. You can see that the screen cannot be accurate for things like 100% primary red, blue and green, as it cannot cover the full colour space properly (no monitor can), but other colours and shades offer very good accuracy overall. Where colours fall inside the available colour gamut space, there is an average dE of 0.9 which is excellent.

Somewhat surprisingly, the AQ344UXM surpasses its spec when it comes to peak brightness. Maybe we shouldn’t have been surprised actually, as the screen is capable of supporting 700 nits in even normal SDR mode! We measured a peak brightness of 1518 nits, which is a considerable way beyond the 1000 nits advertised. Oddly, the highest brightness is experienced for the large APL, reaching this 1518 nits at 100% white screen which is very uncomfortable to use up close. For smaller APL like a 1% window, the peak brightness was much lower at a fairly modest 651 nits. The peak brightness increases as the window size increases but by the time you get to 25% window size and above it’s basically reaching it’s max brightness range. Perhaps the smaller window sizes were limited in brightness to try and avoid haloing and blooming, although the dimming zones should be sufficiently small to handle 1% APL without too much issue.
We would have liked to have seen the screen capable of increasing the brightness for smaller highlight areas more to be honest, although the actual HDR experience is still very pleasing, and very bright. In fact in some situations if you’re using the screen up close for HDR gaming, maybe this high brightness could become a bit uncomfortable, especially on larger window sizes. It might have been nice to allow the user access to the brightness control in the OSD menu, in order to cap the brightness to something lower if they wanted to. As it is, the setting is simply not available.
Conclusion
There’s a lot of monitors advertised as supporting HDR but very few that offer what we would consider proper, “real” HDR experience. The AG344UXM is certainly in the latter category, with an impressive Mini LED backlight that offers some great HDR performance in the LCD monitor market. There’s a very high brightness, the ability to control many small local dimming zones, a very good contrast ratio and an impressive real-World HDR experience. We were also impressed by the screens accuracy and setup in HDR mode, although we would have liked some higher peak brightness from smaller APL and the ability for the user to control how bright the screen gets, for close up viewing purposes. Still, the HDR performance here easily surpasses the vast majority of desktop monitors so if HDR is a priority for you, this is well worth a look.
It was great to see this Mini LED backlight featured in the ultrawide market as well, an area that has had little attention for these high end HDR backlights to date. We like the 3440 x 1440 resolution and 21:9 aspect ratio of these displays and it provides a great screen size for gaming, multimedia and general applications too. We personally prefer a curved format for ultrawide panels, but we know a lot of people still prefer flat format, so it’s interesting to see a flat 34″ ultrawide provided here – that’s very rare nowadays and will please some people.
Gaming wise the panels responsiveness and motion clarity was good and you have a pretty high refresh rate of 170Hz, backed by adaptive-sync VRR as ever. We would like to see a certification passed under the AMD and/or NVIDIA schemes to give buyers reassurance around VRR performance though which hopefully AOC will have completed. Input lag was very low, and there’s a few extras included for gamers too like RGB lighting, shadow detail control etc. It’s missing a blur reduction mode though sadly. HDR gaming is obviously a key area of interest and the screen offers excellent performance in that area.
For general and office use there’s a decent range of extra features like USB-C, a KVM function, a useful ‘Quick Switch’ controller and PbP support. The main OSD control stick is positioned in a very odd and hard to reach spot, and the navigation of the menu (even using the Quick Switch accessory) was a bit of a pain sometimes. We’d like to see that improved with future AOC AGON displays. Default setup was reasonable if you want to work with DCI-P3 content, but the provided sRGB mode – which also carries their factory calibration – is basically unusable as its far too bright, and the settings to change this are locked. Speaking of brightness, the screen can reach excessively bright levels even in SDR mode and with local dimming disabled (700 nits) which is unnecessary, but also means that at the lower end of the adjustment range you can’t get the screen very dark. It’s not practical in darker rooms, or even for those who want to operate at common 120 or 150 nit levels. The brighter screen is likely more attractive for gaming and multimedia, but is less suitable for the general and office uses.
All in all if you’re interested in a proper HDR display and are a fan of the ultrawide format, it’s definitely worth taking a look at the AG344UXM.
| Pros | Cons |
| Very good HDR capabilities in the monitor market with 1,152 zone Mini LED backlight | Screen is very bright and lacks suitable adjustment range at the darker end |
| Good range of extra features like USB-C, KVM and PbP for general and office uses | sRGB emulation mode is good, but unusable due to locked (and very high) brightness level |
| Good response times and very low input lag | OSD menu is tricky and sluggish to use |
Testing and Results Explained
We will test and measure a range of aspects of these displays. By way of a brief explanation of what some of the results mean we thought we’d include this short guide:
Results Round-up section
- Maximum and minimum brightness – the full range in which the backlight can be adjusted using the monitor’s brightness control. At the upper end this can be important for gaming from a further distance, especially in brighter rooms and the daytime. At the lower end this can be important if you are using the screen up close for more general office-type work, especially in darker room conditions or at night.
- Recommended brightness setting – to achieve approx 120 cd/m2, which is the recommended luminance for LCD monitors in normal lighting conditions
- Flicker free – independently tested and confirmed whether the screen is flicker free or not and without PWM at all brightness settings
Setup and Measurements Section

Performance is measured and evaluated with a high degree of accuracy using a range of testing devices and software. The results are carefully selected to provide the most useful and relevant information that can help evaluate the display while filtering out the wide range of information and figures that will be unnecessary. For measurement we use a UPRtek MK550T spectroradiometer which is particularly good for colour gamut and spectrum measurements. We also use an X-rite i1 Pro 2 Spectrophotometer and a X-rite i1 Display Pro Plus for measurements in various ways. Various software packages are incorporated including Portrait Displays Calman Ultimate package. We measure the screen at default settings (with all ICC profiles deactivated and factory settings used), and any other modes that are of interest such as sRGB emulation presets. We then calibrate and profile the screen.
The results presented can be interpreted as follows:
- Greyscale dE – this graph tracks the accuracy of each greyscale shade measured from 0 (black) to 100 (white). The accuracy of each grey shade will be impacted by the colour temperature and gamma of the display. The lower the dE the better with differences of <1 being imperceptible (marked by the green line on the graph), and differences between 1 and 3 being small (below the yellow line). Anything over dE 3 needs correcting and causes more obvious differences in appearance relative to what should be shown. In the table beneath the graph we provide the average dE across all grey shades, as well as the white point dE (important when considering using the screen for lots of white background and office content), and the max greyscale dE as well.
- RGB Balance and colour temperature – the RGB balance graph shows the relative balance between red, green and blue primaries at each grey shade, from 0 (black) to 100 (white). Ideally all 3 lines should be flat at the 100% level which would represent a balanced 6500k average colour temperature. This is the target colour temperature for desktop monitors and the temperature of daylight. Where the lines deviate from this 100% flat level the image may become too warm or cool. Beneath this RGB balance graph we provide the average correlated colour temperature for all grey shades measured, along with its deviance from the 6500k target. We also provide the white point colour temperature and its deviance from 6500k, as this is particularly important when viewing lots of white background and office content.
- Gamma – we aim for 2.2 gamma which is the default for computer monitors. A graph is provided tracking the 2.2 gamma across different grey shades and ideally the grey line representing the monitor measurements should be horizontal and flat at the 2.2 level. Depending on where the gamma is too low or too high, it can have an impact on the image in certain ways. You can see our gamma explanation graph to help understand that more. Beneath the gamma graph we include the average overall gamma achieved along with the average for dark shades (0 – 50) and for lighter shades (50 – 100).
- Luminance, black depth and Contrast ratio – measuring the brightness, black depth and resulting contrast ratio of the mode being tested, whether that is at default settings or later after calibration and profiling.
- Gamut coverage – we provide measurements of the screens colour gamut relative to various reference spaces including sRGB, DCI-P3, Adobe RGB and Rec.2020. Coverage is shown in absolute numbers as well as relative, which helps identify where the coverage extends beyond a given reference space. A CIE-1976 chromaticity diagram (which provides improved accuracy compared with older CIE-1931 methods) is included which provides a visual representation of the monitors colour gamut as compared with sRGB, and if appropriate also relative to a wide gamut reference space such as DCI-P3.
- dE colour accuracy – a wide range of colours are tested and the colour accuracy dE measured. We compare these produced colours to the sRGB reference space, and if applicable when measuring a wide gamut screen we also provide the accuracy relative to a specific wide gamut reference such as DCI-P3. An average dE and maximum dE is provided along with an overall screen rating. The lower the dE the better with differences of <1 being imperceptible (marked by the green area on the graph), and differences between 1 and 3 being small (yellow areas). Anything over dE 3 needs correcting and causes more obvious differences in appearance relative to what should be shown
Gaming Performance Section
We first of all test the screen visually in each of its available overdrive modes and at a range of refresh rates from 60Hz, all the way up to the maximum supported. This allows us to identify what appears to be optimal setting for each refresh rate and we can then measure the response times across a range of grey to grey (G2G) transitions using our oscilloscope setup, including correcting for gamma to improve accuracy as we described in our detailed article. This helps provide measurements for response times and overshoot that are even more representative of what you see in real use. In the summary section the small table included shows the average G2G response time measured at several refresh rates (where supported), along with the optimal overdrive setting we found. The overshoot level is then also rated in the table at each refresh rate. We will explain in the commentary if there are any considerations when using variable refresh rates (VRR) as well as talking about the overall performance our findings during all these tests.
At the maximum refresh rate of the screen we will also include our familiar more detailed response time measurements, which includes a wider range of transition measurements as well as some analysis of things like the refresh rate compliance. This identifies how many of the measured pixel transitions were fast enough to keep up with the frame rate of the screen. Ideally you’d want pixel response times to be consistently and reliably shorter than this refresh rate cycle, otherwise if they are slower it can lead to additional smearing and blurring on moving content.
In this section we will also include the measured input lag and look at any blur reduction backlight feature if it’s available. The commentary in each section will provide more information if a blur reduction mode is available and how it operates.
We may earn a commission if you purchase from our affiliate links in this article- TFTCentral is a participant in the Amazon Services LLC Associates Programme, an affiliate advertising programme designed to provide a means for sites to earn advertising fees by advertising and linking to Amazon.com, Amazon.co.uk, Amazon.de, Amazon.ca and other Amazon stores worldwide. We also participate in a similar scheme for Overclockers.co.uk, Newegg, Bestbuy , B&H and some manufacturers.