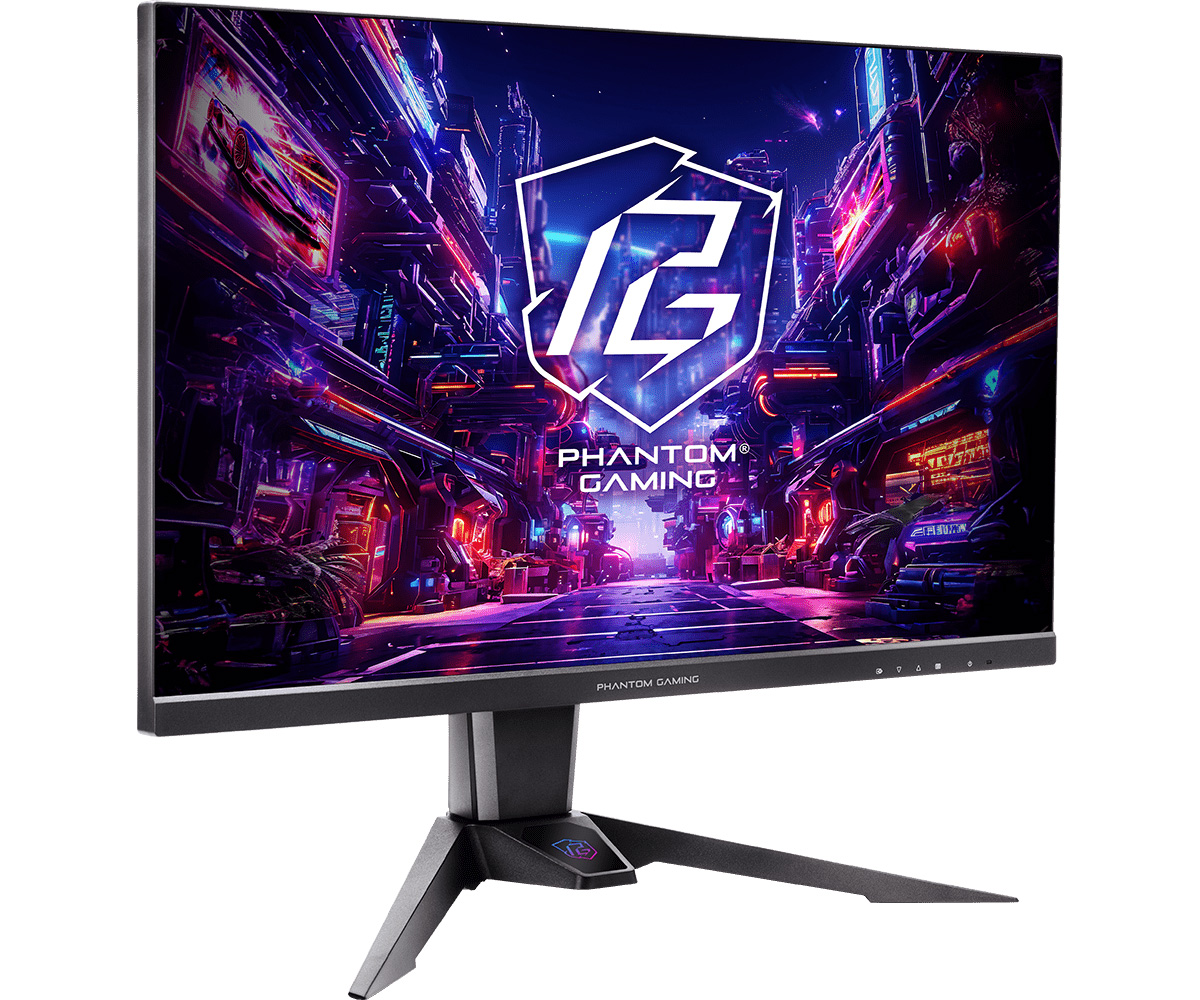
ASRock Phantom Gaming PG27QFT2A

Introduction
With the massive influx of OLED monitors to the market, it’s been a while since we reviewed and tested a lower-priced, mid-tier LCD gaming monitor, but we realise there’s still a lot of users out there who are looking for something lower cost as well and so it’s nice to take the occasional break from all the top-end flagship monitors we typically review and look at something different. We’ve got with us now the new PG27QFT2A monitor from ASRock, a 27” sized screen built around an IPS-type panel, with a 2560 x 1440 resolution and a 180Hz refresh rate. It’s got a fairly standard set of features including an adjustable stand, basic integrated speakers and DisplayPort and HDMI video connections. Like ASRock’s other monitors, a unique feature is the inclusion of integrated wi-fi antenna as well. It’s available for as little as $175 USD at the time of this review, and you can check availability and pricing for your region using the links below.
| Where to Buy |
 –_ –_ |
Key Specs
- 27” screen size, flat format
- IPS-type panel with matte anti-glare coating
- 2560 x 1440 resolution
- 180Hz refresh rate
- Adaptive-sync for variable refresh rates
- 1ms MPRT motion blur reduction mode
- Extended colour gamut with 90% DCI-P3 and 99% sRGB coverage
- Tilt, height and swivel stand adjustments (no rotate)
- 1x DisplayPort 1.4 and 2x HDMI 2.0 video connections
- 1x headphone jack and 2x 2W integrated speakers for audio
- Integrated Wi-Fi antenna
Design and Features

The screen has a 3-side borderless design with a thin black edge around the sides and top measuring 7.5mm. There is a thicker matte black plastic bezel along the bottom with a total 22mm border there.


The rear of the screen is encased in a matte black plastic with the stand attaching via a quick release mechanism in the centre. One note is that these marketing images from the ASRock product page suggest there is an RGB lighting feature on the back of the stand which is not true for this model. There is a logo there, but it doesn’t light up. Same for the front of the stand on the protruding front chin section.

The stand has a chunky profile and is finished in a matte black plastic, and along with a wide foot it provides a strong and stable base for the panel.

The stand offers a good range of adjustments which are all smooth and pretty easy to use. There’s tilt, height and swivel, but no rotation function. There is very little wobble at all when moving the screen around or using the OSD controls which is good news.

There is a simple set of connections on this screen with 1x DisplayPort 1.4 and 2x HDMI 2.0 video connections available. We will look at any impact the HDMI 2.0 ports have on games console support a bit later on. There is no USB type-C connection on this model, or features like PiP / PbP and KVM switches that you might find on higher-tier gaming monitors nowadays. There are also no USB data ports, but a headphone connection is provided if you want to use that. The screen also has some basic 2x 2W integrated speakers which are ok for the occasional sounds clip or YouTube video but aren’t very powerful.

A ‘Phantom Gaming’ branded cable sleeve is provided in the box as well to help keep your cables tidy.

The OSD control buttons are located on the bottom right hand edge of the screen and are reasonably easy to use. It takes a little bit of getting used to and they’re not as intuitive as a good joystick toggle for getting around the menu, but they serve the purpose fine.


The actual OSD menu has a very limited set of options and settings though here. For instance, the “preset modes” are really just a series of defined and locked combinations of brightness and contrast combinations so aren’t of much use. Thankfully the ‘standard’ mode allows you to configure these yourself. There’s few colour controls beyond some pre-defined colour temp modes and RGB channel adjustment, so no gamma or colour space options. There’s also no gaming extras like crosshairs, FPS counters etc either so it definitely feels a more minimalist and basic menu compared with higher end gaming screens.
Integrated Wi-Fi antenna

On the back of the stand are the Wi-Fi antenna connections, a unique feature for ASRock’s gaming monitors which some people may find potentially useful. You connect these back to your PC using SMA connectors and cables if your system supports this. These are commonly used to connect external antennas, but here you can use the monitor as your antenna.

The theory here is that your monitor could be positioned in a better location to optimise signal quality back to your internet hub/main Wi-Fi point than your PC system and case might be. If your PC is tucked away under a desk for instance, or in a cupboard a Wi-Fi card or adapter in the PC might not be able to get an optimal signal. Additionally, those separate devices can be of varying quality, and so the idea here is that by providing a Wi-Fi antenna built in to the monitor, it might be of a better quality, and be in a better position to improve your signal and coverage. In turn, that could maybe improve your online gaming experience.
Whether or not the screen’s integrated antenna is of use to you will depending obviously on whether you have these connections on your system. Not every motherboard features these kind of connectors, and so that does exclude its use from many people. Surveying our audience in the past showed that ~60% of gamers had a motherboard with these connections on it, so there is a decent portion of potential users out there.
The other question here is whether it’s really going to offer you an improved device positioning and signal compared with your PC where you might instead just connect simple antennas straight in to the motherboard. How many gamers have PC cases they stick out of the way under their desk? How many actually have systems they are proud to show off on their desktop with windows to see the insides, RGB lighting, optimised cooling etc? The latter seems more likely in the gaming market and so this brings in to question the logic of needing a separate Wi-Fi antenna in your monitor. Again we polled our audience and found that ~46% had their PC case on their desk which makes the feature of low value, leaving the other ~54% as potential target audience for this feature.
Testing Methodology Explained (SDR)

Performance is measured and evaluated with a high degree of accuracy using a range of testing devices and software. The results are carefully selected to provide the most useful and relevant information that can help evaluate the display while filtering out the wide range of information and figures that will be unnecessary. For measurement, we use a UPRtek MK550T spectroradiometer which is particularly accurate for colour gamut and colour spectrum measurements. We also use an X-rite i1 Pro 2 Spectrophotometer and a X-rite i1 Display Pro Plus colorimeter for various measurements. Several other software packages are incorporated including Portrait Displays’ Calman color calibration software – available from Portrait.com.
We measure the screen at default settings (with all ICC profiles deactivated and factory settings used), and any other modes that are of interest such as sRGB emulation presets. We then calibrate and profile the screen before re-measuring the calibrated state.
The results presented can be interpreted as follows:
- Gamma – we aim for 2.2 gamma which is the default for computer monitors in SDR mode. Testing of some modes might be based on a different gamma but we will state that in the commentary if applicable. A graph is provided tracking the 2.2 gamma across different grey shades and ideally the grey line representing the monitor measurements should be horizontal and flat at the 2.2 level, marked by the yellow line. Depending on where the gamma is too low or too high, it can have an impact on the image in certain ways. You can see our gamma explanation graph to help understand that more. Beneath the gamma graph we include the average overall gamma achieved along with the average for dark shades (0 black to 50 grey) and for lighter shades (50 grey to 100 white).
- RGB Balance and colour temperature – the RGB balance graph shows the relative balance between red, green and blue primaries at each grey shade, from 0 (black) to 100 (white). Ideally all 3 lines should be flat at the 100% level which would represent a balanced 6500K average colour temperature for all grey shades. This is the target colour temperature for desktop monitors, popular colour spaces like sRGB and ‘Display DCI-P3’ and is also the temperature of daylight. It is the most common colour temperature for displays, also sometimes referred to as D65. Where the RGB lines deviate from this 100% flat level the image may become too warm or cool, or show a tint towards a certain colour visually. Beneath this RGB balance graph we provide the average correlated colour temperature for all grey shades measured, along with its percentage deviance from the 6500K target. We also provide the white point colour temperature and its deviance from 6500K, as this is particularly important when viewing lots of white background and office content.
- Greyscale dE – this graph tracks the accuracy of each greyscale shade measured from 0 (black) to 100 (white). The accuracy of each grey shade will be impacted by the colour temperature and gamma of the display. The lower the dE the better, with differences of <1 being imperceptible (marked by the green line on the graph), and differences between 1 and 3 being small (below the yellow line). Anything over dE 3 needs correcting and causes more obvious differences in appearance relative to what should be shown. In the table beneath the graph we provide the average dE across all grey shades, as well as the white point dE (important when considering using the screen for lots of white background and office content), and the max greyscale dE as well.
- Luminance, black depth and contrast ratio (static) – measuring the brightness, black depth and resulting contrast ratio of the mode being tested, whether that is at default settings or later after calibration and profiling. We aim for 120 cd/m2 luminance which is the recommended luminance for LCD/OLED desktop monitors in normal lighting conditions. Black depth should be as low as possible, and contrast ratio should be as high as possible.
- Shadow detail – this is evaluated with the screen configured to a 200 nits white luminance for consistency between different monitors, and viewed in a dimly lit room. This first 16 greyscale shades are measured using our UPRTek MK550T spectro device (0.002 nits lower limit) for shades near-black, and the results are plotted on a graph relative to a target gamma curve (usually 2.2 gamma). Where the measurement line crosses the 0.01 nits point on the Y-axis is typically the visual threshold for where we would start to be able to detect luminance compared with black (0.00 nits). We combine these objective measurements with visual tests using a grey shade test pattern to determine the first visible shade, and then rank the shadow detail performance accordingly.
- Gamut coverage – we provide measurements of the screens colour gamut relative to various reference spaces including sRGB, DCI-P3, Adobe RGB and Rec.2020. Coverage is shown in absolute numbers as well as relative, which helps identify where the coverage extends beyond a given reference space. A CIE-1976 chromaticity diagram (which provides improved accuracy compared with older CIE-1931 methods) is included which provides a visual representation of the monitors colour gamut coverage triangle as compared with sRGB, and if appropriate also relative to a wide gamut reference space such as DCI-P3. The reference triangle will be marked on the CIE diagram as well.
- dE colour accuracy – a wide range of colours are tested and the colour accuracy dE measured. We compare these produced colours to the sRGB reference space, and if applicable when measuring a wide gamut screen we also provide the accuracy relative to a specific wide gamut reference such as DCI-P3. An average dE and maximum dE is provided along with an overall screen rating. The lower the dE the better, with differences of <1 being imperceptible (marked by the green area on the graph), and differences between 1 and 3 being small (yellow areas). Anything over dE 3 needs correcting and causes more obvious differences in appearance relative to what should be shown. dE 2000 is used for improved accuracy and providing a better representation of what you would see as a user, compared with older dE methods like dE 1994, as it takes into account the human eye’s perceptual sensitivity to different colours.
Default Setup
The screen offers an extended colour gamut backlight which provides a boost in vividness and saturation of colours compared with a standard gamut screen, which can be well suited to gaming and multimedia content. This is not quite as wide as some displays on the market including those with Quantum Dot coatings, with the spec suggesting a 90% DCI-P3 coverage. For a lot of normal desktop uses actually you want to work with a smaller SDR / sRGB colour space and that can be more difficult on any wide gamut screen. We will see how this screen handles that usage scenario shortly.

Out of the box there is a nice accurate gamma, very close to our 2.2 target across the greyscale, and measuring 2.23 average overall. You can see from the middle graph that the colour temp was too cool though, with a 7432K white point because the blue channel is now higher than it should be. This causes the image to look a bit cooler and more blue than intended.
The screen is set in its ‘normal’ colour temp mode by default, but there are a few other modes you can switch to in the OSD menu as well. ‘Cool’ is even more blue at 9470K, but ‘warm’ is closer to our target and measured at 6775K and so is an easy change if you own this screen and want to make it a bit more accurate. There’s also a ‘user’ mode which lets you adjust the RGB channels yourself, useful for calibration in a moment and for even more accurate results.
We were impressed by the contrast ratio of this screen which reached 1453:1 out of the box which was strong for an IPS-type panel. Luminance is high by default, but can be adjusted via the OSD between 94 and 490 nits which is decent, and allows you a large range in which to adjust the screen. It doesn’t get quite as low as we would normally like to see so might be a bit more restrictive for use in darker room conditions.

The colour space coverage from the panel’s backlight is a little strange here, extending quite a long way beyond the sRGB and even the DCI-P3 colour spaces in blue shades especially. We measured a 93.1% absolute coverage of DCI-P3 (a little higher than the 90% spec), but this actually reached 102.5% relative coverage if you include the parts where it extends beyond that reference. With this wide colour gamut in use, the accuracy of sRGB colours was only moderate, with a dE 3.2 measured. That’s typical for a wide gamut screen though. Accuracy of DCI-P3 colours was slightly worse at dE 4.0 average, as that colour space isn’t matched that closely here either.
No emulation modes provided
There’s no colour space setting in the menu, or any preset modes that would emulate or clamp the native gamut of the panel back to sRGB or anything else. This means it will be hard for the average user to improve colour accuracy for SDR content, which is mastered in the sRGB space. You will need to consider if this is important for you for your uses, or whether it doesn’t matter and you’d be happy just sticking with the native wider gamut.
It’s a shame these options are not offered here, although the wide gamut is probably going to be fine for many general gaming and multimedia uses. We would have preferred access to an sRGB clamp to offer better support for SDR content and improved colour accuracy. You would need a calibration device to profile the screen yourself if you wanted to match sRGB or other colour spaces more accurately, or you could also try our calibrated profile and recommended settings which are available in our database now.
Calibration


You can improve the RGB balance and colour temp pretty nicely through some simple OSD changes, like moving to the ‘user’ colour temp mode and adjusting the RGB channels from there as shown in the table able. That’s a simple start for everyone to correct the cooler default setup. Because there’s no colour space emulation modes, you can only run the screen in its native gamut, creating profiles to then clamp back to different colour spaces for use in colour-aware applications.
The calibration and profiling can produce excellent results if you have a suitable device and software. This was profiled to 2.2 gamma, 6500K colour temp and to the sRGB colour space. This profile will be used in colour-aware applications (e.g. Photoshop) to map back to sRGB in this instance. You can find our calibrated settings and ICC profile in our ICC profile database now.
General and Office
The resolution of 2560 x 1440 is comfortable on a 27″ sized screen like this, providing a nice desktop area to work with including decent support for split screen working and a sharp text clarity. While there are some higher pixel density 27″ 4K options available, we think that 1440p is perfectly fine for most people on a 27″ screen like this, providing a sharp and crisp image and definitely offering a big step up from 1080p. It has a comfortable text size and a very good image quality.
The IPS panel offers the usual solid all-round performance with very wide viewing angles and a stable image. You do get the familiar IPS glow when viewing darker content from an angle, that is inherent to this technology. The screen has a standard matte anti-glare coating and handles reflections and glare nicely as with other AG coated monitors.
The screen has a good range of ergonomic adjustments with tilt, height and swivel available, but there’s no rotate adjustment. The movements are smooth and mostly easy to use which make it easy to position and move around. Connectivity and related functionality is limited by today’s standards with only DisplayPort 1.4 and HDMI 2.0 video connections available. There is no USB type-C connection available on this model for single cable connectivity from laptops, nor are there any USB data ports which is unusual for any modern monitor. There is also therefore no KVM switch function which you will find on a lot of modern monitors, in case that’s something you needed. There are however some basic 2x 2W integrated speakers as well as a headphone jack connection.

The backlight operates without PWM and so is verified as flicker free.

The spectral distribution of the backlight is shown here at a 6500K white point. The blue peak is at 447 nm wavelength which means it is not Eyesafe certified, where there is a supposed harmful range between 415 – 455nm. There is a ‘Low Blue Light’ setting available in the OSD menu with levels from 1 – 10 to choose from, which makes the image progressively warmer. We measured a few examples when activating this setting from our calibrated screen state (at 6500K), and recorded a white point of 5800K (1), 5391K (2), 5164K (5) and 4535K (10) for example. The lower settings could perhaps be useful if you want to quickly shift to a slightly warmer mode for lots of text work or in the evening perhaps, while the higher settings get a bit too yellow in appearance for our liking.
Gaming

| VRR capabilities and Certification | |
| AMD FreeSync certification | |
| Native NVIDIA G-sync module | |
| NVIDIA ‘G-sync Compatible’ certified | |
| VESA ‘AdaptiveSync’ certification | |
| HDMI-VRR (consoles via HDMI 2.1) |
The PG27QFT2A has a mid-tier refresh rate at 180Hz which is supported by adaptive-sync for variable refresh rates (VRR) from compatible NVIDIA and AMD systems, although at this time the screen hasn’t been certified under either the ‘G-sync Compatible’ or the ‘FreeSync’ schemes according to the databases of the respective manufacturers. There’s not many options for gaming in the OSD menu other than an on/off control for the “OD” (Overdrive), an option to turn adaptive-sync on and off, and an MPRT mode which we will test in a moment.
| (at native resolution) | Refresh Rate |
| Maximum Refresh Rate DisplayPort | 180Hz |
| Maximum Refresh Rate USB type-C | |
| Maximum Refresh Rate HDMI | 144Hz |
| VRR range | 48 – 144Hz (HDMI) 48 – 180Hz (DisplayPort) |
| ClearMR certification tier |
We tested support for NVIDIA DSR / DLDSR and confirmed that this was available on this model if you want to use it. That could be potentially useful to upscale the resolution to something higher like 4K, to improve image detail in games, as it’s then scaled back down to the 1440p resolution of the panel. Good to see it supported.
| Other Features | |
| NVIDIA DSR / DLDSR support | |
| Motion Blur Reduction mode | |
| Gaming extras | |
| Emulated gaming sizes |
We will quickly mention HDR as well here as although the screen can accept an HDR10 input signal, it lacks the necessary hardware capabilities to provide any improvements to the dynamic range / contrast unfortunately. There is no local dimming available here at all, so you’re stuck with the ~1500:1 contrast ratio of the IPS-type panel, which is decent at least for this technology. There is an extended colour gamut, so you get decent support for HDR content mastered in DCI-P3, but we could not consider this an HDR-capable monitor. If you want something more capable for HDR, check out Mini LED or OLED monitors.
Our thanks to the following manufacturers for support in the build of our new test system:
| AMD Ryzen 9 7950X | Buy AMD Ryzen 9 CPUs here on Amazon | |
| Asus ProArt B650-Creator | Buy Asus B650 motherboards here on Amazon | |
| Corsair DDR5 RAM | Buy here on Amazon | |
| Corsair H100i Elite Capellix AIO cooler | Buy Corsair coolers here on Amazon | |
| Corsair iCUE RGB Elite Fans | Buy here on Amazon | |
| NVIDIA RTX 3090 | Buy NVIDIA RTX graphics cards here on Amazon |
| We may earn a commission if you purchase from our affiliate links in this content – TFTCentral is a participant in the Amazon Services LLC Associates Programme, an affiliate advertising programme designed to provide a means for sites to earn advertising fees by advertising and linking to Amazon.com, Amazon.co.uk, Amazon.de, Amazon.ca and other Amazon stores worldwide. We also participate in a similar scheme for Overclockers.co.uk, Newegg, Bestbuy and some manufacturers. |
Response Times
As discussed in our detailed article about Response Time Testing – Pitfalls, Improvements and Updating Our Methodology we are using an improved and more accurate method for capturing G2G response times and overshoot, based on figures that are more reflective to what you see visually on the screen in real-World usage. Our article linked above talks through why this is better and how we arrived at this improved method in much more detail.

We first of all tested the screen at its native maximum 180Hz refresh rate in each of the two available OD modes. There was no visual difference as you switch between the two modes during motion tests, and only very minor differences detected in the measurements from our tools. Both modes had no visible overshoot which was great news, although the response times aren’t fast enough to keep up with the frame rates properly.
With OD turned on, we had a 6.2ms G2G response time with only 50% of the measured transitions falling within the 5.56ms refresh rate window. This resulted in some added smearing on moving content that would otherwise not have been there had the response times been a bit faster, and able to keep up with the 180fps frame rate. We would have liked for the ‘on’ mode to have a slightly more aggressive overdrive impulse and some faster G2G response times.

With the OD setting turned on, we measured the response times at a range of different VRR refresh rates. The G2G response times improve slightly as the refresh rate lowers which is not uncommon for adaptive-sync screens, although this is actually the reverse of what you want to happen as it means that overshoot can creep up as well. In contrast, screens with ‘variable overdrive’ will slow down the G2G slightly as the refresh rate lowers in order to control and limit the overshoot.
Thankfully the overshoot never reached bad levels and remained rated as ‘good’ even at 60Hz. The refresh rate compliance is better at lower refresh rates too where the response times keep up better, and you do at least have a single overdrive setting experience on this screen. The response times are a bit too slow at 180Hz to keep up, but it does at least mean that at the lower end of the VRR range, the overshoot never becomes problematic or noticeable.
Motion Clarity and Gaming Experience
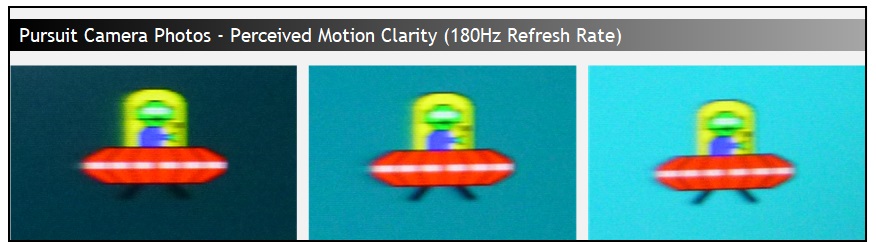
The above pursuit camera photos capture the real-world perceived motion clarity of the screen at its native 180Hz refresh rate and with overdrive turned on. This is pretty typical for an IPS-type panel of this refresh rate, and we were pleased that there was no obvious issues with black smearing like you get on most VA panels, and no visible overshoot either. There is a bit of smearing from light to dark transitions like behind the yellow part of the UFO, caused by the slower response time transitions you can see in the bottom left hand corner of the tables provided above. You will find faster refresh rate monitors of course, but 180Hz is a mid-tier refresh rate and certainly a lot better than 60Hz-only panels. If the refresh rate compliance had been better, we would have seen an even sharper and clearer image but it’s still pretty decent here for this refresh rate.
MPRT Motion Blur Reduction Mode
| Motion Blur Reduction Mode | ||
| Motion Blur Reduction Backlight | ||
| Refresh rates supported | 180Hz, 144Hz and 120Hz | |
| 60Hz single strobe operation | ||
| Blur reduction available with G-sync/FreeSync VRR | ||
| Strobe length control | ||
| Strobe timing control | ||
| Brightness capability (SDR, max refresh rate supported) | ||
| Independent brightness control available | ||
| Motion blur OFF – Max brightness | 490 nits | |
| Motion blur ON – Max brightness | 124 nits | |
The MPRT motion blur reduction mode is available via a simple on/off toggle in the menu and is available to use when the screen is running at 180, 144 or 120Hz refresh rate. It is not available when using the screen at 60Hz which is fairly common in the market. With MPRT enabled, the brightness setting of the screen is locked and unavailable, and the screen only reaches 124 nits which is low considering that it can reach 490 nits when this setting is turned off. It is a shame there is not a better brightness range available, and also user control over the brightness setting when using this mode.

We confirmed the backlight strobing operates in sync with the active refresh rate, with 180Hz shown above as an example. There’s no controls over the strobe timing or length in the OSD menu, so it’s not a customisable mode at all.

The motion clarity in MPRT mode was surprisingly good, especially in the upper half of the screen. The top region of the screen showed the lowest levels of cross-talk and ghosting and looked the clearest. The middle region, where a lot of your attention will be focused during gaming was not quite as clear, but still looked pretty decent. Tracking of moving objects became easier and the image looked sharper. The bottom region showed higher levels of strobe cross-talk and so didn’t look as clear though. The motion clarity overall in this mode was decent though.
Console Gaming
| Console Gaming | |
| Native panel resolution | 2560 x 1440 (1440p) |
| Maximum resolution and refresh rate supported | 1440p @ 120Hz |
| Virtual 4K support | |
| 4K at 24Hz support | |
| 4K at 50Hz support | |
| HDMI connection version | 2.0 |
| HDMI-CEC auto switch | |
| HDMI-VRR (over HDMI 2.1) | |
| Adaptive-sync (FreeSync) over HDMI | |
| Auto Low Latency Mode (ALLM) | |
| HDR10 support | PS5 only |
| Dolby Vision HDR support |
Modern console support is limited on this screen. There is no “virtual 4K” support on this screen, so the maximum resolution and refresh rate you can select is 1440p @ 120Hz. That matches the native resolution of the panel and will allow you to prioritise frame rates instead of resolution, had 4K been available. Without Virtual 4K support, the Xbox Series S/X cannot output in HDR mode as that only operates at 4K resolution, although there’s no real HDR hardware capabilities from this screen anyway so it isn’t really a major gap. From PS5 you can output HDR at 1440p if you want to, but don’t expect much in the way of improvements given the lack of HDR hardware support like local dimming and a high peak brightness. If you enable FreeSync from the OSD menu of the monitor, you can use VRR from an Xbox via FreeSync over HDMI. We don’t have a PS5 to be able to check if VRR works from that console, but generally that requires HDMI-VRR which isn’t available here because of the older HDMI 2.0 ports.
Overall, you aren’t really buying this screen expecting major HDR capabilities, and so being able to run at the native 1440p @ 120Hz is probably going to be adequate for most users anyway.
Input Lag
Read our detailed article about input lag and the various measurement techniques which are used to evaluate this aspect of a display. The screens tested are split into two measurements which are based on our overall display lag tests and half the average G2G response time, as measured by our oscilloscope. The response time element, part of the lag you can see, is split from the overall display lag and shown on the graph as the green bar. From there, the signal processing (red bar) can be provided as a good estimation of the lag you would feel from the display. We also classify each display as follows:
Lag Classification (updated)
- Class 1) Less than 4.17ms – the equivalent to 1 frame lag of a display at 240Hz refresh rate – should be fine for gamers, even at high levels
- Class 2) A lag of 4.17 – 8.33ms – the equivalent of one to two frames at a 240Hz refresh rate – moderate lag but should be fine for many gamers. Caution advised for serious gaming
- Class 3) A lag of more than 8.33ms – the equivalent of more than 2 frames at a refresh rate of 240Hz, or 1 frame at 120Hz – Some noticeable lag in daily usage, not suitable for high end gaming


Lag was measured at the max 180Hz refresh rate, as well as at 60Hz to account for external devices, including games consoles. The overall lag at 180Hz was measured at 1.57ms but with the response times accounting for nearly all of that, we had a very low estimated signal processing lag of only ~0.02ms which was very impressive. The lag was higher at 60Hz as with many screens, but remember that is only applicable for devices set with a fixed 60Hz refresh rate. For VRR gaming, even if frame rates drop down low, the 180Hz input lag figure will apply (assuming you’ve set the screen to that in your graphics card settings).
Conclusion
The PG27QFT2A was a a decent all-round performer given the very competitive price point. Obviously this is never going to have all the features and bells and whistles as top-tier gaming screens that can cost up to $1000 or more. We can forgive the lack of USB type-C, KVM functions, PiP/PbP, fancy gaming settings and things like that given the price point. We were disappointed though not to have an sRGB emulation mode and some USB data ports which feels like things that even a lower tier screen should have. ASRock have added a couple of bonus features like the integrated Wi-Fi antenna, and MPRT motion blur reduction mode which you may see value in depending on your uses. There’s also a decent and robust stand, and some basic integrated speakers.
The IPS panel offered solid all round performance with a good picture quality, wide viewing angles and a stable image. Setup and colour accuracy were good with just some simple OSD tweaks which was pleasing, although as we just said, the lack of colour space clamping for sRGB was a shame. Response times were a bit slow at the top end of the refresh rate but adequate still for offering a decent mid-tier motion clarity. They were at least free from visible overshoot, even in VRR situations and the screen offered a single overdrive mode experience which was good. Input lag was super low too. The motion blur reduction mode offered surprisingly decent motion clarity but it was limited in its brightness range and user controls. Console support was adequate as well given the panel spec, and its SDR-only hardware capabilities.
| Where to Buy |
| –_ |
The PG27QFT2A is available to buy now from some regions via Amazon, and also via other retailers like Newegg. You can check latest pricing and availability using our affiliate links above. If you’re after a low cost 27″ screen then this is a decent option to consider.
| Pros | Cons |
| Decent overall performance from IPS panel | Lacking an sRGB emulation mode |
| Good support for mid-tier gaming with 180Hz refresh rate and super low input lag | Response times could have been a bit faster at the top end of refresh rate range |
| Added MPRT mode and Wi-Fi antenna may be useful to some people | Lacking the bells and whistles of higher-tier gaming monitors |
We may earn a commission if you purchase from our affiliate links in this article- TFTCentral is a participant in the Amazon Services LLC Associates Programme, an affiliate advertising programme designed to provide a means for sites to earn advertising fees by advertising and linking to Amazon.com, Amazon.co.uk, Amazon.de, Amazon.ca and other Amazon stores worldwide. We also participate in a similar scheme for Overclockers.co.uk, Newegg, Bestbuy , B&H and some manufacturers.