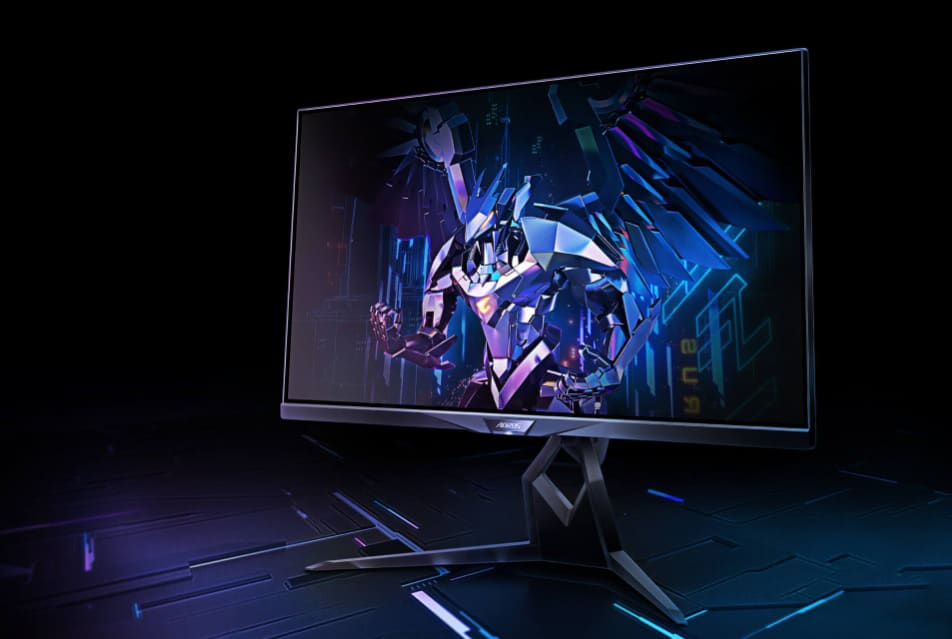
Gigabyte Aorus FI32Q X
This is a shorter format review but we have included as much of our normal testing and results as we can, especially in relevant areas for this screen. We will of course still be carrying out our normal full, detailed reviews for the most interesting, complex and exciting new screens, but using this short format helps us cover a few additional models in the meantime. An explanation of the results and figures discussed in this short format review can be found at the bottom of the page.
Key Specs and Features
- 32″ Super Speed IPS-type panel (AU Optronics M320DAN02.0)
- 2560 x 1440 resolution (1440p)
- 270Hz max overclocked refresh rate
- Adaptive-sync for VRR, including FreeSync Premium Pro certification
- Aim Stabilizer Sync (blur reduction backlight that works with VRR)
- Quantum Dot display with wide colour gamut (99% Adobe RGB)
- VESA DisplayHDR 600 certification
- Premium Sound by Audio ESS SABRE HiFi
- 2x HDMI 2.1 ports with Virtual 4K at 120Hz, VRR and ALLM
- DisplayPort 1.4 with DSC
- USB type-C (DP Alt mode, 18W power delivery)
- KVM switch, PiP and PbP support
- Full stand ergonomic adjustments with tilt, height, swivel and rotate
 | Check pricing and availability in your region |
 | |
 |
| TFTCentral is a participant in the Amazon Services LLC Associates Programme, an affiliate advertising programme designed to provide a means for sites to earn advertising fees by advertising and linking to Amazon.com, Amazon.co.uk, Amazon.de, Amazon.ca and other Amazon stores worldwide. We also participate in a similar scheme for Overclockers.co.uk. |
Introduction
The FI32Q X is the latest model in Gigabyte’s Aorus gaming monitor line-up. It’s 32″ in size and features a so-called Super Speed IPS technology panel. Gigabyte quote a common 1ms G2G response time of course, something we will measure and validate in this review. The key selling point of this screen is probably its combination of a 2560 x 1440 (Quad HD, 1440p) resolution with a high refresh rate. This is a native 240Hz panel, but can also be overclocked to 270Hz maximum. The screen supports adaptive-sync for variable refresh rates (VRR) from both NVIDIA and AMD systems, and includes certification under AMD’s ‘FreeSync Premium Pro’ scheme to give some assurances around VRR performance. Additionally for gamers the screen includes Gigabyte’s familiar range of “tactical” features like black equalizer modes, frame rate counter and crosshairs. It also supports their ‘Aim Stabilizer Sync’ technology, which offers a blur reduction backlight that can be used at the same time as VRR.
Away from gaming the screen also provides some impressive features and specs like DisplayHDR 600 certification, a particularly wide colour gamut, a focus on sound performance, USB type-C connectivity and a built in KVM switch. Being based on an IPS-type panel and so offers the all round performance benefits of this technology, including wide viewing angles and a stable image quality.
The screen should not be confused with the older version (the FI32Q – without the “X” on the end) which had a lower spec like a 170Hz max refresh rate, HDR 400, a smaller colour space and lacked HDMI 2.1 and USB type-C connections.

The FI32Q X is in keeping with many other Aorus series screens we’ve seen before. It has a 3-side thin bezel design along the sides and top (2mm plastic edge + 7.5mm black panel border), and a thicker plastic edge along the bottom (23mm plastic bezel + 1mm black panel border). The back of the screen is encased in a matte black plastic with some familiar “wing” styling, and some modest ‘RGB Fusion 2.0’ lighting sections as pictured above. These can be customised easily through Gigabyte’s app or through some OSD menu controls.
The stand is metal and provides a heavy and wide base for the screen. It has a carry handle at the top to assist with moving the screen which is useful as it weighs in at a heavy 10.33 Kg with this metal stand attached. It has a wide and pretty deep foot as well, so make sure you have appropriate desk space. The stand provides a full range of ergonomic adjustments with tilt, height, swivel and rotate offered. They are all mostly easy to move and provide smooth adjustments. Tilt is a little stiff, and it’s not always easy to get the screen level because of the rotate and swivel adjustments. In fact the screen also has quite a wobble to it if you knock it or use the OSD menu controls. The OSD is controlled via a single joystick control on the bottom edge of the screen. It is quick, easy and intuitive to navigate and provides plenty of options to play with.

Gigabyte provide a decent range of modern connectivity options including DisplayPort 1.4 (with DSC), 2x HDMI 2.1 (features discussed later on) and USB type-C (with DP Alt mode, upstream data and 18W power delivery). There is also 2x USB 3.0 ports, headphone output, mic input and line out connections.
Setup and Colour Performance

Default Setup

Out of the box the screen comes in the ‘green’ preset mode (green, as in environmentally green, as opposed to the colour). The full native colour gamut of the backlight is active, producing very vivid and oversaturated colours, especially in red and green tones. Brightness was reasonably modest and the image felt a little cool overall to the naked eye.
While the gamma was well configured in this default mode, the colour temp was a little cool, the balance of the RGB primaries was not very good, and grey shades had a visible slight pinkish tint to them. This led to high errors in the greyscale out of the box. Contrast ratio was decent enough and on spec at 1041:1, and brightness was modest and usable at 154 cd/m2.

The screen is set up by default to produce wide gamut saturated and vivid colours, and you couldn’t really consider any of them “accurate”. There is a very wide colour space thanks to the Quantum Dot coated backlight, extending far beyond the sRGB reference space (142.3% relative coverage). With the large over-coverage in red and green shades especially, you get large errors when viewing sRGB/SDR content (dE 7.6 average). This is common on all wide gamut screens, but its particularly inaccurate here because of the particularly wide colour space.
There is good coverage of the DCI-P3 colour space (97.0%) and even the Adobe RGB colour space (99.5%), the latter of which is commonly used in the professional and photo markets. While there are lots of wide gamut screens on the market, it’s quite rare to find one that can cover the Adobe RGB space properly, but the FI32Q X does well here. You can see it still has a large over-coverage (122.0% relative coverage), especially in red shades, so while the screen has the potential to be used for Adobe RGB content, you’d still need to be able to profile it and work within colour aware applications like Photoshop to restrict that native gamut back to Adobe RGB properly. Again because of the over-coverage in this native mode by default, we still have high dE errors for Adobe RGB colours with 5.9 average.
sRGB Emulation Mode

You need to scroll up in the ‘picture mode’ preset menu to find the sRGB mode, but thankfully one is available and works nicely to offer an emulation and clamping of the sRGB colour space. In this mode there is still access to the brightness control which is good news, but sadly no access to any of the other colour of gamma controls. That makes it a bit restrictive for tweaking, and correcting some of the issues that remain.
Gamma was configured here to an sRGB gamma curve and is very good overall, no real issues there. White point was slightly closer to the target 6500k now than the default mode of the screen, measured at 6670k (3% out). The greyscale was a little too cool though, and had the same visible pinkish tint in lighter shades as the default mode. This led unfortunately to some high greyscale errors again with dE 5.1 average.

You can see that this mode restricts the colour space nicely back to sRGB, cutting down on the very large over-coverage of the native mode. We had an absolute 95.6% coverage of sRGB which was good. Not perfect but decent enough. With the screen now operating in the sRGB colour space, the accuracy of sRGB colours was of course improved quite a lot. We had some large errors still in the grey shades (up to 7.7 max) because of the pinkish tint we talked about above, but most of the other colours were a lot better now between dE 1 – 3. The average overall was 3.1 which was moderate. It could have been better, but it certainly provided a far more accurate mode for working with sRGB/SDR content if you need, than the native wide gamut mode.
Calibration


Calibration and profiling can produce excellent results if you have a suitable calibration device and appropriate software. Our results are included above. It seemed tricky to fully correct the gamma curve in the lightest shades, and the 100% blue shade showed a higher error than other colours as the gamut didn’t quite cover that exactly; but this was still a solid result all round. You can see the recommended OSD settings above, and then further corrections are taken care of at the profile level. If you want you can also try our calibrated ICC profile out.
General Usage

The FI32Q X is equipped with a range of features showing that Gigabyte’s focus is not just on gaming. The inclusion of things like USB type-C with DP Alt mode and 18W power delivery making single cable connectivity simple from supporting laptops for instance. There’s also a built in KVM switch, something that Gigabyte seem to be adding to all their new screens pretty much. Picture in Picture (PiP) and Picture by Picture (PbP) are both supported as well if you need them too.
There’s a couple of challenges though when using this screen for general work and office type applications. The IPS panel offers some solid all round performance including wide viewing angles and a stable image quality. The contrast ratio is not as good as VA panels, and on dark content you get a familiar pale glow from an angle, especially noticeable in darker room conditions.
The super-wide colour gamut is both a blessing and a curse. This is useful for gamers who want vivid and bright colours, and useful for HDR content that is mastered in the wider colour spaces anyway. But for normal uses, it can be a little tricky to provide an accurate image and accurate colours. We’ve discussed that above in the colour measurements section and it’s something to keep in mind.
The other possible issue is that 2560 x 1440 resolution is fairly low for a 32″ sized screen and may put some people off. This resolution has been used for many years on 27″ sized screens and provides a reasonably crisp and sharp image here on the larger screen size. We expect some people might initially be a bit put off by the idea of using this resolution on a larger screen size, but in truth the resolution is still pretty comfortable, and some people may even prefer it. The pixel pitch (a useful comparison indicator for how large the text will look) is 0.2768mm on this model, which is the same size as a 24″ model running at 1920 x 1080. Those screens have been used for a very long time and many people are perfectly happy with the text size and sharpness there. Some people may well prefer the slightly smaller text and improved sharpness of 1440p on a 27″ model (0.2335mm) but some people also find that a bit too small if they are more used to common 24″ sized screens at 1080p.
The good thing about this 32″ sized screen is that you retain that same text size from a 24″ 1080p model, but have a much larger screen and a much larger desktop resolution area to work with. This makes it far better for split screen working and multi-tasking, but if you were worried about moving to a 27″ model where text would be smaller, this is a good answer. We should note also that the text size is still smaller and sharper than a 27″ model running at 1080p (0.3113mm) which is often criticised for having text that is too large, although again many people are perfectly happy with that option too. All in all, we don’t really have any problem with 2560 x 1440 on a 32″ screen for normal desktop and office use. Text is a bit bigger than on a 27″ model of the same resolution, but it’s by no means too big or becomes unclear. It’s still sharp and crisp. This resolution and screen size combination is also nice when it comes to gaming and multimedia that we will talk about later in the relevant sections.

The screen has a blue peak at 455 nm, and is unfortunately not part of the Eyesafe certified range of screens like the FI32U was, or the previous FI32Q was. There are a range of blue light reduction modes in the OSD with a setting from 1 – 10 available. Each seems to make the image slightly more greenish in colour in fact and makes the image slightly warmer as well, therefore reducing the blue peak a bit. The max 10 setting returned a white point of 5329k.
Response Times and Gaming

The FI32Q X has a native 240Hz refresh rate, but also supports up to 270Hz with an overclocking feature, enabled quickly and easily in the OSD menu. There is an advertised 1ms G2G response time spec, and a range of overdrive settings available in the menu to help you obtain the optimal gaming performance and pixel response times.
It’s worth noting here that the FI32Q X has a 1440p resolution (2560 x 1440) and so will be a lesser strain on your system than if it were 4K, like some other 32″ sized screens. There is a higher refresh rate to power here though up to 270Hz, so it’s still going to require a powerful system and graphics card to run it at a decent level. The inclusion of VRR will also help support varying performance and refresh rates, including less powerful systems. The super-high refresh rate provides noticeable improvements in motion clarity, frame rate support and overall gaming experience compared with lower refresh rate screens. It’s not as drastic as the jump from 60Hz to 144Hz, but it is still a decent improvement going up to 270Hz. You get smoother and clearer motion and it makes everything look even better for fast paced content.

We first set the screen to the maximum 270Hz refresh rate after the overclocking mode had been enabled. Through a range of visual tests and measurements we wanted to identify how each overdrive mode behaved and try and identify which was the optimal setting. First of all the measurements above were all at 270Hz and we found that the best overdrive mode was the ‘Balance’ setting. This was a fair bit faster (4.6ms G2G average) than the lower ‘Picture Quality’ mode (6.5ms G2G), and still didn’t have any overshoot at all.
The maximum ‘Speed’ setting didn’t look too bad at this max refresh rate in practice. It offers a slightly clearer and sharper image, with the response times improved quite a bit now (3.1ms G2G) but at the expense of some fairly high overshoot. In practice this didn’t look too bad, but there was some slight pale halos to moving objects. It wasn’t worth pushing up the max ‘Speed’ mode we didn’t feel, especially when you consider what happens at other refresh rates…

Having settled on the ‘Balance’ setting as optimal (at least at the max refresh rate of 270Hz) we measured the response times, and performed various visual tests at a range of refresh rates down to 60Hz as a minimum. You can see from the tables above that the response times were largely the same across all these refresh rates at around 4.1 – 4.5ms G2G. They were slightly slower at 240Hz and 270Hz for some reason.
The response times were not quite fast enough to keep up with the refresh rate at the very top end in this ‘Balance’ mode, showing 30% refresh rate compliance at 270Hz (63% if we allowed a small additional 1ms leeway), and 57% at 240Hz (80% with 1ms leeway). By the time you reach 200Hz, the response times keep up very well with the refresh rate. This leads to some slight additional smearing on moving images at the highest refresh rates of 240/270Hz, but not by anything too severe. Those modes are still usable, they just don’t offer much improvement over 200Hz in reality. You can see some pursuit camera photos captured below at 200Hz and 270Hz which demonstrates this, designed to capture actual perceived real-life performance.

The screen does not use variable overdrive unfortunately, a technology often seen in screens that feature a Native hardware G-sync module from NVIDIA, and designed to slow down the response times a bit as refresh rate lowers, in an effort to control the overshoot. Because nothing like that is used here (and it’s an adaptive-sync screen without the NVIDIA module), the response times remain consistent, but as a result of this the overshoot creeps up as refresh rate lowers. We would say that the ‘Balance’ mode therefore ends up being usable down to about 144Hz, but below that the overshoot becomes too noticeable and problematic with noticeable pale halos in practice, and you really need to switch down to a lower overdrive setting. This is a pain (but sadly common) for a gaming screen and means that unfortunately it lacks a “single overdrive setting experience”. You will need to consider your active refresh rate, and typical frame rates when using VRR, and pick an overdrive mode that is suitable from the OSD menu.
We would recommend ‘Balance’ for >144Hz, and hopefully you’ll be pushing frame rates in this upper range from 144 – 270Hz to make the most of that high refresh rate anyway. For <144Hz you should switch to ‘Picture Quality’ mode to eliminate most of the overshoot. Although by the time you reach 60Hz you’d probably be better with overdrive turned ‘off’. So for fixed 60Hz inputs like Blu-ray players or games consoles, maybe just turn this ‘off’ instead.

We should note here as well that we measured a super low input lag on the FI32Q X. There was ~0.05ms signal processing lag only, so the screen is perfectly fine for fast paced competitive games if you need.
Blur Reduction Mode
The FI32Q X includes Gigabyte’s ‘Aim Stabilizer Sync’ mode, which allow you to turn on a strobing blur reduction backlight, and use it at the same time as VRR too if you want. There is a simple on/off setting for this in the OSD menu, but unfortunately no further controls for things like strobe timing or strobe length which can be useful for refining the picture quality. This mode is also not available for any refresh rate <100Hz, but it is available at the 270Hz overclocked refresh rate if you want.

Oddly there is no control for the screen brightness when Aim Stabilizer Sync is enabled, so you are stuck with a high brightness of ~245 cd/m2 which is annoying. It’s odd that you can’t control the brightness at the same time as using this mode. There are some pretty good improvements to motion clarity, making moving objects sharper and easier to track. The central region was the cleanest area with the lowest levels of strobe cross talk (the slight ghost trail you see behind the moving object). As the screen uses Quantum Dot to produce its wide colour gamut instead of alternative KSF LED backlighting technology (as used on their FI32U for instance), it avoids any red fringing associated with that technology in the blur reduction mode which is good news. The blur reducing performance was pretty good, it’s just a shame the mode is inflexible with brightness setup.
Console Gaming
The screen features HDMI 2.1 connectivity with 2x ports provided which thankfully provide new functionality and features that are associated with this revision. You can read our recent article about HDMI 2.1 certifications and “fake HDMI 2.1” which is an interesting topic. Anyway, the ports on the FI32Q X offer good support for the new features. It’s not clear from the specs or our usual testing method what bandwidth is being used, but we believe them to be running at 24Gbps with DSC, much like the Gigabyte Aorus FI32U (where we could confirm that from our testing tools).
From an Xbox Series X you can run at 1080p, 1440p or 4K at 120Hz. The 4K input is possible since the screen supports Virtual 4K input. That’s more useful for the PS5 discussed in a moment. Gigabyte list in their spec that if you run at 4K 120Hz then the chroma will be reduced to 4:2:0, sacrificing some colour levels (not that this matters to most content and games anyway). This was the same situation on the FI32U, and one of the reasons why we believe the HDMI ports are 24Gbps with DSC here too. The consoles don’t seem to support DSC and so that’s why the 4:2:0 chroma drop occurs. From an Xbox Series X though you can also output 1440p and since that’s the native panel resolution that’s probably a better option here we think, providing your content is ok at this resolution. It allows 1440p @ 120Hz, and this should also avoid the need for any chroma drop, as this is within the 24Gbps bandwidth and doesn’t need to even try and use DSC. So our recommendation is to stick to 1440p @ 120Hz.
For a PlayStation 5 this won’t support 1440p output (at the moment) so you’d be best using 4K @ 120Hz and letting the screen scale that back down. You’d be limited to 4:2:0 due to the bandwidth of the port. That’s better than running 1080p @ 120Hz though.
We confirmed also that the screen supports both HDMI-VRR (natively from the HDMI 2.1 port) and FreeSync over HDMI, giving good support for Xbox that supports VRR already, and hopefully good future cover for PS5 if Sony ever add it. It also supports ALLM, 50Hz / 24Hz signals and HDR10 but cannot support Dolby Vision gaming.
High Dynamic Range (HDR)

The FI32Q X is certified under the VESA DisplayHDR600 standard and offers some basic edge-lit local dimming, a moderately increased peak brightness and some colour enhancements associated with HDR.
- The screen supports not only the normal HDR10 input signals of common HDR content, but can also support Hybrid Log Gamma (HLG) HDR. Sadly it cannot support Dolby Vision HDR though.
- With HDR enabled there are 3 modes available in the menu – labelled as HDR 600, HDR game and HDR movie. HDR600 mode is basically locked down in settings, but the other modes you can control various things, you can even turn off the local dimming if you want although that will remove some of the benefit of HDR in the first place
- Local dimming has 16 edge-lit zones. These are fairly subtle in behaviour without any majorly obvious turning off and on as objects move around the screen, but you don’t get very finite control over the content due to the very limited number of zones. There isn’t a lot of blooming around small objects, but only because much larger zones need to be lit up instead. It’s better than nothing but won’t compete at all with higher end FALD / Mini LED backlights
- We measured a peak brightness of ~556 cd/m2 in HDR mode which was a little shy of the spec
- There is some small improvement to “local contrast” in HDR, measuring between adjacent bright and dark areas ~1684:1 measured.
- There were some larger improvements in “whole screen contrast” in HDR, measuring a bright area relative to a dark area much further away, at ~5200:1. Reasonable improvements for an IPS panel, but not amazing.
- There are OSD controls in the HDR Game and Movie modes for “light enhance” (3 levels) and “dark enhance” (on/off) which seem to basically just control the contrast adjustment, and adjust digital white and black levels. We prefer to leave them off rather than skew the image.
- Since the screen uses Quantum Dot coating it can offer the colour enhancements associated with HDR content with 97% absolute / 113.5% relative DCI-3 coverage measured. Also for comparison there’s 82.6% of the Rec.2020 space covered which is very good, and that’s the colour space HDR content is mastered in. This is higher coverage than many other wide gamut screens on the market.
Conclusion
As a gaming screen the FI32Q X delivers very well in some areas, but has a few frustrating set backs in others that could have made it better had they been addressed. First off, the combination of 1440p and a very high 270Hz refresh rate is a great combo, avoiding the strain of 4K and instead focusing on increasing refresh rate and the benefits that brings in motion clarity and frame rates. Having this resolution on a 32″ sized screen instead of 27″ is both good and bad, allowing for improved immersion, a larger screen for more distant viewing positions (e.g. when playing a console) and for some people, creating a larger font size for PC use that they may prefer. On the other hand some may find the text size a little too large, and be disappointed to give up the improved sharpness you get from 1440p on a smaller sized screen. On balance, because this is a gaming screen primarily, and aimed quite a lot at consoles usage too, we think the larger format is a good thing.
Input lag was very low too we should note, and there was the usual decent range of gaming settings and “tactical features” offered from a Gigabyte Aorus screen. Support for adaptive-sync for VRR is a must-have nowadays and that was included here. We were also pleased with the overall support for consoles, with decent HDMI 2.1 features being included. Virtual 4K resolution support was available which is handy for the PS5, although not really needed for Xbox which can run at 1440p anyway. HDMI-VRR, FreeSync over HDMI and even ALLM were all supported too.
Response times were overall good, although in the optimal response time mode they struggled a little to keep up at the very top end of the refresh rate range. Nothing too major, but they weren’t quite fast enough to handle 270Hz. The more annoying thing is the lack of a single overdrive mode experience, with the need to switch between 2, or maybe even 3, modes in the OSD depending on your system performance and achievable frame rate. Gigabyte also provide a blur reduction mode, which on the face of it works pretty well with some decent improvements to motion clarity and the ability to use it at the same time as VRR. Frustratingly the brightness control is locked in this mode, so you seem to be stuck with the default brightness which is pretty high and probably uncomfortable to many people.
| Check pricing and availability in your region |
| |
|
| TFTCentral is a participant in the Amazon Services LLC Associates Programme, an affiliate advertising programme designed to provide a means for sites to earn advertising fees by advertising and linking to Amazon.com, Amazon.co.uk, Amazon.de, Amazon.ca and other Amazon stores worldwide. We also participate in a similar scheme for Overclockers.co.uk. |
Away from gaming the default setup of the screen offered a decent gamma, but its native colour gamut was particularly wide because of the Quantum Dot coating. This produces very vivid and saturated colours which might be preferable for gaming and multimedia (especially for HDR content), but was not really very good for general usage. Colour temp was a little too cool, the RGB balance was off and we had some large errors in grey shades with a noticeable pinkish tint which was a shame. If you’re going to have such a wide colour gamut then you need a sensible way for an average user to tame those colours back to sRGB, or maybe to other common colour spaces like Adobe RGB too. There is an sRGB mode available, and thankfully it’s pretty usable with a good emulation of the smaller colour space, a decent gamma and access to the brightness control still. Sadly colour temp is a bit too cool and we still have those large greyscale errors. It’s probably adequate for general users though, and a decent way to restrict the wide colour gamut if you want for common sRGB/SDR content. With the very wide gamut the screen is also capable of supporting Adobe RGB content nicely, with a good coverage of that space, but you will need a calibration device really. There’s also a good range of extra features provided by Gigabyte with a fully adjustable stand, USB type-C input, KVM and PiP/PbP support.
The screen isn’t perfect, but overall it offers a nice set of features and capabilities for gamers and general users alike. The FI32Q X is available to buy in the UK from Overclockers and on Amazon in most key regions.
- Further reading – if you’re after a different gaming screen you should also check out our TFTCentral Recommendations List for Gaming Monitors
| Pros | Cons |
| High refresh rate for very good motion clarity and frame rate support | Lacks a single overdrive setting experience which is annoying |
| Super low lag | Some issues with greyscale and RGB balance, including in the sRGB emulation mode |
| Nice range of extra features like KVM, USB type-C etc showing it’s not just a gaming screen | Blur reduction mode is locked to a single brightness level |
Testing and Results Explained
We will test and measure a range of aspects of these displays. By way of a brief explanation of what some of the results mean we thought we’d include this short guide:
Results Round-up section
- Maximum and minimum brightness – the full range in which the backlight can be adjusted using the monitor’s brightness control. At the upper end this can be important for gaming from a further distance, especially in brighter rooms and the daytime. At the lower end this can be important if you are using the screen up close for more general office-type work, especially in darker room conditions or at night.
- Recommended brightness setting – to achieve approx 120 cd/m2, which is the recommended luminance for LCD monitors in normal lighting conditions
- Flicker free – independently tested and confirmed whether the screen is flicker free or not and without PWM at all brightness settings
Setup and Measurements Section

Performance is measured and evaluated with a high degree of accuracy using a range of testing devices and software. The results are carefully selected to provide the most useful and relevant information that can help evaluate the display while filtering out the wide range of information and figures that will be unnecessary. For measurement we use a UPRtek MK550T spectroradiometer which is particularly good for colour gamut and spectrum measurements. We also use an X-rite i1 Pro 2 Spectrophotometer and a X-rite i1 Display Pro Plus for measurements in various ways. Various software packages are incorporated including Portrait Displays Calman Ultimate package. We measure the screen at default settings (with all ICC profiles deactivated and factory settings used), and any other modes that are of interest such as sRGB emulation presets. We then calibrate and profile the screen.
The results presented can be interpreted as follows:
- Greyscale dE – this graph tracks the accuracy of each greyscale shade measured from 0 (black) to 100 (white). The accuracy of each grey shade will be impacted by the colour temperature and gamma of the display. The lower the dE the better with differences of <1 being imperceptible (marked by the green line on the graph), and differences between 1 and 3 being small (below the yellow line). Anything over dE 3 needs correcting and causes more obvious differences in appearance relative to what should be shown. In the table beneath the graph we provide the average dE across all grey shades, as well as the white point dE (important when considering using the screen for lots of white background and office content), and the max greyscale dE as well.
- RGB Balance and colour temperature – the RGB balance graph shows the relative balance between red, green and blue primaries at each grey shade, from 0 (black) to 100 (white). Ideally all 3 lines should be flat at the 100% level which would represent a balanced 6500k average colour temperature. This is the target colour temperature for desktop monitors and the temperature of daylight. Where the lines deviate from this 100% flat level the image may become too warm or cool. Beneath this RGB balance graph we provide the average correlated colour temperature for all grey shades measured, along with its deviance from the 6500k target. We also provide the white point colour temperature and its deviance from 6500k, as this is particularly important when viewing lots of white background and office content.
- Gamma – we aim for 2.2 gamma which is the default for computer monitors. A graph is provided tracking the 2.2 gamma across different grey shades and ideally the grey line representing the monitor measurements should be horizontal and flat at the 2.2 level. Depending on where the gamma is too low or too high, it can have an impact on the image in certain ways. You can see our gamma explanation graph to help understand that more. Beneath the gamma graph we include the average overall gamma achieved along with the average for dark shades (0 – 50) and for lighter shades (50 – 100).
- Luminance, black depth and Contrast ratio – measuring the brightness, black depth and resulting contrast ratio of the mode being tested, whether that is at default settings or later after calibration and profiling.
- Gamut coverage – we provide measurements of the screens colour gamut relative to various reference spaces including sRGB, DCI-P3, Adobe RGB and Rec.2020. Coverage is shown in absolute numbers as well as relative, which helps identify where the coverage extends beyond a given reference space. A CIE-1976 chromaticity diagram (which provides improved accuracy compared with older CIE-1931 methods) is included which provides a visual representation of the monitors colour gamut as compared with sRGB, and if appropriate also relative to a wide gamut reference space such as DCI-P3.
- dE colour accuracy – a wide range of colours are tested and the colour accuracy dE measured. We compare these produced colours to the sRGB reference space, and if applicable when measuring a wide gamut screen we also provide the accuracy relative to a specific wide gamut reference such as DCI-P3. An average dE and maximum dE is provided along with an overall screen rating. The lower the dE the better with differences of <1 being imperceptible (marked by the green area on the graph), and differences between 1 and 3 being small (yellow areas). Anything over dE 3 needs correcting and causes more obvious differences in appearance relative to what should be shown
Gaming Performance Section
We first of all test the screen visually in each of its available overdrive modes and at a range of refresh rates from 60Hz, all the way up to the maximum supported. This allows us to identify what appears to be optimal setting for each refresh rate and we can then measure the response times across a range of grey to grey (G2G) transitions using our oscilloscope setup, including correcting for gamma to improve accuracy as we described in our detailed article. This helps provide measurements for response times and overshoot that are even more representative of what you see in real use. In the summary section the small table included shows the average G2G response time measured at several refresh rates (where supported), along with the optimal overdrive setting we found. The overshoot level is then also rated in the table at each refresh rate. We will explain in the commentary if there are any considerations when using variable refresh rates (VRR) as well as talking about the overall performance our findings during all these tests.
At the maximum refresh rate of the screen we will also include our familiar more detailed response time measurements, which includes a wider range of transition measurements as well as some analysis of things like the refresh rate compliance. This identifies how many of the measured pixel transitions were fast enough to keep up with the frame rate of the screen. Ideally you’d want pixel response times to be consistently and reliably shorter than this refresh rate cycle, otherwise if they are slower it can lead to additional smearing and blurring on moving content.
In this section we will also include the measured input lag and look at any blur reduction backlight feature if it’s available. The commentary in each section will provide more information if a blur reduction mode is available and how it operates.
We may earn a commission if you purchase from our affiliate links in this article- TFTCentral is a participant in the Amazon Services LLC Associates Programme, an affiliate advertising programme designed to provide a means for sites to earn advertising fees by advertising and linking to Amazon.com, Amazon.co.uk, Amazon.de, Amazon.ca and other Amazon stores worldwide. We also participate in a similar scheme for Overclockers.co.uk, Newegg, Bestbuy , B&H and some manufacturers.