LG UltraFine 32EP950 OLED Pro

Introduction
Where is OLED technology in the monitor market? That’s been the question for quite a few years now, with the use of this technology now pretty widespread and readily available in the TV and mobile phone market. OLED (Organic Light Emitting Diode) is very popular in the TV market now thanks to its performance in a number of key areas. OLEDs emit their own light at a sub-pixel level meaning they do not need an additional backlight unit like a traditional LCD display would. In the TV space OLED panels use a WRGB structure where each sub-pixel emits white light which is then passed through a passive colour filter to produce red, green and blue, and a fourth white sub-pixel is also added. Here on the more advanced “true RGB” OLED panel of this monitor the sub-pixels don’t need filters because they emit red, green or blue wavelengths of light, which can improve efficiency and accuracy. With both types of OLED panel if you want to display black you can simply turn off the sub-pixels so they omit no light. True, deep blacks are one of the key benefits, and the per pixel control allows for exceptional “local dimming” for HDR content, allowing for infinite contrast ratios and great dynamic range. The technology also inherently offers super-fast pixel response times, truly offering <1ms G2G and offering the capability at least to drive high refresh rates and very good motion blur reduction technologies where both are available. OLED is therefore a very popular option for multimedia displays, for HDR gaming and movies particularly in the mainstream consumer market. These capabilities also make an excellent option for professional users working with HDR content, video creation and colour critical applications for much the same reasons.
Back in July 2020 we wrote an article that looked at OLED technology and its strengths and weaknesses in much more detail. We also considered the reasons why OLED had yet to really make an impact on the desktop monitor market. We later tested and reviewed in October 2020 the LG CX OLED display, which is a TV but thanks to a (relatively) small size model of 48″ being released, has become fairly popular as a monitor alternative, for those who are focused on gaming and movies primarily and have the space. Having such a large screen on your desk is not practical for many people though, and it’s not really a great option for other uses like normal desktop work, content production, image editing etc in our opinion. So we were left with the same issue as before, that OLED isn’t really available in any guise in the desktop monitor market.
Then came CES 2021 in January of this year, where LG announced the exciting arrival of OLED technology with their UltraFine 32EP950 OLED display. This marked the first venture in to OLED monitors from LG and is hopefully a sign of things to come for this segment. The 32EP950 was first announced and is a 31.5″ sized display with a 3840 x 2160 true RGB OLED panel. It’s aimed firmly at professional users, video production, colour critical work and content creators. Those who need exceptional image quality, colour accuracy, a wide range of reference modes to work with and top-notch HDR capability that goes beyond anything else currently available in the monitor market.
Despite the technology’s general popularity for gaming it’s not positioned for that market at all. Perhaps more gamer-oriented options will follow at some point, but for now we are at least seeing this technology evolve for professional monitors. The current high production prices also tend to mean new technologies like this first appear in high-end professional grade monitors. As a result the 32EP950 lacks gaming features like high refresh rate and VRR support, but please keep in mind that it is not intended for those uses. If you’re more interested in multimedia and gaming then the screen at least gives us a feel for what this technology offers in terms of picture quality, colours and HDR and a flavour of things to come in the future hopefully.
LG also announced at around the same time a 27″ model (27EP950) with basically the same specs and features, but a smaller screen size. A couple of months later information about a couple of slightly different versions emerged as well in the form of the 32BP95E and 27BP95E. The specs will remain largely the same but these new BP models will also include a built-in calibration sensor and come packaged with a shading hood. They are basically slightly more advanced (and likely more expensive) versions of the original EP models.
We have with us now for review the 31.5″ 32EP950 display, the first OLED monitor announced by LG. This has a 3840 x 2160 “4K” resolution and a wide colour gamut covering 99% of the DCI-P3 and Adobe RGB reference spaces. It also offers a 10-bit colour depth, loads of different colour modes for different content and colour spaces, and support for hardware calibration too. It’s a professional grade screen as we’ve said above, but even if that’s not for you, it will be exciting to see how OLED performs in the monitor segment.

If you enjoy our work and want to say thanks, donations to the site are very welcome. If you would like to get early access to future reviews please consider becoming a TFT Central supporter.
| Check Availability and Pricing – Affiliate Links |
|---|
| Amazon | Overclockers UK |
| TFTCentral is a participant in the Amazon Services LLC Associates Programme, an affiliate advertising programme designed to provide a means for sites to earn advertising fees by advertising and linking to Amazon.com, Amazon.co.uk, Amazon.de, Amazon.ca and other Amazon stores worldwide. We also participate in a similar scheme for Overclockers.co.uk. |

Specifications and Features
The following table gives detailed information about the specs of the screen as advertised:

Design and Ergonomics
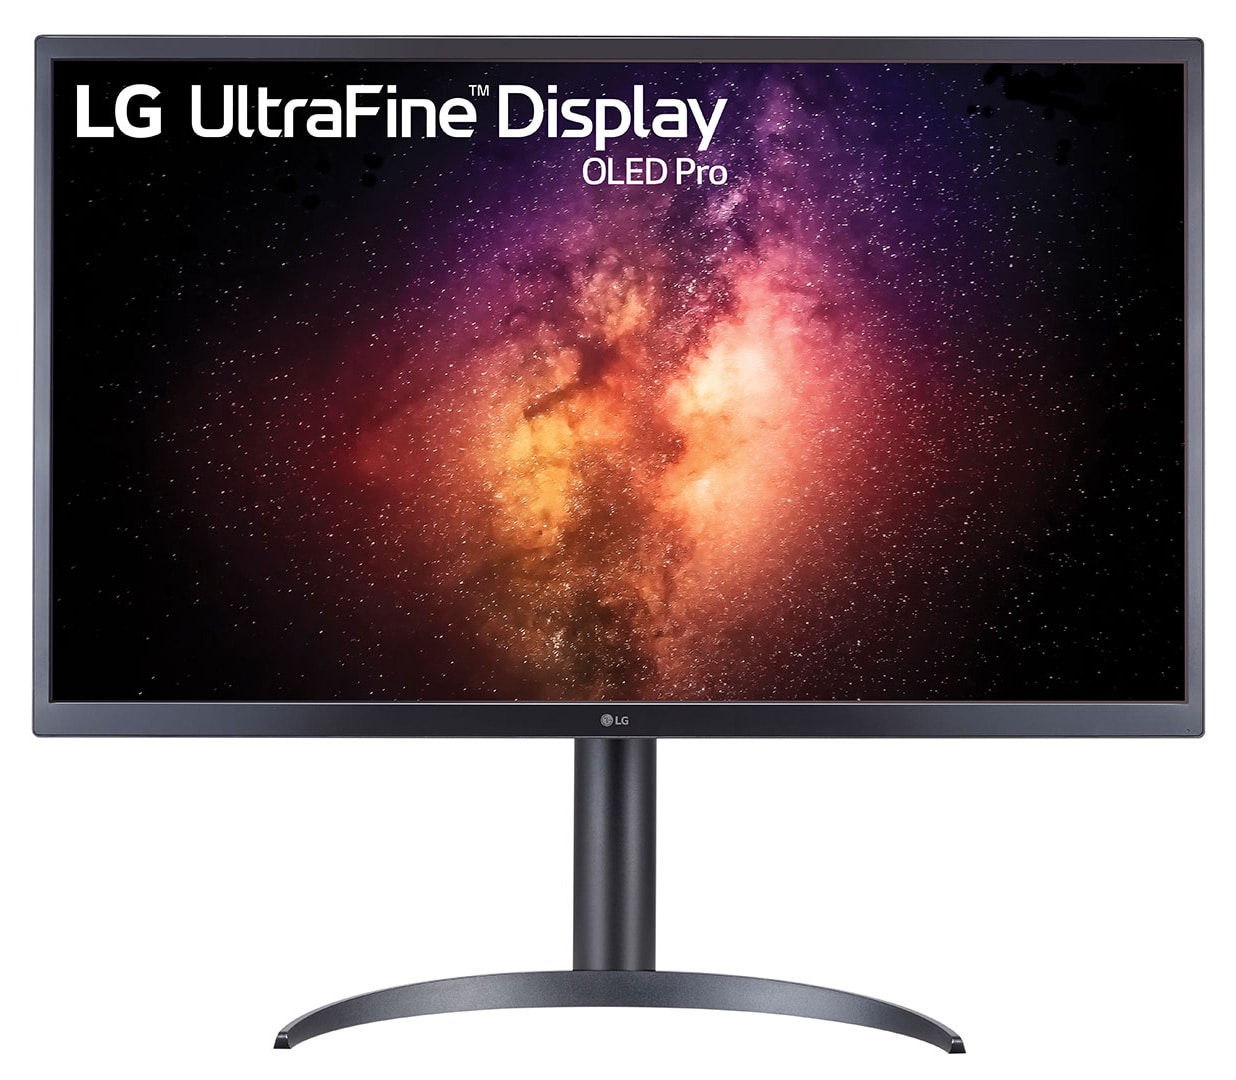
The 32EP950 has a fairly simple design more appropriate to professional users and content creators, and certainly deviating from the wide range of gaming monitors we’ve tested. There’s no RGB lighting or fancy design highlights here as they are not appropriate. The screen has matte black plastic bezels around all four sides but they are not too chunky. Along the sides there is an 11mm plastic edge and then a small 3mm black panel border before the image starts. Along the top it’s 15mm + 2mm of borders, and along the bottom it’s 21mm + 5mm. There’s a light grey LG logo in the middle of the bottom bezel but no other markings on the bezels. A very small circular power LED is located in the bottom right hand corner.

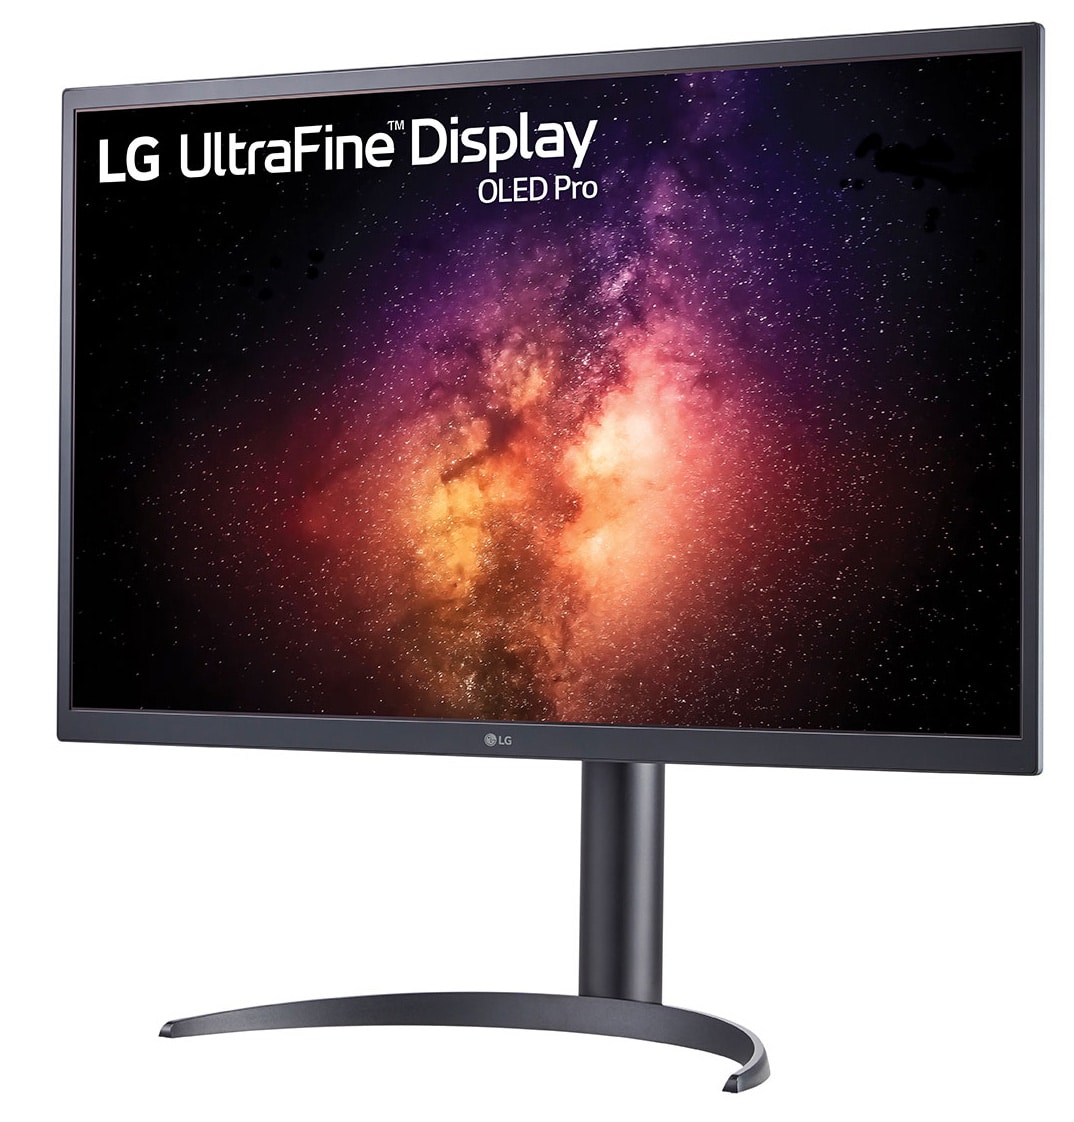
The stand needs to be screwed together when you unbox it, and has a fairly chunky but sturdy arm, that clicks simply in to place on the back of the screen. This can also be removed for VESA 100mm mounting if you’d rather. There is a fairly basic arc shaped foot that screws to the bottom of the arm, which provides a pretty sturdy base for the screen and looks reasonable.
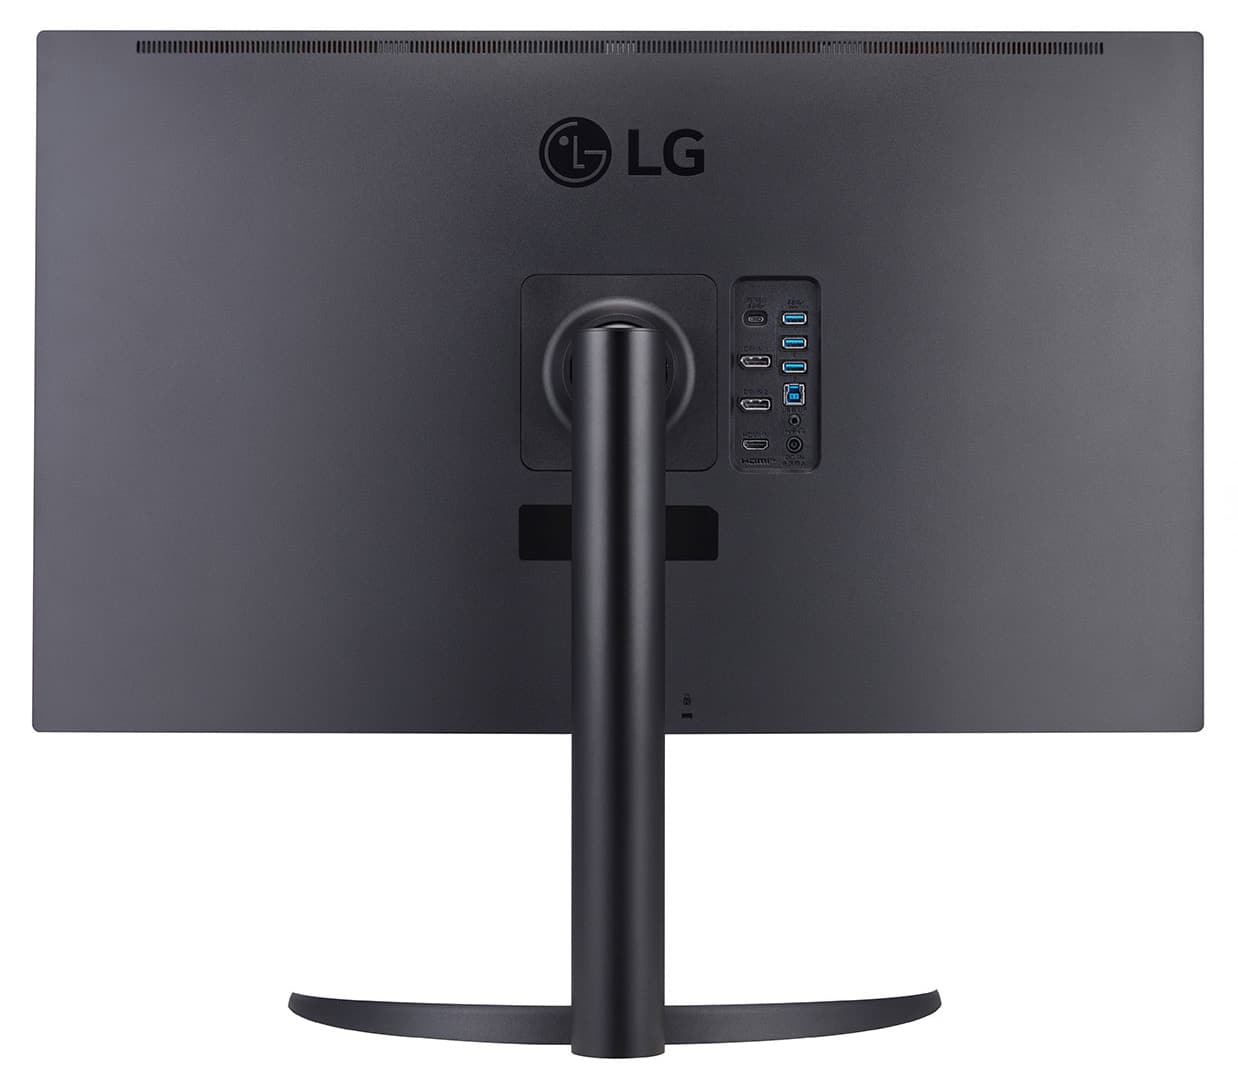
The back of the screen is enclosed in a matte black plastic as well with a simple design as shown above. The connections are all located on the back of the screen to the right of the stand (when viewed from behind). They are easy to get to here.

The screen has a very thin profile and is also very light thanks to the OLED panel, the lack of a backlight unit (not needed for OLED) and the external power supply. There is a decent range of ergonomic adjustments offered from the stand too. There are tilt, height and rotate adjustments but no side to side swivel which is a bit of a shame. All of them provide decent adjustment ranges and smooth movement, although are quite stiff to operate. Nothing major and the screen does at least stay stable and wobble-free on the desk.
A summary of the ergonomic adjustments are shown below:

The materials were of a good standard and the build quality felt solid. The whole screen remained fairly cool even during prolonged use.


The 32EP950 offers a good range of connectivity with 2x DisplayPort 1.4, 1x USB type-C (90W power delivery) and 1 x HDMI 2.0 offered for video connections. There is no HDMI 2.1 offered, and that has yet to be used on any available desktop monitor where it is attractive for console gaming in paticular. Plus that’s not really needed here given the maximum 60Hz refresh rate support and the fact it’s really not aimed at gaming anyway. 3x USB downstream and 1x upstream ports are provided on the back as well, along with a headphone out connection and the power connection.


The screen comes with a box containing all the accessories and cables you might need. There’s cables provided for all the connections here. There’s also a USB type-A to type-C adapter, a cable tidy clip for the stand and an installation CD.
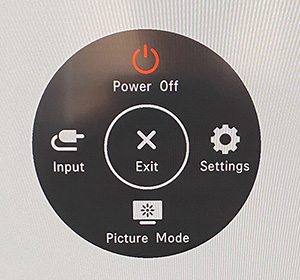
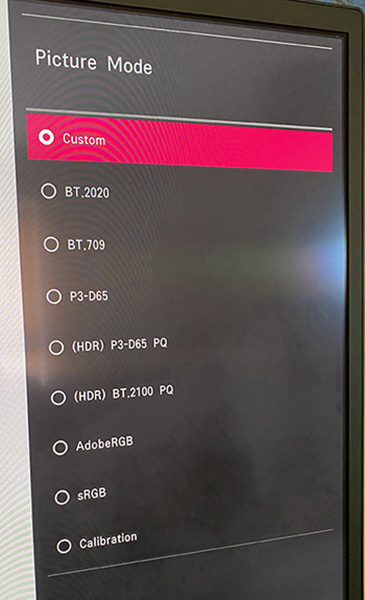
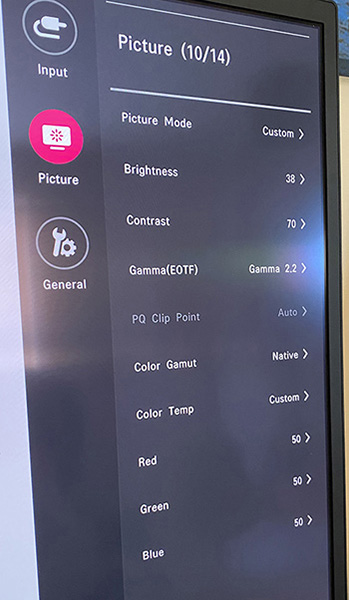
The OSD menu is access via a single control joystick located in the middle of the bottom edge of the screen. There is quick access there to the input selection and volume controls. Pressing the button brings up the main menu which is split in to 3 sections. Forgive the angled photos above, it was tricky to capture the menu without reflections from the semi-glossy panel coating. You can see the wide range of preset picture modes available in the menu, as well as the excellent level of control over things like gamma, colour space, RGB values etc. There’s a lot of options to configure in the picture mode menu. Navigation was quick, easy and intuitive thanks to the joystick controller.
Image Retention and Burn-in Measures
We will not go too much in to potential concerns around lifespan of the OLED panel, colour shift, dark spots or image retention/burn-in here. You can read our OLED Displays and the Monitor Market article for more information about those potential issues. As a desktop monitor if you are going to use the screen for many hours per day, some of these things might become an issue in time. In our fairly short period of time testing and using the screen we noticed no issues in any of these areas but if you stress the screen beyond its intended usage and are not careful for extended periods, you may see problems. If you are using the screen a lot as a desktop monitor and working with a lot of static content you will probably want to consider things like auto-hiding your taskbar, setting a screensaver to run etc. If you’re working with a lot of stationary windows for office work, internet browsing, photos etc then the risk of burn-in increases and to be honest that’s a bit of an annoyance with an OLED screen like this. These are things you don’t need to worry about with a typical LCD desktop monitor but it’s always in the back of your mind when using an OLED screen.
If you’ve got the money to spend on a super-high end professional screen like this, we are going to assume you have the common sense to know how to protect it from issues like this and aren’t going to leave it on static images for really extended periods of time. The screen is more aimed at content creation, HDR video etc and so static images are probably less common in those spaces. But obviously you may well want to use the screen for office work, web-browsing and some static content content as well. LG provide a 12 month warranty for the screen in the US (may vary in Europe) which includes protection against image retention and burn-in which is good news. They also provide a few built-in features help mitigate issues.

Screensaver
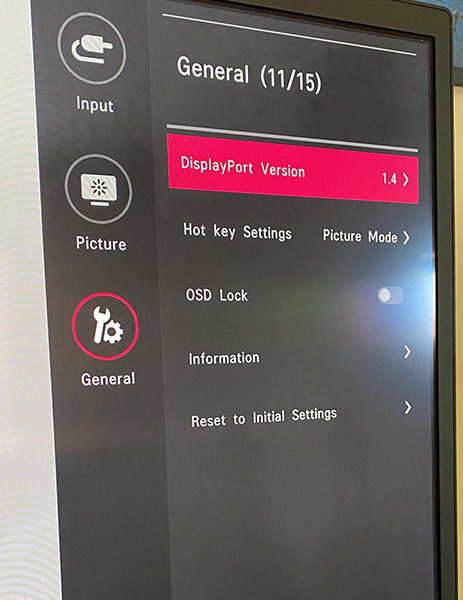
In the general section of the menu are a few useful OLED related options. The “screen saver” function detects when you leave the screen with a static image for a few minutes, dims the screen nearly off and then after a few more seconds turns the screen to black (pixels turned off). The power LED glows amber to signify that the screen is in standby mode but your computer is still on. If you move your mouse of change the screen content it quickly comes back to life. Leave that turned on we would suggest.
Screen shift
The ‘screen shift’ setting might be familiar to those who’ve used an OLED TV, which basically just shifts the image a couple of pixels at regular intervals to help avoid retention. This is not noticeable in usage, so again leave it turned on.
‘Auto Brightness Limiter’ (ABL)
This term has become a little mixed up in the OLED market and really it can be used for two different things. One is related to how OLED panels operate from a technical / physics point of view, the other has become associated with an image protection feature common on LG OLED TV’s (and maybe others). We will look at what applies on this screen here:
1) On the one hand OLED panels all have an inherent limitation with the panel itself. The power consumption of these panels is highly dependent upon the content displayed. With a pure white image, every pixel must be lit, while with a pure black image every pixel is off. As the display has a maximum power usage, this opens up the capability for OLED displays to allocate more power per pixel to create a higher maximum luminance when not displaying a full-white image. This is different to LCD panels where a separate backlight unit sits behind the panel and can produce the same max luminance level regardless of the screen content, and how much of it is white in this example. On the OLED screen the percentage of the display that is lit up compared with a full white display is known as the Average Picture level (APL). You will see then on OLED panels that with a low APL (like a small 1% window size of white) the maximum peak brightness is achievable. This peak brightness reduces normally as the window size increases, as this is where the Auto Brightness Limiter (ABL) feature comes in. If you try and display a bright area over a certain window size you will find that the screen is dimmer than if that window size was smaller.
The point at which this ABL feature kicks in based on the size of the APL will vary on different panels. We will measure that later on in the HDR section but [spoiler alert] this is far better on this desktop OLED monitor than it is on the LG CX OLED TV’s for example. So this ABL feature is really a feature of how OLED panels operate, it’s not really specifically to do with image retention. You will notice the ‘ABL indicator’ setting in the OSD menu photo above. This basically gives you a warning via a blinking of the power LED in an amber colour if this ABL feature kicks in, to warn you that colour accuracy/luminance might not be accurate as the APL is high enough for the ABL to kick in. The power LED is small so this is a subtle indication, you can change the brightness of the LED or turn it off altogether if you want in the menu. We will look at the point where the ABL feature kicks in later in the review for both office/general use situations and for HDR content. For now this ABL feature isn’t related to image retention mitigation so we will look at it later.
2) What makes this a bit confusing is that in the OLED TV space the term “ABL” has become associated more with a specific image retention feature like that seen on LG OLED TV’s. This is actually called “Temporal Peak Luminance Control” (TPC) by LG but because it dims the screen it’s become associated with the term ABL. This image retention saving feature detects static content on the screen and unless there is a regular (but fairly small) change in the APL the pixels are dimmed in brightness to help avoid image retention problems. In the most common usage for a TV of video, movies, gaming etc the content and therefore the APL is changing regularly and so you should never see this TPC feature kick in, although if you leave something paused for a short while you might notice it. When the APL changes again, the screen brightness increases back to what it was before. If you’re using the screen for desktop PC usage then working with static content can result in this feature turning on and you will spot the overall image dim after a couple of minutes. Having tested the LG CX OLED as a PC monitor this is fairly noticeable in those uses.
That TPC feature is on LG OLED TV’s but it is not included here on the 32EP950 OLED monitor – as that would be very impractical for a monitor aimed at desktop usage. While the screen is still intended for video content and generally non-static images where possible, it’s accepted that being a monitor you will also need to use the screen for more static content as well. There is no dimming feature here tied to the APL which is good news.
Panel and Backlighting

The OLED panel has a characteristic PWM-like behaviour that we see on all OLED panels. It’s not technically PWM as there’s no backlight to dim here, and it’s there at all brightness levels but for ease we can think of it in the same way. The pixels are changing state very rapidly here in luminance but at the speed of OLED which is very fast. This is a characteristic of the JOLED panel and helps with motion handling and avoiding issues like cross-talk on a panel with such fast pixel transitions. You will see this used in a similar way on LG’s own OLED panels like in the OLED TV range. his might present some problems for those sensitive to this kind of thing and associated eye-strain and headaches.
Although it’s not as drastic as on LCD backlight PWM, or like with strobing blur reduction backlights where it can be turned fully off and on rapidly. You can see from the graph below that this operates at 120Hz frequency with alternating small (approx 1/3) modulation and larger (approx 2/3) modulation. These “off” periods are also very brief given the super-fast pixel switching time so there’s no perceivable variation in the luminance or visible flicker. This applies at all brightness settings from 0 – 100%. But as a result the screen cannot be considered “flicker free”.

The screen is unfortunately not flicker free, shown above at calibrated brightness level. Horizontal scale = 20ms
Brightness and Contrast
This section tests the full range of luminance (the brightness of the screen) possible from the individual OLED pixels, while changing the monitors brightness setting in the OSD menu. This allows us to measure the maximum and minimum adjustment ranges, as well as identify the recommended setting to reach a target of 120 cd/m2 for comfortable day to day use in normal lighting conditions. Some users have specific requirements for a very bright display, while others like a much darker display for night time viewing or in low ambient light conditions. At each brightness level we also measure the contrast ratio produced by the screen when comparing a small white sample vs. a black sample (not unrealistic full screen white vs. full screen black tests). The contrast ratio should remain stable across the adjustment range so we also check that.
Graphics card settings were left at default with no ICC profile or calibration active. Tests were made using an X-rite i1 Display Pro Plus colorimeter paired with the Calman Ultimate software for very high levels of accuracy.

At the full brightness setting in the OSD the maximum luminance reached was a decent 266 cd/m2 in SDR mode which was a bit higher than manufacturer quoted spec of 250 cd/m2. There was a very good 245 cd/m2 adjustment range in total, so at the minimum setting you could reach down to a luminance of 21 cd/m2. This was a good adjustment at the lower end, and should allow you a low luminance option for working in darkened room conditions with low ambient light. A setting of 41 in the OSD menu is needed to return you a luminance as close to 120 cd/m2 as possible at default settings. We have plotted the luminance trend on the graph above. The screen behaves as it should in this regard, with a reduction in the luminance output of the screen controlled by the reduction in the OSD brightness setting in a linear relationship.
OLED dimming requires the use of a PWM-type behaviour as described in the previous section so the screen cannot be considered “flicker free”. This might present some problems for those sensitive.
Being an OLED panel each pixel is individually lit and so when it is asked to show black, it just turns itself completely off. This creates true blacks so at all brightness settings the minimum black depth is 0.00 cd/m2. This in turn creates an infinite contrast ratio regardless of the brightness setting. No LCD panel can do this in the same way, and this is one of the major strengths of OLED technology. Far beyond what is possible from even VA technology panels in the desktop monitor space.
Testing Methodology

Performance is measured and evaluated with a high degree of accuracy using a range of testing devices and software. The results are carefully selected to provide the most useful and relevant information that can help evaluate the display while filtering out the wide range of information and figures that will be unnecessary. For measurement we use a UPRtek MK550T spectroradiometer which is particularly good for colour gamut and spectrum measurements. We also use an X-rite i1 Pro 2 Spectrophotometer and a X-rite i1 Display Pro Plus for measurements in various ways. Various software packages are incorporated including Portrait Displays Calman Ultimate package. We measure the screen at default settings (with all ICC profiles deactivated and factory settings used), and any other modes that are of interest such as sRGB emulation presets. We then calibrate and profile the screen before re-measuring the calibrated state.
The results presented can be interpreted as follows:
- Greyscale dE – this graph tracks the accuracy of each greyscale shade measured from 0 (black) to 100 (white). The accuracy of each grey shade will be impacted by the colour temperature and gamma of the display. The lower the dE the better, with differences of <1 being imperceptible (marked by the green line on the graph), and differences between 1 and 3 being small (below the yellow line). Anything over dE 3 needs correcting and causes more obvious differences in appearance relative to what should be shown. In the table beneath the graph we provide the average dE across all grey shades, as well as the white point dE (important when considering using the screen for lots of white background and office content), and the max greyscale dE as well.
- RGB Balance and colour temperature – the RGB balance graph shows the relative balance between red, green and blue primaries at each grey shade, from 0 (black) to 100 (white). Ideally all 3 lines should be flat at the 100% level which would represent a balanced 6500k average colour temperature for all grey shades. This is the target colour temperature for desktop monitors, popular colour spaces like sRGB and ‘Display DCI-P3’ and is also the temperature of daylight. It is the most common colour temperature for displays, also sometimes referred to as D65. Where the RGB lines deviate from this 100% flat level the image may become too warm or cool. Beneath this RGB balance graph we provide the average correlated colour temperature for all grey shades measured, along with its percentage deviance from the 6500k target. We also provide the white point colour temperature and its deviance from 6500k, as this is particularly important when viewing lots of white background and office content.
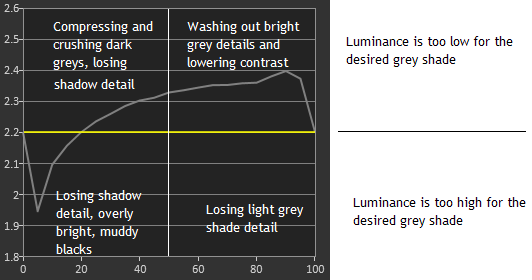
- Gamma – we aim for 2.2 gamma which is the default for computer monitors in SDR mode. Testing of some modes might be based on a different gamma but we will state that in the commentary if applicable. A graph is provided tracking the 2.2 gamma across different grey shades and ideally the grey line representing the monitor measurements should be horizontal and flat at the 2.2 level. Depending on where the gamma is too low or too high, it can have an impact on the image in certain ways. You can see our gamma explanation graph to help understand that more. Beneath the gamma graph we include the average overall gamma achieved along with the average for dark shades (0 black to 50 grey) and for lighter shades (50 grey to 100 white).
- Luminance, black depth and contrast ratio (static) – measuring the brightness, black depth and resulting contrast ratio of the mode being tested, whether that is at default settings or later after calibration and profiling. We aim for 120 cd/m2 luminance which is the recommended luminance for LCD monitors in normal lighting conditions. Black depth should be as low as possible, and contrast ratio should be as high as possible.
- Gamut coverage – we provide measurements of the screens colour gamut relative to various reference spaces including sRGB, DCI-P3, Adobe RGB and Rec.2020. Coverage is shown in absolute numbers as well as relative, which helps identify where the coverage extends beyond a given reference space. A CIE-1976 chromaticity diagram (which provides improved accuracy compared with older CIE-1931 methods) is included which provides a visual representation of the monitors colour gamut coverage triangle as compared with sRGB, and if appropriate also relative to a wide gamut reference space such as DCI-P3. The reference triangle will be marked on the CIE diagram as well.
- dE colour accuracy – a wide range of colours are tested and the colour accuracy dE measured. We compare these produced colours to the sRGB reference space, and if applicable when measuring a wide gamut screen we also provide the accuracy relative to a specific wide gamut reference such as DCI-P3. An average dE and maximum dE is provided along with an overall screen rating. The lower the dE the better, with differences of <1 being imperceptible (marked by the green area on the graph), and differences between 1 and 3 being small (yellow areas). Anything over dE 3 needs correcting and causes more obvious differences in appearance relative to what should be shown. dE 2000 is used for improved accuracy and providing a better representation of what you would see as a user, compared with older dE methods like dE 1994, as it takes into account the human eye’s perceptual sensitivity to different colours.
| Check Availability and Pricing – Affiliate Links |
|---|
| Display Calibration Devices at Amazon |
| TFTCentral is a participant in the Amazon Services LLC Associates Programme, an affiliate advertising programme designed to provide a means for sites to earn advertising fees by advertising and linking to Amazon.com, Amazon.co.uk, Amazon.de, Amazon.ca and other Amazon stores worldwide. We also participate in a similar scheme for Overclockers.co.uk. |
Default Performance and Setup
The 32EP950 has a wide range of preset modes and settings designed for specific uses, with carefully tuned gamma, white point and colour spaces. However initially out of the box the screen was set in the ‘custom’ preset mode, set with a 2.2 gamma, 100% brightness adjustment and ‘native’ gamut. This mode isn’t really aimed at anything in particular and so can be customised to your liking or calibrated how you see fit. There are sections within the menu to set the gamma, white point, colour space and everything else so this provides a great deal of flexibility for this ‘custom’ mode. As we said, there are also defined preset modes available for certain reference uses which we will look at in a moment.
As normal we tested the screen in this default state anyway and can compare it to certain content types to give you an idea of the image accuracy if you were to just stick with the default mode. You won’t want to or need to, but it’s here for completeness.

With the display set at its maximum 100% brightness this was too bright for general use but not too eye-scorching. As with most displays will need to turn it down though. The picture quality was excellent thanks to the OLED panel. Colours looked vivid and bright, the contrast was exceptional and the image “popped” a little more than normal screens thanks to the semi-glossy screen coating. We went ahead and measured the default state with our testing equipment.
You can see in this mode that the colour temperature is a bit too warm, at 6140k average and leaving a fairly small 6% deviance from the target of 6500k. Gamma was pretty good in general, certainly in the darker tones where its average 2.19 was very close to the 2.2 target for a computer monitor. In brighter shades it dropped a bit, down to 2.04 in the most extreme example which results in a bit of loss of light grey shade detail. This resulted in a moderate greyscale at 2.4 average, although there were some issues in brighter shades and white where the deviance ranged up to 3.6 maximum dE. Remember this default ‘custom’ mode doesn’t really carry any factory calibration and isn’t set up for anything in particular so we expect most people to either calibrate the screen themselves or switch to one of the specific-use preset modes tested in a moment.

The CIE-1976 diagram in the top section confirms that the monitors colour gamut (white triangle) extends a significant way beyond the sRGB reference space which is used for SDR content (maroon coloured triangle), mostly in green and red shades. We measured using our newly updated more accurate methods a 99.8% absolute coverage of the sRGB space, leaving a tiny part of the colour space not quite met although this is so minor as to not be any issue at all. If we were comparing the colour space relative to a standard gamut screen then actually the colour space corresponds to about 133.7% of the sRGB reference. Obviously when comparing the displayed colours of the native screen gamut to colours within the sRGB reference space this results in a very high dE with average of 4.2. Accuracy of sRGB colours is poor in this mode, but that’s because the screen has a native wide colour gamut and we are not working within a colour managed workflow.
If you compare the native gamut of the display with some common wide gamut reference spaces it covers 99.7% of the DCI-P3 reference, slightly higher than the 99% spec even and very close to 100% coverage. In this native full gamut mode it stretches beyond the DCI-P3 space a bit in some areas giving rise to the 106.6% relative coverage measurement. The same can be said for Adobe RGB coverage, with 98.3% absolute coverage here, but some over-coverage to 114.6% in native mode. Remember that the screen has specific preset modes for these (and other) colour spaces so we will test those later in more detail. If we compare the produced colours to those in the DCI-P3 reference space that might be used for cinema content creation then colour accuracy in the native mode is much better at 1.8 dE average since the native gamut is close to the DCI-P3 space. There are still some inaccuracies in places because of the over-coverage. If you’re working with DCI-P3 content then you’ll probably want to switch the gamut to the P3 mode anyway, just like if you were working with sRGB content you could switch to that gamut mode.
It’s interesting to consider the out-of-the-box setup and the total native colour space of the display but really the 32EP950 is aimed at specific use-cases where the factory calibrated preset modes will be more applicable. We will look at those next. Before we do we also wanted to measure the ‘color temperature’ modes available in the OSD menu as an option.
Colour Temperature Modes
The OSD menu has a setting for ‘color temp’ and this is one area that doesn’t seem to change with each of the preset modes. By default it is always on ‘custom’ color temp mode with access to the RGB controls, so that remains pretty consistent as the default in all the modes. There is also a user setting where you can set a defined colour temperature, and so when using any of the preset modes like sRGB, DCI-P3 etc you may want to consider manually changing this depending on your desired colour temperature.
While in the ‘custom’ and the sRGB preset modes we tested each of these manual color temp settings to see how close they were to the target. Measurements were taken using a spectroradiometer to ensure accuracy:
Native Gamut (‘custom’ preset mode)

sRGB Preset mode

The warmer colour temp modes seemed to be a little more accurate and closest to their intended temperature, especially in the Custom preset mode (with full native panel colour gamut) where the cooler modes above 7500k varied further from their target and were a bit too warm relative to their intended level. Within the sRGB mode we had better overall tracking of the colour temp for each setting though until about 9000k where they then became a bit cooler than intended. At 6500k the white point was very accurate in this sRGB mode too which was useful. This provides overall a decent control over the colour temperature, although we suspect if you’re spending this much money on a professional display then you’re likely to have a calibration device so you can always software profile or hardware calibrate the screen to reach your desired colour temp for each mode and for your uses.
sRGB Emulation Mode
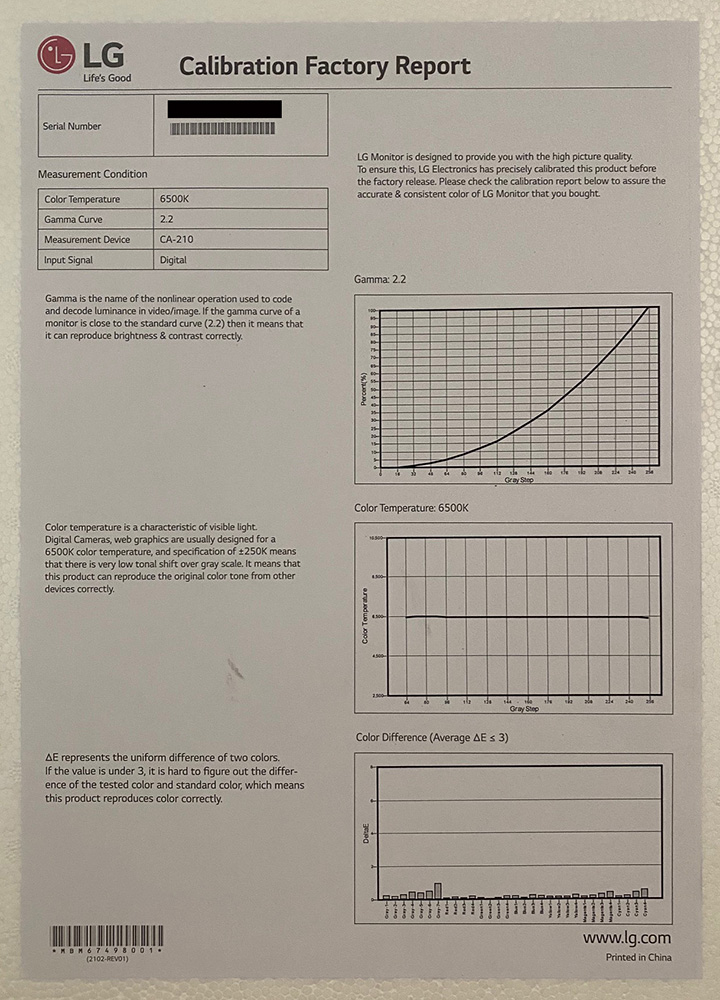
We should note that the 32EP950 is provided with a factory calibration report in the box, shown above for our sample. This confirms calibration to 2.2 gamma, 6500k white point and dE <3. Oddly this report fails to mention which mode it applies to, but based on the targets and the norm for this kind of thing we believe it to apply to the sRGB mode.

The screen includes an sRGB emulation mode which we tested at its default settings. When you enable this mode the screen defaults to a defined brightness level although you can still change this if you want to something else, it’s not locked out like on many consumer screens. This gives you flexibility if you want to use the screen for standard gamut content but at a brighter setting than its target which is 80 cd/m2. We measured 83 cd/m2 which was very close to this, and thanks to the OLED panel we had a true black and infinite contrast ratio.
The gamma curve was very close to the 2.2 target measured at 2.21 average. The colour temperature was also very close at 6307k average (6327k white point) leaving only a small 3% deviance from the 6500k target. This resulted in a very good greyscale dE of 1.1 average which was pleasing.

The colour space had been very nicely emulated to sRGB here as you can see from the CIE diagram on the left, with a 99.6% absolute coverage (100.2% relative) measured it very closely matched the sRGB reference triangle. The resulting colours were excellent with an average 0.6 dE and great accuracy. If you want to work with standard gamut content in the sRGB colour space (like for SDR) then this mode offers a very reliable factory calibration and colour space emulation.
DCI-P3 Emulation Mode

We also tested the DCI-P3 mode which is a common colour space for cinema content creation. You will note that this mode defaults in the OSD menu to a 2.6 gamma and a brightness setting of only 13. This looks dark but is designed to reach the target luminance for this standard which is 48 cd/m2. Again you can change this brightness level if you want, it is not locked. DCI-P3 for cinema/theatre (as opposed to ‘display DCI-P3’) uses a 2.6 gamma curve and a luminance of 48 cd/m2. White point is not defined but here it has been targeted to the common D65 (6500k). So those are the targets we adjusted to here for the measurements.
You can see that the gamma curve is very good at 2.64 average, with very little deviance across the greyscale. This was excellent news. The correlated colour temperature was very close to the 6500k target too with only a very minor 2% deviance. This resulted in a very good greyscale with dE 1.0 average.

The colour gamut of the display was very closely matched to the DCI-P3 reference now in this mode as you can see from the CIE diagram on the left. We had a 99.5% absolute coverage which was excellent. The colour accuracy of the produced colours relative to this colour space was also excellent, with an average dE of only 0.8. This mode provided a very accurate performance for DCI-P3 content creation and viewing. If you want a mode for display DCI-P3 as opposed to cinema DCI-P3 you can always calibrate the screen in one of the other modes including with hardware calibration or change things like gamma and colour temp in this mode.
Other Preset Modes
The 32EP950 has a wide range of other preset modes and settings designed for specific uses, with carefully tuned gamma, white point, luminance and colour spaces. We tested the other preset modes as well and have provided a summary of each one below. We will provide analysis and testing of the HDR modes later.

The preset modes were all very well set up and thought through. Each one provided a set brightness level in the OSD that was designed to reach a reference luminance level, and achieved that very well within only a few percent each time, and likely to vary depending on your measurement device to be fair. You can still change the brightness control and quite a few other settings in each preset mode too, so if you want to tweak any of them you can do so.
The gamma was also nicely set up in each mode relative to its target. Note that some of these modes have a different target gamma to our common 2.2, based on that particular reference. Same thing with colour temperature, all being pretty close to the targets although we did find it to be around 150 – 200k too warm relative to 6500k. A minor difference and something you could easily correct by tweaking the ‘custom’ colour temp mode and the RGB values. The reliable gamma and colour temperature setup in each mode results in a very good greyscale with a very low dE of <1.5 in all modes.
Emulation of the colour spaces was also very good for sRGB, BT.709 (the same colour space as sRGB) and DCI-P3 especially. The defined gamut setting very nicely clamped the native panel gamut to those reference spaces giving >99% coverage. This resulted in excellent colour accuracy in each of those modes with dE <1 average, and <2 maximum. So the sRGB, BT.709 and DCI-P3 modes were all excellent.
The Adobe RGB and Rec.2020 modes were very good but a little lacking when it came to colours due to the inability to cover the full reference gamut. For Adobe RGB we had a 96.7% coverage of the Adobe RGB space which was very high, but it can’t quite reach the green primary fully (hence the lower than 100% coverage). This resulted in a dE max of 3.0 for green shades, but on the whole all the other colours showed very low dE <1 which was excellent. No major issues with Adobe RGB, it’s very close to covering the full gamut and everything else like luminance, gamma and greyscale are very accurate. This is useful for those doing photo work where Adobe RGB is commonly used.
BT.2020 mode has a colour gamut target that this panel and all other displays simply can’t reach (based on Rec.2020), and here it covers “only” 77.6%. This is a problem for all modern displays if you wanted to try and display the full range of colours for Rec.2020 though. While gamma, greyscale etc are all nicely set up, the inability to show all the shades of this space leads to some higher dE in the red and green shades but everywhere else colour accuracy is still excellent and there’s still an average dE of 1.3.
Overall these preset modes were all very well thought out and configured and represent very accurate performance for different uses and requirements. LG have done a really good job here for the intended professional audience.
| Check Availability and Pricing – Affiliate Links |
|---|
| Amazon |
| TFTCentral is a participant in the Amazon Services LLC Associates Programme, an affiliate advertising programme designed to provide a means for sites to earn advertising fees by advertising and linking to Amazon.com, Amazon.co.uk, Amazon.de, Amazon.ca and other Amazon stores worldwide. We also participate in a similar scheme for Overclockers.co.uk. |
Calibration (Profiling)
The 32EP950 has support for hardware calibration which affords you a great level of control over the setup in different modes and accurate results. For hardware calibration this is carried out at the hardware LUT level and results are saved to the screen itself. So there is no need to worry about ICC profiles or colour management within your software. This is likely to be the preferred calibration method and we will test that in a moment. For completeness we also carried out a software profiling of the screen, where optimal OSD adjustments were obtained and an ICC profile was created which can be used for colour-aware applications. This can be useful if you’re using the screen for mixed content where maybe you want some applications/content working with a wide gamut colour space, and some others using an ICC profile to map to sRGB for instance. So software profiling is still likely to be important to those working within colour managed workflows in some cases.
This was profiled using the screen’s native gamut but with the profile created relative to the sRGB colour space


The OSD settings were adjusted as shown in the middle table above, as guided during the process. These OSD changes allowed us to obtain an optimal hardware starting point and setup before software level changes would be made at the graphics card level through creation of the profile. These adjustments before profiling the screen would help preserve tonal values and limit banding issues. After this we let the software carry out the LUT adjustments and create an ICC profile.
Calibrated results were very good as you would expect after profiling the screen. We made some useful changes to the screen settings to correct the brightness level and minor colour temperature deviance we had out of the box. After profiling, the gamma, greyscale and colour accuracy were all very good. You can use our settings and try our calibrated ICC profile if you wish, which are available in our ICC profile database. Keep in mind that results will vary from one screen to another and from one computer / graphics card to another.
Hardware Calibration
The 32EP950 like all respectable professional grade screens also features support for hardware calibration. This gives you access to the internal Look Up Table (LUT) so that you can calibrate the screen at a hardware level. You need LG’s free and easy to use Calibration Studio software for this and a compatible calibration device.
 (Coming Soon)
We should note here also that LG and Portrait Displays are working on support as a Calman Ready display device for their excellent Calman software, which will give even enhanced levels of control, reporting and configuration than LG’s Calibration Studio software for this display. This will offer ‘Autocal’ features for simple but advanced LUT based hardware calibration. We expect this feature to be available later this year in their software.
In the meantime we calibrated the screen using free LG’s Calibration Studio software (currently v5.6.6 on LG’s website):

When you load up the software you are asked which preset picture mode you want to calibrate. There is one entirely configurable new “calibration” mode in the menu you can use, or you can also re-calibrate some of the existing preset modes like sRGB, DCI-P3 if you want. At the moment calibration of the HDR modes is not supported in the software but it is expected to be added very soon and likely in time for when stock lands.
The software supports various meters including popular options like the X-rite i1 Display Pro colorimeter and i1 Pro spectrophotometer. We noticed that at the moment there is no option to select a correction profile for the i1 Display Pro to account for the OLED wide gamut panel, and so calibration with that tool produces errors right now as a colorimeter doesn’t cope well with these panels natively. This should be updated in their software soon to include different correction matrices for those kind of devices. We instead used the i1 Pro spectrophotometer which doesn’t need correction and will work fine on all kinds of backlights and colour gamuts.
Anyway after selecting your picture mode and meter you can then choose your target colour gamut, brightness, colour temp and gamma settings – above we are calibrating to sRGB in this example but there’s good flexibility here for different options.

You then press proceed where the calibration process is entirely automated. It takes around 12 minutes to complete (the timer shown above updated during the process to shave off time) at which point you are presented with a quick summary of the results:

This confirms your targets have been met (hopefully) but is a simple summary only. You can switch between before and after modes for a visual demonstration of the calibration on/off, and there is then an additional validation step available if you want a bit more reporting on the results. This takes around 4 minutes to complete.

The validation report provides some further details including dE for a range of colour samples and greyscale, although oddly it doesn’t list a greyscale dE number in the table. Even so, this provides a useful and quick confirmation of your calibration. With the calibration active at the hardware LUT level you don’t need to worry about ICC profiles or colour management, the screen is now configured in our case here to sRGB gamut and our defined targets.
LG also gave us a sneak peak at the updated version of this software (should be v5.6.8) which is a pre-release preview of a version that LG will release later in the year. The version releasing later in the year will add a few new features including the capability to calibrate using a 3D LUT based approach in addition to the existing 3×3 matrix approach possible in the current version 5.6.6. It will also support more gamma options beyond the current ‘power’ functions, including sRGB gamma and BT.1886. Importantly it is also expected to allow you to calibrate HDR picture modes as well as SDR. You can see a screenshot below of the updated version:

Sneak peak at the update to the Calibration Studio software expected later this year with more functionality.
Viewing Angles
Viewing angles of the screen were excellent which is a strength of OLED technology. There is very little colour tone or contrast shift from any viewing position which is great news. On darker content and a black image there is also no glow like you get from desktop monitors, like IPS tech which has the widest available viewing angles in the LCD monitor market, but which shows common pale/white glow from an angle. None of that here, and viewing angles are excellent.
Panel Uniformity
We wanted to test here how uniform the brightness was across the screen here. Measurements of the luminance were taken at 35 points across the panel on a pure white background. The measurements for luminance were taken using BasICColor’s calibration software package, combined with an X-rite i1 Display Pro Plus colorimeter with a central point on the screen calibrated to 120 cd/m2. The below uniformity diagram shows the difference, as a percentage, between the measurement recorded at each point on the screen, as compared with the central reference point.
It is worth noting that panel uniformity can vary from one screen to another, and can depend on manufacturing lines, screen transport and other local factors. This is only a guide of the uniformity of the sample screen we have for review.

Luminance uniformity of the screen was excellent on our sample, with 100% of the screen within a 10% deviance of the centrally calibrated area. In fact 100% of the screen was within a 5% deviance! This provides excellent uniformity for colour critical work, photo editing, content creation and is in keeping with what we would expect from a professional-grade screen like this.
It should be noted that if you display a full black image to test for backlight bleed there is none – as there is no backlight on this screen and each pixel is individually lit. Showing an all-black screen causes all pixels to turn off, and the screen shows true black as result, and looks like it’s just turned off.
General and Office Applications

The 32EP950 isn’t really designed for static image work, office use etc although LG of course understand that you aren’t going to be using it all the time for video production, HDR content creation etc. Being an OLED panel one of the first things people will think about is the risk of image retention of the dreaded “burn in”. See our earlier section which talked about the warranty for this and some measures included to help mitigate and avoid issues. With that risk accepted because of the OLED panel we can instead concentrate on the exceptional image quality that this panel offers which can make office work, photo editing and colour critical work very enjoyable.
One of the key features of this screen is its high 3840 x 2160 Ultra HD (“4K”) resolution. This 4K resolution is probably still a bit too high to use at native scaling (100%) on a screen even of this pretty large 31.5″ size although some people may find it ok. Text is small but if you’ve got good eye-sight and are up close then it’s still reasonable and does provide you then with a massive screen real estate and very sharp picture. Other people will probably want to use operating system scaling to ensure fonts and text are a more sensible and readable size though. 150% is probably unnecessarily large, with 125% scaling offering a nice balance on a screen of this size we think. That gives you comfortable text size which is very similar to a 27″ 1440p screen, but does give you the equivalent desktop real-estate area of a 3072 x 1728 resolution. So that’s quite a nice jump up from common 2560 x 1440 resolution screens in this approximate size range. The extra pixel density of the 4K resolution will provide a very sharp and clear image for all uses including office and general applications. Just make sure that your software will support scaling effectively as it can sometimes be a bit difficult to get it right.
The semi glossy coating of the panel is different to many desktop LCD monitors which normally have a light anti-glare (AG) coating. This does increase the reflections a bit so be careful if you’ve got a window or lighting behind you but at the same time it does help improve the image quality even further and provides a bit of added “pop” to the colours and blacks. Speaking of which the OLED panel obviously has a major benefit in that it offers exceptional black depth and infinite contrast ratio, something far beyond anything you can get from LCD panels even where FALD or Mini LED backlights are used. We will talk about HDR and local dimming later in the review, but the amazing contrast ratio helps provide an overall very impressive image and exceptional picture quality even for static general office work. There is also support for a true 10-bit colour depth from this screen if you have the necessary graphics card and applications that can support it.
The wide viewing angles provided by the OLED panel technology on both horizontal and vertical planes, helps minimize on-screen colour shift when viewed from different angles. Unlike IPS technology which is commonly used in the desktop monitor space for other professional grade screens, the OLED panel is free from the “IPS glow” and pale appearance on dark content when viewed from an angle too.
The out of the box setup was set up in a general way to use the OLED panel’s native capabilities largely. LG provide a large range of controls and settings for you to customise the gamma, colour temperature, colour space and other areas to your liking within that ‘custom’ mode. And they’ve done a great job overall in ensuring those settings are accurate to what they say they will deliver. There are also a wide range of preset modes designed for different reference workflows and colour spaces including for instance sRGB, DCI-P3 and Adobe RGB. Each mode has a reliable and accurate emulation of the target colour space and is well calibrated for gamma, white point and colour accuracy too.
The brightness range of the screen was good, with the ability to offer a luminance between 266 and 21 cd/m2 in SDR mode. This gives you flexibility even in darker room conditions and low ambient light conditions. A setting of 41 in the OSD brightness control should return you a luminance close to 120 cd/m2 out of the box. The brightness regulation is unfortunately controlled using a fairly low 120Hz frequency Pulse Width Modulation (PWM) type behaviour and so those who suffer from eye fatigue or headaches associated with flickering backlights might need to be careful. It’s a characteristic of the JOLED panel, something common to OLED in general actually. It certainly shouldn’t be any problem for motion content, videos etc but on static backgrounds, particularly white/bright content those sensitive may experience some issues with it.

Spectral distribution graph showing calibrated mode at 6500k
At our calibrated 6500k colour temperature you can see a the spectral output above. However the blue wavelength peak is shifted from the typical 448 – 450 nW/nm level and is instead at 459 nW/nm which is supposed to be less harmful on the eyes. It should be noted that there are settings no settings for a Low Blue Light filters available in the OSD menu on this display. You would have to use one of the other colour temperature modes if you want something warmer for a lot of text work or late at night.
The USB type-C port provides simple connectivity for compatible laptops and other devices, and offers 90W power delivery which makes it super-convenient. There are also 3x USB 3.0 downstream ports provided on the back of the screen which are reasonably easy to get to as they are not tucked away. There is also a headphone jack here. There are no other extras like motion sensors or card readers on this screen which are sometimes useful for office-type uses. There is a good range of adjustments offered overall from the stand which provided a stable and sturdy base, with smooth but quite stiff adjustments for tilt, height and rotate. The stand lacks swivel adjustment though.

“ABL” in office and general PC use? Not here
Some people might be familiar with the so-called “ABL” (Auto Brightness Limiter) feature of OLED TV’s (talked about earlier in this review) where the brightness is dimmed when using a lot of static PC/office type content. You will experience that when using the LG CX OLED for instance for a lot of PC content. This could happen in theory for a couple of reasons. Firstly, and most likely to result in this behaviour, it could happen if the image retention saving function of that TV kicks in. This is controlled on the CX OLED TV when the Average Picture Level (APL – basically the portion of the screen that is of a certain defined brightness level) doesn’t change frequently enough or in a big enough way. On the CX OLED TV which is designed for video/gaming etc and non-static content where it’s always changing, this kicks in quite often if you’re viewing static PC content, as in those situations the APL is not changing enough. That kind of function for image retention is not included here on the 32EP950 which means you won’t fall foul of that at all.
The second potential time this kind of dimming could kick in is in situations where the panel is not capable of sustaining the same brightness for white areas of a certain size. So if for instance you tried to display a full screen white image like on a spreadsheet the APL would be close to 100%; certainly a high portion of the screen would be white. The screen definitely won’t be able to display the full peak brightness capability for 100% APL screen, due to the way OLED panels are powered, but the question is whether it can display your SDR / normal office use brightness in this situation? Or does the ABL have to kick in and lower the overall brightness? On the LG CX OLED we measured a 100% APL brightness of 164 cd/m2 maximum. The brightness can be higher if the APL is lower, like a 50% APL can reach around 300 cd/m2. So if you were using your desktop at say 200 cd/m2, then on the CX OLED if you viewed an all white screen then the ABL would kick in and the brightness would be lowered to what it can handle at around 164 cd/m2. This will vary on different TV’s and could be lower than this as well, but generally that ABL handling is quite aggressive on OLED TV’s. If it could only manage 100 cd/m2 for instance at 100% APL this might be too low for many users for PC use, and it might kick in regularly. TV’s are great for small bright areas and specular highlights but less so for large bright content across the whole screen and they’re not really designed for that kind of content anyway.
On the 32EP950 we measured (covered later in the HDR section) a full 100% APL brightness capability of around 340 cd/m2 which is impressive. Given that for SDR content like office work the maximum luminance of the screen we measured earlier is around 266 cd/m2 anyway, this means the ABL will never need to kick in. So in summary for SDR content viewing like office work and PC general use, you should never see the screen dim like you might see often on OLED TV’s.
Response Times and Gaming

Being OLED based the screen does not need to use overdrive technology to boost pixel transitions across grey to grey changes as the response times of this technology are already very fast and near-instant. The part being used is an JOLED OLED technology panel. Have a read about response time in our specs section if you need additional information about this measurement. Our thanks to NVIDIA for hooking us up with an RTX 3090 for all our testing.
| Check Pricing and Buy – Affiliate Links |
 NVIDIA RTX30 Series graphics cards: Amazon and Overclockers UK |
| TFTCentral is a participant in the Amazon Services LLC Associates Programme, an affiliate advertising programme designed to provide a means for sites to earn advertising fees by advertising and linking to Amazon.com, Amazon.co.uk, Amazon.de, Amazon.ca and other Amazon stores worldwide. We also participate in a similar scheme for Overclockers.co.uk. |

We measured the response times of the screen using our updated and more accurate method. The OLED panel provides exceptional response times which are near-instant. Overall there was a 0.67ms G2G response time average, and only a 1.4ms in the absolute worst case. There was no need for any overdrive here either because of the OLED panel and so no overshoot issues at all. This was of course easily fine to support 60Hz refresh rate, it’s just a shame that the panel cannot support a high refresh rate like 120Hz or higher.
When considering gaming usage we need to remember that this screen is in no way aimed at gaming, but can it be used for that anyway? We’re sure lots of people would have loved a high refresh rate to be offered here, as OLED technology is really well suited to gaming thanks to its super-fast response times, no overshoot, amazing contrast ratios and exceptional HDR performance. You can get some high refresh rate OLED TV’s nowadays such as the very popular LG CX OLED that we reviewed (from 2020), or also their new 2021 C1 range. Those offer 120Hz refresh rate and things like HDMI 2.1 as they are aimed a lot more at gamers, multimedia and modern games consoles like PS5 and Xbox Series X. The high refresh rate on those screens provides noticeable improvements in motion clarity and gaming experience and is really important nowadays if you want an excellent gaming experience from any display for FPS gaming or anything like that. That increased refresh rate also allows for higher frame rate support above 60fps which is again important for those kind of games. We need to keep in mind here that it doesn’t matter that response times are super-fast on OLED, if you are stuck with 60Hz then you are still restricted when it comes to overall gaming experience and motion clarity because of that refresh rate.
Here on the LG 32EP950 the screen is aimed at content creators, HDR video production and professional uses and so only a 60Hz refresh rate is offered. We wouldn’t be surprised to see high refresh rate OLED alternatives at some point in the future, but none are currently announced. And don’t forget this is a new venture for LG to bring OLED in to the monitor space and with production and development costs being very high at the moment, it’s likely it will be restricted to professional screens for the time being where retail costs for the displays are much higher.
But going back to the question of whether you can game on this screen anyway – keep in mind that 60Hz was the norm for desktop monitors for many many years, and not everyone even needs high refresh rates anyway. If you’re playing strategy (RTS) games or slower paced, more static games then 60Hz may be all you need. Running at 60Hz does at least allow you to push things like resolution (the full 4K) and game details without putting a massive strain on your system or graphics card too, and you can see this also from modern consoles where 4K gaming with high settings is limited to 60Hz only at the moment. For 120Hz and the motion clarity improvements that brings on those modern consoles, you have to sacrifice resolution or settings. Remember again that older consoles from the last generation like PS4 etc were also 60Hz-only, so it’s not like everyone even needs to use high refresh rate.
If you’re playing fast paced games, FPS and the likes then there’s no doubt that a high refresh rate will bring about noticeable and obvious improvements not just in motion clarity and experience, but in frame rate support. That is unfortunately not available here on the 32EP950 at all, and there are definitely better gamer-focused displays out there for those kind of games. There’s also no VRR support (maybe one feature they could have included that might have been helpful here), blur reduction backlights or gamer settings like you get on all those gamer screens either. But, if you only want or need to game at 60Hz anyway, then you don’t need to rule out this display for gaming altogether. It certainly isn’t its target market, or even really an “intended use”, but the super fast response times, no overshoot, no lag, great image quality and exceptional HDR performance provided by the OLED panel could make this a very good 60Hz-only display for some gaming needs.
Lag
Read our detailed article about input lag and the various measurement techniques which are used to evaluate this aspect of a display. The screens tested are split into two measurements which are based on our overall display lag tests and half the average G2G response time, as measured by our oscilloscope. The response time element, part of the lag you can see, is split from the overall display lag and shown on the graph as the green bar. From there, the signal processing (red bar) can be provided as a good estimation of the lag you would feel from the display. We also classify each display as follows:

The total lag measured was a very impressive 1.29ms total. The pixel response times account for around 0.34ms of that, and so we can say that there appears to be around 0.96ms of signal processing lag on this screen which is super low. A solid result from this display even though it’s in no way aimed at gamers.
Movies and Video
The following summarises the screens performance for videos and movie viewing:
| Category | Display Specs / Measurements | Comments |
| Size | 31.5″ widescreen | Fairly large for a desktop monitor but smaller than TV’s by a lot |
| Aspect Ratio | 16:9 | Well suited to most common 16:9 aspect content and input devices |
| Resolution | 3840 x 2160 | Can support Ultra HD (“4K”) and 1080p content natively |
| HDCP | Yes v2.2 | Suitable for encrypted content including the latest v2.2 |
| Connectivity | 2x DisplayPort 1.4 1x HDMI 2.0 1x USB type-C | Useful additional 1x HDMI input for external Blu-ray players or games consoles. Does not feature the latest HDMI 2.1 though for next gen games consoles (no desktop monitor does yet) although HDMI 2.0 is sufficient for 4K @ 60Hz anyway |
| Cables | DisplayPort, USB type-C and HDMI | Useful to include an HDMI cable in the box |
| Ergonomics | Tilt, height, rotate | A bit stuff but easy enough to use adjustments with a wide range, and with smooth movement. Side to side swivel would have been useful for different viewing positions. The stand remains very sturdy and stable |
| Coating | Semi glossy | Provides clear image with no graininess. Might create more reflections than a common AG coating on an LCD monitor so be careful about positioning of windows and lights, but it still avoids major reflections of full glossy solutions |
| Brightness range | 21 – 266 cd/m2 (SDR) 581 cd/m2 (peak HDR) | Good adjustment range offered including a decent enough max brightness (SDR) and good darkened room adjustment range. Backlight dimming unfortunately requires the use of PWM and so is not flicker free. HDR discussed in the following section |
| Contrast | Infinite:1 | One of the obvious strengths of this screen thanks to its OLED technology panel, with true black (pixels turned off) and infinite contrast ratio as a result. Excellent for improving dynamic range and providing deep blacks in darker content |
| Preset modes | None | There are no specific preset modes for movie viewing in the menu but you can easily set up one of the other modes to your liking including the ‘custom’ mode perhaps. There’s loads of presets for content creation so you could also use one of those like DCI-P3 mode for instance, or of course the HDR modes if watching HDR content |
| Response times | 0.67ms G2G with no overshoot at all | Response times are excellent thanks to the OLED panel with no overshoot as overdrive is not even needed or used. This should be very capable of handling movie content |
| Viewing angles | Excellent | Super-wide viewing angles thanks to the OLED panel and no glow like you would get on an IPS panel on dark content |
| Backlight bleed | None | No bleed as when an all black image is shown, the pixels are turned off thanks to the OLED panel |
| Audio | Headphone output | No integrated speakers on this model but a headphone jack is provided |
| Aspect Ratio Controls | Original, Full Wide, 1:1 pixel mapping | Good support for non-native aspect ratios if needed although the native 16:9 aspect ratio is very common for external Blu-ray players or DVD players anyway |
| PiP / PbP | Neither supported | n/a |
| HDR support | See below | see following section |
| 24p content handling | 48Hz setting available | To help support devices that need to run at 24 fps a specific setting is available on the screen that lets you set the refresh rate at 48Hz ( a multiple of 24fps) instead of 60Hz. This would only apply for detected 24p devices but can be useful to some specific uses |
HDR (High Dynamic Range)

The screen is perfectly positioned to handle HDR content and surpasses anything available currently in the desktop monitor space. This includes both HDR content creation and of viewing of course. OLED technology has long been regarded as the best technology for HDR thanks to its pixel-level dimming capability. This allows each pixel to be individually lit, meaning you don’t need backlight local dimming zones or need to worry about issues like “blooming” or halos like you get on other monitor backlight technologies. Technically the contrast ratio you get for normal SDR content is infinite:1 as well (for maximum “dynamic range”), but in HDR mode these OLED screens are capable of offering increased peak brightness as well. Let’s compare it to the desktop monitor market though first.
Most desktop monitors, especially those advertised with the very lapse and in our opinion pointless VESA DisplayHDR 400 certification, lack any form of local dimming for HDR. So by their nature cannot actually improve the dynamic range of the display! Sure, they can accept an HDR input source and some may offer slightly brighter screens, maybe 10-bit colour depth, maybe a wider colour gamut but they don’t always. The HDR 400 spec doesn’t even require any of that either! But without local dimming there’s no improvement to the dynamic range at all and you are basically limited by the LCD panel’s native contrast ratio. For a TN Film or IPS panel this would max out at around 1000 – 1300:1 and for a VA panel maybe around 3000 – 5000:1. Local dimming is a vital component of HDR.
Some screens might carry the higher HDR 500 or HDR 600 certifications though which do at least require some form of local dimming to achieve the spec, making it at least viable for the dynamic range to be improved. Those specs also require a higher peak brightness of 500 or 600 cd/m2, 10-bit colour depth and wide DCI-P3 gamut so you can at least expect a better HDR potential from HDR 500/600 screens. However, all of these screens feature only fairly simple edge-lit local dimming of the backlight in a very limited number of zones. This is normally something like 8 zones, maybe 16 or 32 if you’re lucky. In theory this can allow for improved dynamic range across the screen as a whole, with the backlight being capable of dimming darker areas while brightening others. In practice you don’t get much of an improvement in “local HDR contrast” between adjacent areas of light and dark, and it’s not capable of picking out smaller highlights or sample areas very well. This also results in large areas of blooming as to increase the brightness of a certain highlight requires a whole large area to be increased. It’s better than nothing, but far from being a very good HDR experience. Those HDR 500/600 screens are still a very small portion of the monitor market as well.
For the top-end HDR experience in the LCD monitor market today you’d be looking currently at some of the niche and very expensive top-end models with a Full array Local Dimming (FALD) backlight. Those that have a “direct backlight” behind the panel split in to many more dimming zones. We’ve reviewed models like the Asus ROG Swift PG27UQ and PG35VQ in the past with 384-zone and 512-zone local dimming backlights for instance. These meet the upper tier HDR 1000 standard as well, so can reach even higher peak brightness of 1000 cd/m2, along with wide gamut colour space and 10-bit colour depth. These FALD options, and some newer “mini LED” options like the forthcoming Asus ROG Swift PG32UQX for instance (HDR 1400 with 1152 zones) with even more (and smaller) dimming zones represent the best available HDR options for desktop LCD monitors today. The problem is these models are very expensive and top-end, and even with many hundred or even over a thousand zones, it can still leave you with some issues for HDR content. Blooming and halos are still a problem when smaller highlights are needing to be brightened, and while the more zones the better, it will never be as optimal as per-pixel dimming like on OLED. They can however reach much higher peak brightness than OLED panels so can look punchy if the backlight is decent enough.
The dimming capabilities of the OLED panel here on the 32EP950 easily surpass all desktop monitors when it comes to HDR, and the true black and infinite contrast make it ideal for improving the dynamic range. This particular LG 32EP950 also has the necessary wide gamut with 99.5% DCI-P3 coverage, and 10-bit colour depth support so it offers the boosted colours and appearance associated with HDR content too. While it doesn’t offer the peak brightness capability that an LCD display could reach, at (a measured) 581 cd/m2 it’s still pretty decent and not far off many OLED TV’s too. A lot of people tend to prefer the per-pixel dimming, true blacks and infinite contrast ratio that OLED offers as opposed to aiming for higher peak brightness and living with the limitations of LCD local dimming methods for HDR viewing.

For illustrative purposes only, image courtesy of LG
The problems with accuracy of even the best Multi-zone LCD backlights
We wanted to touch on a direct comparison here between an OLED panel and a top-end LCD ‘dynamic backlight’ display featuring many hundreds of zones. For instance when comparing OLED to even the most recent Mini LED backlights with more than 1000 zones, there are considerations when it comes to professional content creation and the true accuracy of the image. With the ability to control the brightness of each pixel individually on an OLED panel, and to dim them/turn them off to black if needed, not only do you get the exceptional contrast but you also get the benefit that each pixel is unaffected by the pixels around it. The same cannot be said for a FALD backlights, Mini LED backlights or indeed any LCD backlight which is controlled with dynamic zones. The output from each pixel on the OLED panel can be accurate and predictable, but not on LCD’s with dimming zones. We will explain why.
4K OLED panel = 8,294,400 individually controlled and dimmed pixels
4K Mini LED backlight panel at best today with 1152 dimming zones = 7,200 pixels within each zone
The algorithm for any local dimming LCD backlight is constantly making a choice about how bright to drive a zone, but each zone is still limited to the panels native contrast ratio at best. If you have a zone with some dark content and some light content in it (like some stars on a black night sky), how does the backlight know whether to dim or darken the zone? Ideally if it could control each pixel individually (like an OLED can) it would brighten the stars while at the same time dim the black sky. This deliberately extreme image example needs a really high contrast ratio, but the reality of HDR content is that it will often exceed the panel native contrast within a zone. Unfortunately on an LCD panel the backlight has to make a choice for that zone, and the content within the zone will be limited by the native panel contrast. On an IPS panel, which is commonly used at the moment for the best FALD and Mini LED backlights in the monitor market, that would be around 1000:1. As a result if there’s any content within an individual dimming zone that requires a higher contrast than the panel, that means some of that zone by its nature will be inaccurate. If the backlight chooses to make the bright areas accurate, it comes at the cost of the dark areas and visa versa.

Even the best modern Mini LED backlights have challenges with real image accuracy
Manufacturers also often desire to make images “pop” more for HDR viewing, driving overall luminance of a brighter region up if they can to do so. Add to this conundrum the fact that to minimise blooming and reduce halos, LCD display manufacturers tend to be cautious with how the luminance of a given zone is controlled relative to adjacent zones. There is a need to blend the light output between zones to try and “smooth” the appearance of these zones in their operation, which again can lead to inaccuracies across the screen. The best dynamic backlight systems will modulate the LCD panel and its backlight in concert, knowing how much to open the LCD shutter when combined with the backlight to achieve a colour or shade. However, lower quality dynamic backlight systems will not do this due to the costs and complexity in doing so, resulting in the two behaving independently from one another. The LCD is effectively driven as though the backlight is not dynamic, and then the backlight simply analyses the incoming signal and applies a gain based on that to each region, smoothing between the regions. The vast majority of dynamic backlight LCD’s use a de-coupled approach. So with all these factors considered the practical result of this is that nothing reproduced on screen is predictable, or an accurate representation of the signal unfortunately. None of this is a problem for OLED panels where the image can be controlled at the individual pixel level.
We are not saying that Mini LED or other LCD backlight types cannot produce really good HDR images and look great for the viewer. They absolutely can, and for HDR gaming and multimedia playback they can look really good. Very often the colour gamut and brightness levels these display are capable of exceeds those with pixel level control like OLED. They can produce very high peak brightness, vivid colours and sometimes the local dimming even works very well without major halos or blooming. However, they cannot be considered “accurate”, and for users who need to create HDR content, or need accurate representation of colours, contrast and the overall image then these type of direct backlights are not sufficient. Don’t be fooled either by measurements of a screens setup or accuracy using a calibration tool. This is only capturing a static colour block in a fixed location of the image, where the dimming zone doesn’t have to worry about any of these issues above with contrast, dimming level, halos etc. This is not representative though of real content or dynamic, moving images.


Above: the Apple XDR and Asus ProArt PA32UCG – very pleasing HDR images, but still limited by local dimming accuracy issues
A larger number of zones improves the situation slightly, but you still cannot get away from the limitation that each zone, even if it were as small as a few pixels, is a compromise, and therefore all pixels are compromised in accuracy. Of course today we are nowhere near each zone being only a few pixels even for desktop monitors, with high end best-in-class options like the Apple XDR display and forthcoming Asus ProArt PA32UCG for instance only have 576 or 1152 zones respectively. As we said, these screens are absolutely capable of producing excellent HDR images and look great for HDR content playback, but what they cannot really be is a reference monitor or offer the same level of accuracy that an OLED monitor could. The only exception to this is the dual stack LCD based systems which use one LCD to control luminance, and another for colour, like the reference grade Sony BVM-HX310 (got a spare $30k to spend?) and the similar EIZO product based on the same Panasonic panel which is now out of production.
This is only really an issue for HDR content creation and for those who are interested in accuracy and reliability for their work in the movie and broadcast industry for instance – like the target market for this LG 32EP950. For SDR content you don’t need a dynamic backlight and so normal LCD’s with normal backlights can certainly be accurate and suitable and there are plenty of excellent professional monitors for such uses. They are still limited by the native panel contrast of course but for SDR and desktop use this isn’t really an issue.
HDR modes calibrated for accuracy
That’s the background to why OLED technology is an excellent choice for HDR, but let’s look at the 32EP950 in a bit more detail. This screen has been designed specifically with the needs of video content creators in mind which include:
- A high level of colour accuracy
- Repeatable and trustworthy color reproduction independent of what is on screen (which local dimming LCD’s of any kind are unable to provide as discussed above)
- Support for a variety of video standards and references such as BT.709, DCI-P3 etc
- Support for HDR with accurate PQ EOTF tracking and a range of options for tone mapping
- The ability to calibrate all modes effectively and reliably
LG have worked with many professional content creators to understand these needs and develop the screen to address them. Prior to this product, there really hasn’t been any monitor product from any manufacturer that meets these needs, short of very expensive (~$40,000 USD) professional reference displays. There are 3 preset modes available when an HDR signal is detected. The ‘custom’ mode which you can pretty much set up as you like, with a wide range of controls and settings available in the OSD menu to choose from. There are also defined modes for DCI-P3 HDR and BT.2100 HDR which have preset colour spaces (DCI-P3 and Rec.2020 respectively) but allow you to change other things if you want. Each of these modes has importantly been set to the ST 2084 EOTF PQ gamma required for HDR content, which has been carefully tuned by LG. We should reference here that the screen supports HDR10 inputs but will not support HLG or Dolby Vision.
We tested each of the HDR preset modes in more detail:


First up we tested the BT.2100 mode which is designed to follow the PQ gamma, have a 6500k white point and to cover the Rec.2020 wide gamut colour space. From our measurements you can see that the PQ gamma is very nicely met here, in fact you can’t even see the grey line for the monitor measurement as it so closely matches the yellow target line on the graph. White point was slightly too warm at 6357k, but only a small 2% out from the target which was very good. You can see the colour gamut of the panel cannot fill the entire Rec.2020 colour space as that is very wide (no display can), but it meets a reasonable 77.6% coverage at least, doing well in blue shades but falling short in greens and reds. This results in some high dE values for those shades (5.4 dE max) as the screen cannot produce the intended red and green shades properly as the gamut is too small, but the rest of the colour checker results are excellent with dE < 1. We also measured a peak brightness of 576 cd/m2 which was decent, and a little beyond the 540 cd/m2 spec even. This is achievable with APL (Average Picture Level) up to 50% as well, dropping a little at 75% APL and then a bit more for 100% APL, but still being impressively capable relative to many OLED TVs.


We also measured the DCI-P3 HDR mode which is designed for HDR cinema content creation. This offered excellent results overall. Here the smaller DCI-P3 colour space has been very closely emulated (as it had in the SDR DCI-P3 mode as well) and we get a 99.5% coverage which is great. The greyscale is excellent and colour temperature remains a small 2% out from our target but very close. The PQ gamma curve is again very closely matched which is excellent news. Thanks to the panels ability to properly cover the DCI-P3 colour space we have very low dE for all shades now with a 0.4 average across all measured samples which was excellent. Peak brightness capability was very close again to the BT.2100 mode.
Conclusion
If you enjoy our work and want to say thanks, donations to the site are very welcome. If you would like to get early access to future reviews please consider becoming a TFT Central supporter.
The 32EP950 was a really interesting screen to test, and it was exciting to finally see the arrival of OLED technology in the monitor space. We’re sure a lot of people would love an OLED gaming monitor and we realise a lot of the market, and our audience, is the more mainstream consumer base. We need to keep in mind here the target market and usage for this screen, and consider it’s performance and also its price point accordingly. We can’t get too annoyed that is lacks x feature when that’s not what it was designed for. For those readers who aren’t interested in a specialist professional screen aimed at the target uses, this review still gives a nice flavour of what is possible for OLED in the monitor space and what might appear in the future as the technology becomes more affordable, and hopefully becomes more widely adopted. So it’s certainly interesting to use, review and test whichever way you look at it.
So to re-iterate, this screen is aimed at professional users, content creation and HDR video production. The OLED panel offers really great picture quality with bright, vivid colours, true deep blacks and infinite contrast ratio for SDR and HDR. The semi-glossy screen coating does add to the picture quality and feel of the screen as well, although you need to be more mindful of light reflection sources in your screen positioning as a result. For SDR content there’s a really good range of carefully configured and thought through options, settings and preset modes. This makes it suitable for a wide range of content types including the all-important SDR/sRGB uses. We were impressed by the factory setup in these modes and performance in our testing. Hardware calibration support is very welcome and LG’s own software was free, simple and pretty decent. Hardware calibration will be even better and more flexible when Calman support is added soon. Brightness capability and the absence of any “ABL” type issues was very welcome, panel uniformity was great and viewing angles were also very good thanks to the OLED panel. This technology really does offer some great performance. We can’t forget gaming and general multimedia usage and with the very fast response times, no overshoot, no lag and excellent HDR it’s still capable of decent 60Hz gaming if you want.
On the other hand you do always have in the back of your mind the issue of possible image retention when you use an OLED screen. There’s some measures included on the screen, and some others you can take to mitigate the risk, but if you’re using OLED for a lot of static content this could be a worry still. It’s not intended or expected that you’d use this screen for a lot of desktop/office static content, and we’re sure it will handle a fair bit of that without issue. So it’s probably not going to present a problem to most people anyway, certainly not if you’re working more with non-static content. But it’s always there in the back of your mind when you use it, or leave the screen alone for a bit.
HDR usage is obviously a really key area for this screen and it does very well here. There are obvious benefits from the OLED panel again with per pixel dimming, no blooming, amazing contrast etc. This is really well-suited to HDR. The HDR picture modes are again well set up here and offer good flexibility for HDR content creation and work. We were pleasantly surprised by the decent peak brightness and certainly the APL handling and capability. It can’t get as bright as modern LCD monitors with direct backlights like Mini LED so you lack a bit of the brightness “punch” you get from those, but it makes up for it in its OLED capabilities we felt.
HTML clipboard
The 32EP950 was expected to be released late May/early June and it’s finally started to appear in some regions near the beginning of July. It’s listed for around $4,000 USD and you can check latest availability and pricing using the links below. The screen could be very popular for design work and content studios where nothing like this really exists today, apart from super-expensive reference monitors. If you’re in that niche then it’s a great option and a solid first venture in to OLED for the desktop monitor market.
| Pros | Cons |
| Wide range of well configured modes and settings for both SDR and HDR | Possible concerns around image retention play on your mind with an OLED |
| Accurate setup and colour performance | The fact that the backlight is not flicker free may concern some people |
| Excellent HDR capabilities thanks to the OLED panel | Although not the target audience we would have loved high refresh rate and VRR support |

| Check Availability and Pricing – Affiliate Links |
|---|
| Amazon | Overclockers UK |
| TFTCentral is a participant in the Amazon Services LLC Associates Programme, an affiliate advertising programme designed to provide a means for sites to earn advertising fees by advertising and linking to Amazon.com, Amazon.co.uk, Amazon.de, Amazon.ca and other Amazon stores worldwide. We also participate in a similar scheme for Overclockers.co.uk. |