ASRock Phantom Gaming PG34WQ15R3A

Introduction
Over the last couple of years we’ve seen several established PC component and peripheral manufacturers decide to enter the desktop monitor market, including the likes of Gigabyte, Cooler Master and Corsair. In September 2022 ASRock decided to join the party, and announced their first display – the PG34WQ15R2B which is part of their new ‘Phantom Gaming’ line-up. ASRock are better known for their PC components like graphics cards and motherboards, but it’s always nice to see a new manufacturer emerge in to the monitor market to help spice things up and bring more competition.
We didn’t have chance to test or review their PG34WQ15R2B, but we now have with us their slightly updated version that was announced on 4 January 2022. It’s basically the same screen (so the review applies equally to the older model), but with a couple of additional features – most notably the RGB lighting on the rear of the stand and the inclusion of a small OLED display on the front.
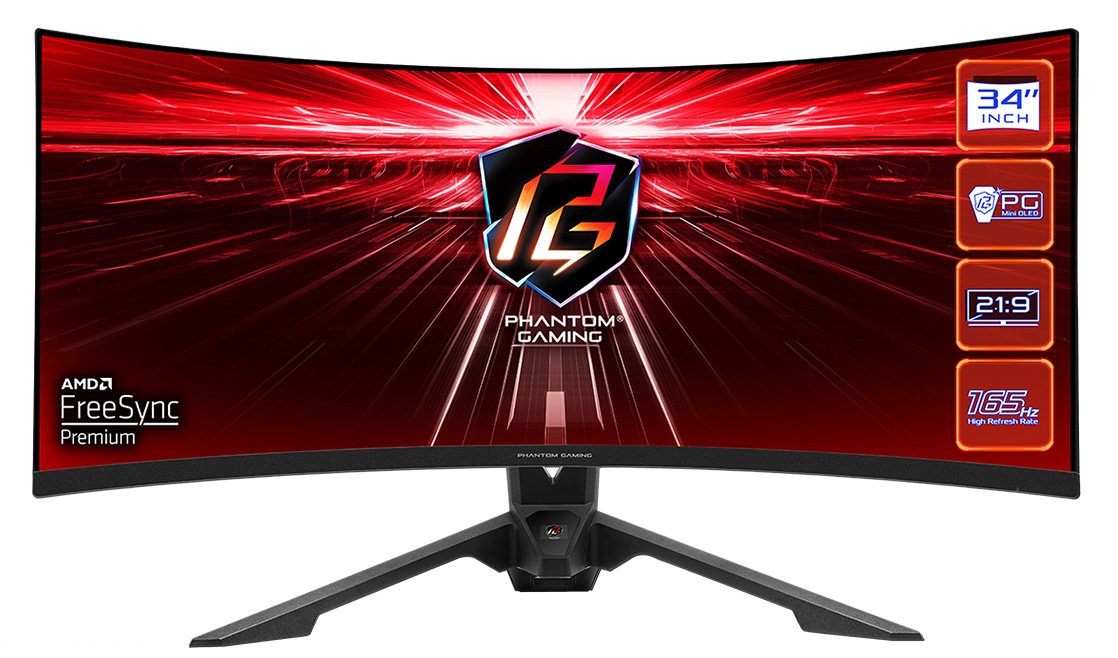
The PG34WQ15R3A is a 34″ ultrawide screen with a 21:9 aspect ratio, 1500R curvature and 3440 x 1440 resolution VA technology panel. This is combined with a fairly high 165Hz refresh rate, backed as ever by adaptive-sync for variable refresh rate (VRR) support. To separate the PG34WQ15R3A from competing models, of which there are many in this 34″ ultrawide space, ASRock have added a few interesting extra features. These include a small 1.3″ OLED graphical display in the base of the stand (not included on the older R2B model), and even an integrated Wi-Fi antenna. We will check out both of these in more detail later.
 | Check pricing and availability in your region |
 | |
 |
Key Specs and Features
- 34″ ultrawide format with 21:9 aspect ratio
- 1500R curvature
- VA technology panel
- 3440 x 1440 resolution
- 165Hz refresh rate
- Adaptive-sync VRR including AMD FreeSync Premium certification
- 1ms MPRT (with blur reduction mode)
- Extended colour gamut with 91% DCI-P3 and 115% sRGB coverage
- 1x DisplayPort 1.4 and 2x HDMI 2.0 video inputs
- Headphone jack and basic 2x 2W speakers
- Stand with tilt, height and swivel adjustments
- 1.3″ OLED customisable display built in to stand (3RA model only)
- Integrated Wi-Fi antenna
- Polychrome RGB lighting (3RA model only)
Design and Features
The PG34WQ15R3A comes in a black finish with a 3 side “borderless” design. As well as the thin black plastic edge, there is a black panel border as normal on these panels giving a total black edge of 8.5mm along the sides and top. The bottom edge has a traditional thicker matte black plastic bezel giving a total 22mm black edge. There is a subtle “Phantom Gaming” logo in the middle of the bottom bezel and a small power LED in the bottom right hand corner.
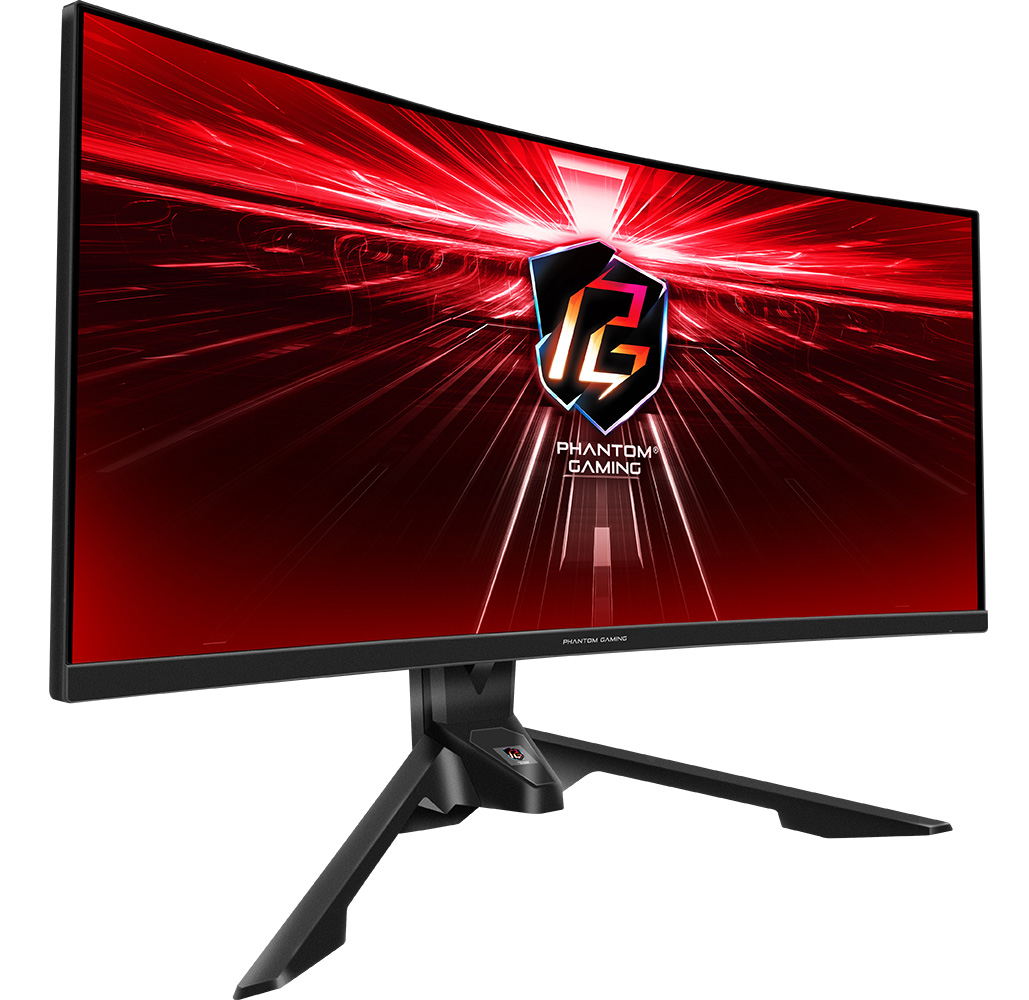
The stand is metal with a plastic coating and provides a strong, wide and sturdy base for the large 34″ ultrawide panel. You can see the small protruding section at the front of the stand which houses the 1.3″ OLED display feature.

You can use ASRock’s “Polychrome Sync” software to update this OLED display, loading 3 images or GIF’s to be displayed on the small panel. This same software can be used to control the RGB lighting on the back of the stand too.
A USB cable is provided in the box to connect the monitor back to your PC, which then powers this OLED display and the RGB lighting. If you don’t add your own images, an ASRock Phantom Gaming logo will be shown, but this flashes on and off periodically to prevent burn in – even on a small OLED panel like this, burn-in is a concern! This might be a nice bonus feature for gamers or streamers who want to display their own logo or graphics perhaps but personally I disabled it.

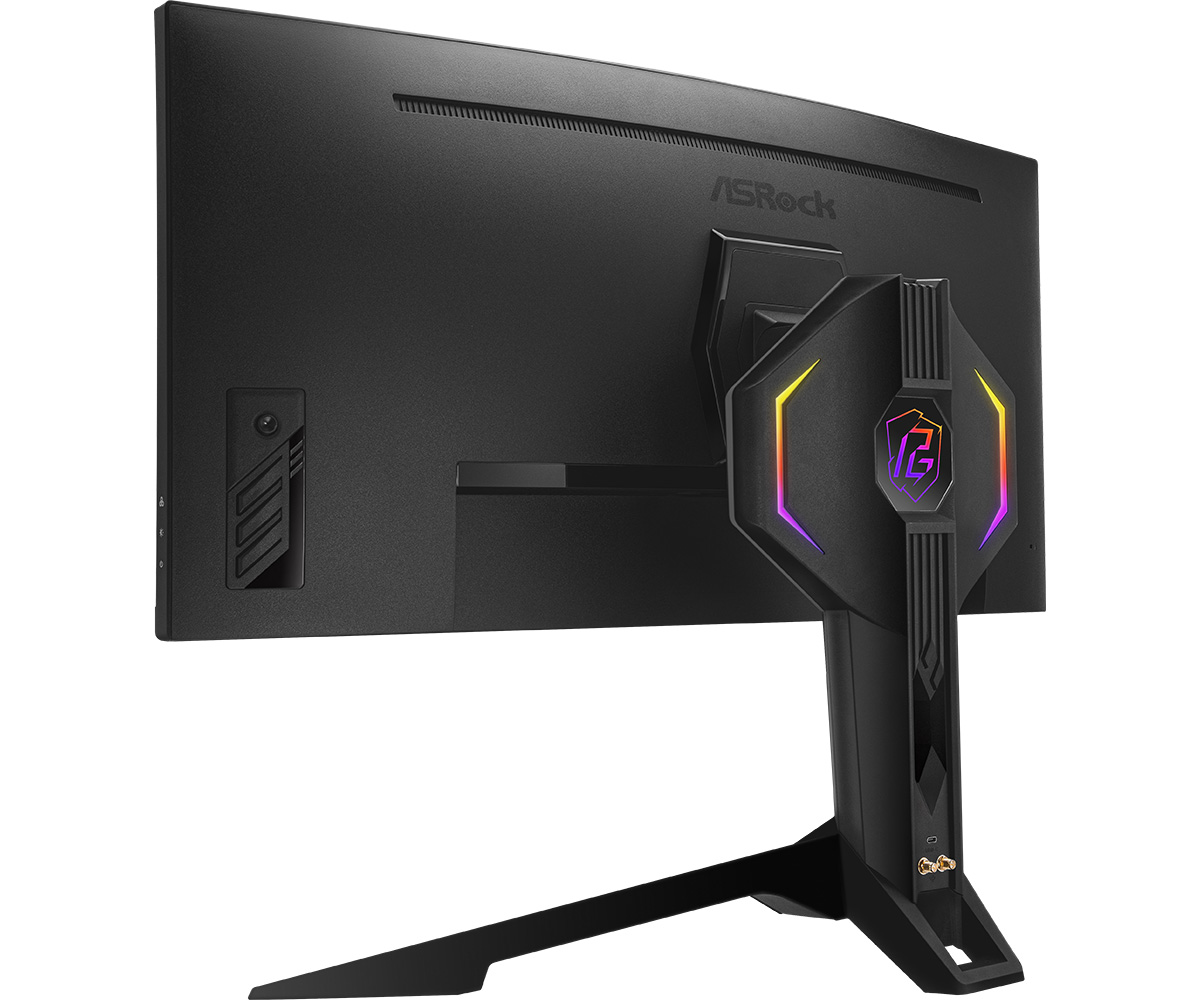
The back of the screen is encased in a matte black plastic enclosure. The stand connects in to the centre and has a useful cable tidy hole in the back of it. You will note the gold SMA connectors for the Wi-Fi antenna at the bottom of the stand, discussed more in a moment.
The new R3A model has some simple integrated RGB lighting in the top section of the stand which can be customised and adjusted using the free Polychrome RGB software. There is a Phantom Gaming logo and two edge sections. The brightness is limited so is only really useful if you can see the screen from the rear, it’s not bright enough or large enough to provide any backlighting or glow on your wall behind the screen or anything.
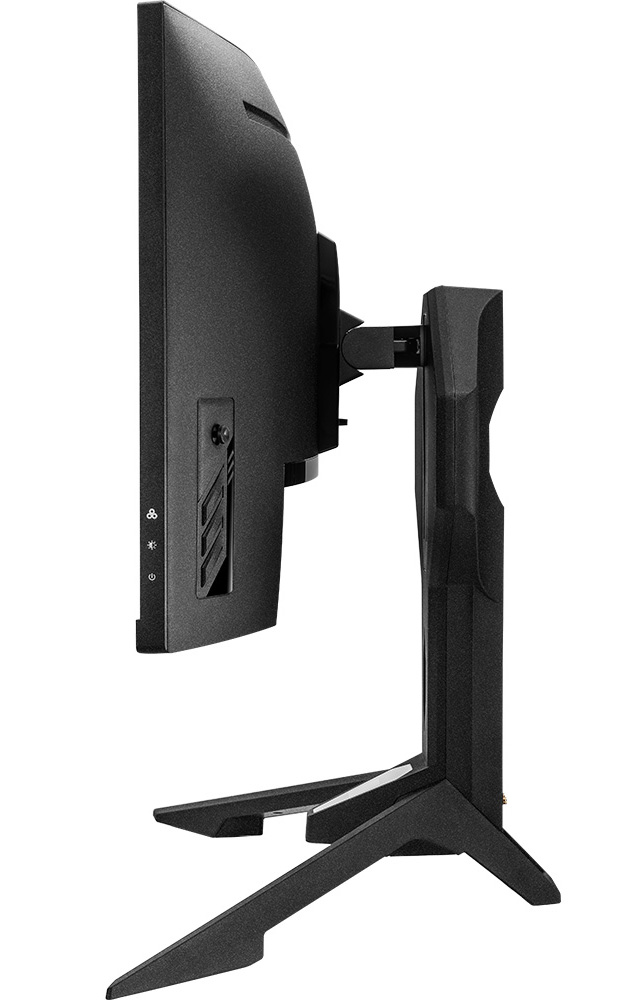
The OSD control buttons are located on the left hand edge of the screen, when viewed from the rear. There is a joystick controller which provides quick and intuitive access to the main OSD menu, along with 3 pressable buttons. These give quick access to the preset modes, brightness control and then power on/off.


The menu is quick and easy to use but has a limited range of settings overall. We will talk about the “preset modes” later on, but they are very limited. There are also only simple on/off settings for most things, without various modes or levels available to play with. The software felt limited and basic to be honest, more akin to a general budget office monitor than a gaming screen.

The stand provides a good range of ergonomic adjustments with tilt, height and side to side swivel available. These are all a little stiff to operate, but are smooth to move, giving you a good range of adjustment. There’s only a little wobble from the screen as you move it around of use the OSD menu, and the stand provides a decent sturdy base for the large panel. The stand on this new R3A model has a little more height adjustment (20mm extra) than the stand on the R2B model by the way.s

The screen has a modest range of connectivity options on the back with 1x DisplayPort 1.4 and 2x HDMI 2.0 for video, as well as a headphone jack. Unfortunately there is no HDMI 2.1 here for some latest gen consoles features, and no USB type-C, which you can find on many competing monitors. There also aren’t any USB ports on this screen which is very rare in today’s market, and missed a bit.
Integrated Wi-Fi

One of the key features promoted for the ASRock monitors, and something unique in the market at the moment, is the integrated Wi-Fi antenna. This is built in to the monitor’s stand as indicated in the ASRock marketing image above. The theory here is that your monitor could be positioned in a better location to optimise signal quality back to your internet hub/main Wi-Fi point than your PC system and case might be. If your PC is tucked away under a desk for instance, or in a cupboard a Wi-Fi card or adapter in the PC might not be able to get an optimal signal. Additionally those devices can be of varying quality, and so the idea here is that by providing a Wi-Fi antenna built in to the monitor, it might be of a better quality, and be in a better position to improve your signal and coverage. In turn, that could maybe improve your online gaming experience.

Before we received the screen and looked in to this properly, we expected this to be some kind of USB connected device, with the monitor being connected back to your PC by USB and the Wi-Fi antenna working from there as if it was a USB peripheral. In fact what you have to do is connect the screen back to your PC using SMA connectors and cables. These are usually used for connecting either simple antennas or maybe an external antenna via longer cables.
Whether or not the screen’s integrated antenna is of use to you will depending obviously on whether you have these connections on your system. Not every motherboard features these kind of connectors and so that does exclude its use from many people. Surveying our audience showed that ~60% of gamers had a motherboard with these connections on it, so there is a decent portion of potential users out there.

The other question here is whether it’s really going to offer you an improved device positioning and signal compared with your PC where you might instead just connect simple antennas straight in to the motherboard. How many gamers have PC cases they stick out of the way under their desk? How many actually have systems they are proud to show off on their desktop with windows to see the insides, RGB lighting, optimised cooling etc? The latter seems more likely in the gaming market and so this brings in to question the logic of needing a separate Wi-Fi antenna in your monitor. Again we polled our audience and found that ~46% had their PC case on their desk which makes the feature of low value, leaving the other ~54% as potential target audience for this feature.

It’s nice to see innovation in the monitor space and something a bit different, but whether or not this feature will be useful to you will depend on your setup of course.
Testing Methodology Explained (SDR)

Performance is measured and evaluated with a high degree of accuracy using a range of testing devices and software. The results are carefully selected to provide the most useful and relevant information that can help evaluate the display while filtering out the wide range of information and figures that will be unnecessary. For measurement, we use a UPRtek MK550T spectroradiometer which is particularly accurate for colour gamut and colour spectrum measurements. We also use an X-rite i1 Pro 2 Spectrophotometer and a X-rite i1 Display Pro Plus colorimeter for various measurements. Several other software packages are incorporated including Portrait Displays’ Calman color calibration software – available from Portrait.com.
We measure the screen at default settings (with all ICC profiles deactivated and factory settings used), and any other modes that are of interest such as sRGB emulation presets. We then calibrate and profile the screen before re-measuring the calibrated state.
The results presented can be interpreted as follows:
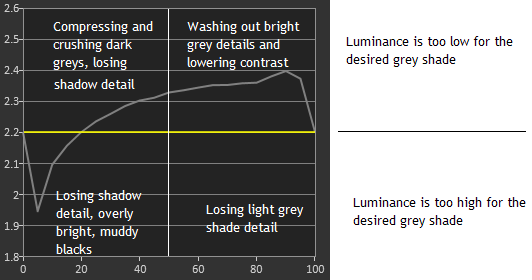
- Gamma – we aim for 2.2 gamma which is the default for computer monitors in SDR mode. Testing of some modes might be based on a different gamma but we will state that in the commentary if applicable. A graph is provided tracking the 2.2 gamma across different grey shades and ideally the grey line representing the monitor measurements should be horizontal and flat at the 2.2 level, marked by the yellow line. Depending on where the gamma is too low or too high, it can have an impact on the image in certain ways. You can see our gamma explanation graph to help understand that more. Beneath the gamma graph we include the average overall gamma achieved along with the average for dark shades (0 black to 50 grey) and for lighter shades (50 grey to 100 white).
- RGB Balance and colour temperature – the RGB balance graph shows the relative balance between red, green and blue primaries at each grey shade, from 0 (black) to 100 (white). Ideally all 3 lines should be flat at the 100% level which would represent a balanced 6500K average colour temperature for all grey shades. This is the target colour temperature for desktop monitors, popular colour spaces like sRGB and ‘Display DCI-P3’ and is also the temperature of daylight. It is the most common colour temperature for displays, also sometimes referred to as D65. Where the RGB lines deviate from this 100% flat level the image may become too warm or cool, or show a tint towards a certain colour visually. Beneath this RGB balance graph we provide the average correlated colour temperature for all grey shades measured, along with its percentage deviance from the 6500K target. We also provide the white point colour temperature and its deviance from 6500K, as this is particularly important when viewing lots of white background and office content.
- Greyscale dE – this graph tracks the accuracy of each greyscale shade measured from 0 (black) to 100 (white). The accuracy of each grey shade will be impacted by the colour temperature and gamma of the display. The lower the dE the better, with differences of <1 being imperceptible (marked by the green line on the graph), and differences between 1 and 3 being small (below the yellow line). Anything over dE 3 needs correcting and causes more obvious differences in appearance relative to what should be shown. In the table beneath the graph we provide the average dE across all grey shades, as well as the white point dE (important when considering using the screen for lots of white background and office content), and the max greyscale dE as well.
- Luminance, black depth and contrast ratio (static) – measuring the brightness, black depth and resulting contrast ratio of the mode being tested, whether that is at default settings or later after calibration and profiling. We aim for 120 cd/m2 luminance which is the recommended luminance for LCD/OLED desktop monitors in normal lighting conditions. Black depth should be as low as possible, and contrast ratio should be as high as possible.
- Gamut coverage – we provide measurements of the screens colour gamut relative to various reference spaces including sRGB, DCI-P3, Adobe RGB and Rec.2020. Coverage is shown in absolute numbers as well as relative, which helps identify where the coverage extends beyond a given reference space. A CIE-1976 chromaticity diagram (which provides improved accuracy compared with older CIE-1931 methods) is included which provides a visual representation of the monitors colour gamut coverage triangle as compared with sRGB, and if appropriate also relative to a wide gamut reference space such as DCI-P3. The reference triangle will be marked on the CIE diagram as well.
- dE colour accuracy – a wide range of colours are tested and the colour accuracy dE measured. We compare these produced colours to the sRGB reference space, and if applicable when measuring a wide gamut screen we also provide the accuracy relative to a specific wide gamut reference such as DCI-P3. An average dE and maximum dE is provided along with an overall screen rating. The lower the dE the better, with differences of <1 being imperceptible (marked by the green area on the graph), and differences between 1 and 3 being small (yellow areas). Anything over dE 3 needs correcting and causes more obvious differences in appearance relative to what should be shown. dE 2000 is used for improved accuracy and providing a better representation of what you would see as a user, compared with older dE methods like dE 1994, as it takes into account the human eye’s perceptual sensitivity to different colours.
Default Setup
The PG34WQ15R3A offers an extended colour gamut backlight which provides a boost in vividness and saturation of colours compared with a standard gamut screen, which can be well suited to a lot of gaming and to modern multimedia content. This is not quite as wide as some displays on the market including those with Quantum Dot coatings, with the spec suggesting a 91% DCI-P3 coverage. For a lot of normal desktop uses actually you want to work with a smaller SDR / sRGB colour space and that can be more difficult on any wide gamut screen. We will see how this screen handles that usage scenario shortly.
We first want to measure the accuracy of the default out-of-the-box setup relative to typical sRGB content, while also examining the screen’s suitability and accuracy for common wider colour gamut spaces such as DCI-P3, or for Adobe RGB which is used in the professional and photography markets quite often.

The screen provides a decent default setup in terms of gamma, white point and greyscale which is great news. The gamma curve is a little low (2.14 average) but tracks pretty close to the 2.2 target. The white point is only slightly too warm at 6286K, with a minor 3% deviance from our 6500K target. Across the greyscale the colour temp is also only slightly too warm at 6396K average (2% deviance). This results in a good greyscale accuracy with dE 2.3 average measured.
The default brightness of the screen is modest at 170 cd/m2, and thanks to the VA technology panel there is a very high 3827:1 contrast ratio, surpassing easily modern TN Film and IPS panels, even the latest IPS Black panels. In this default mode we measured the backlight adjustment range via the ‘Brightness’ setting and recorded a maximum of 460 cd/m2, and a min of 76 cd/m2. This gives you a good overall adjustment range, although we would have perhaps liked a little more room at the darker end for dark room conditions.
There are a range of what ASRock call “preset modes” in the OSD menu, but these seem to simply be pre-configured and locked brightness levels designed for different uses. There are modes for text (locked at 20% brightness), Internet (40%), Game (60%), Movie (80%) and Sports (100%). The ‘Standard’ mode gives you flexibility to control the brightness setting as you wish, although having quick access to other brightness levels may be useful in some situations. These preset modes do not allow you to save separate settings for other things like colour temp though so they are pretty limited as far as savable preset modes go. You’d normally expect more from gaming screens when it came to preset and customisable modes.

You can see that the monitor’s colour gamut extends a fair way beyond the sRGB reference space, resulting in a 121.7% relative coverage. Most of the over-coverage is in red shades, leading to higher saturation in reds and skin tones (for SDR content). There is decent, but not complete coverage of common wide colour gamut spaces here too. We measured a 93.3% DCI-P3 coverage and 89.3% Adobe RGB. These aren’t really enough to make the screen viable for working in these wider gamut spaces fully, so you’d want to be looking for a screen with an even wider colour gamut if you wanted to specifically work with content in DCI-P3 or Adobe RGB. This is obviously a screen aimed at gamers so this under-coverage is not a huge problem to be honest, but if you wanted a screen for work and play and needed better coverage of DCI-P3 / Adobe RGB you might need to look at alternatives. Accuracy of sRGB / SDR colours was good though even in this extended gamut mode, with a dE 2.0 average recorded.
Colour Temp Modes
| Colour Temp Mode | RGB values in menu | Resulting White Point |
| Normal | 50, 44 , 44 | 6286K |
| Warm | 50, 40, 33 | 5576K |
| Cool | 45, 41, 50 | 7393K |
| User | 50, 50, 50 (customisable) | 6782K |
| sRGB | 50, 40, 33 | 5567K |
There are some ‘Color Temp’ modes available in the OSD menu with options for normal (the default), warm, cool, user (which is customisable) and sRGB. We had expected the sRGB option to perhaps provide an sRGB emulation mode to clamp the wide colour gamut of the screen back to the sRGB reference space, but unfortunately this was not the case. Instead it just appeared to be a mode that locked the RGB channels at something different (50, 40, 33) compared with the default ‘normal’ mode (50, 44, 44) and was the same as the ‘warm’ mode. This resulted in a much warmer image but there was no change to the gamut of the screen. We have captured the screen’s RGB settings in each mode along with the resulting white point in the table above.
This does mean that there is no way to emulate the smaller sRGB colour space from the monitor hardware itself, and you will instead need to rely on other methods such as graphics card clamping, or of course calibration and ICC profiles, if you want to restrict the colour space and have better accuracy for sRGB / SDR content. Having a usable and working sRGB emulation mode from the monitor itself is the easiest method though so it’s definitely a shame it’s not featured here.
Calibration


Calibration and profiling can produce very good results if you have a suitable calibration device and software and make some tweaks to the monitor’s OSD settings. This was profiled to 2.2 gamma, 6500k colour temp and to the sRGB colour space. The screen was left in its native wide gamut mode, but this profile will be used in colour-aware applications (e.g. Photoshop) to map back to sRGB in this instance. In the absence of an sRGB emulation mode on the monitor itself, this was the best and most accurate way to achieve this colour space clamping. The contrast ratio had improved a little with our tweaked settings too, up to 4023:1 which was excellent. This is certainly a big strength of this VA panel technology.
You can see the recommended OSD settings above that go along with this profile. Our calibrated ICC profile for this display is available now for our Patreon supporters and will be added to our main database in the coming months.
General and Office
The 3440 x 1440 resolution is a comfortable size on a 34″ ultrawide screen like this and provided a sharp image and comfortable text size without the need to use any operating system scaling (0.23mm pixel pitch, 110 PPI). It’s far better than the 2560 x 1080 resolution options you sometimes see in this ultrawide space, giving you a large screen area to work with and a decent real estate for split screen multi-tasking. Like most ultrawide screens available today, the PG34WQ15R3A is curved with a moderate 1500R curvature. We prefer a curve on an ultrawide screen which helps improve immersion and bring the edges of the screen a little closer to your central viewing position for a more comfortable experience, minimising the viewing angle gamma shifts a bit as well which are a bit more pronounced on a VA panel like this than on competing IPS ultrawide screens. A flat format may be better for graphical work, or when using content with a lot of straight lines like spreadsheets for instance, so you will have to figure out which you prefer. There’s not many flat format ultrawide screens produced nowadays, although we recently tested the AOC AGON Pro AG344UXM which is flat.
The contrast ratio is very good thanks to the VA technology panel, measuring 4023:1 after calibration. This is a considerable way beyond typical TN Film and IPS panels which reach around 1000:1, and even the latest generation of IPS Black panels which can reach ~2000:1. The backlight adjustment range (76 – 460 cd/m2) is wide and offers flexibility for a range of working conditions. We would have perhaps liked a little more adjustment at the lower end for darkened room conditions, but it’s decent overall. Backlight operation is confirmed as flicker free at all brightness levels too.

Viewing angles of the screen are typical for a VA panel, showing more noticeable gamma and colour tone shifts as you move your viewing position than competing IPS panels. The image isn’t quite as stable and consistent as IPS technology. There is also the familiar off-angle gamma shift on darker content, causing some very dark detail to be lost from a head on viewing position as common with this panel technology.
The colour gamut of the backlight is a little tricky to be honest. On the one hand it’s an extended gamut covering 121.7% of the sRGB space provides a boost in vividness and saturation for multimedia and gaming, and goes some way towards supporting wide gamut material like HDR movies and games. Although it doesn’t have a particularly wide gamut compared with other screens and only offers moderate DCI-P3 coverage for instance (93.3%) so isn’t as punchy as some other wider gamut screens. The display cannot fully cover common wide gamut colour spaces like Adobe RGB (89.3%) and so is not really suitable for any professional or photography work which might be based on this colour space. This means that despite it having a greater-than-sRGB gamut, it doesn’t quite offer enough extension to make it suitable for working fully with wider gamut reference spaces. A decent boost for gaming and multimedia, but not enough for other content creation or professional uses. The other challenge here is that ASRock do not provide a working sRGB emulation mode from the monitor, and so you need to rely on other methods like graphics card clamping, or proper calibration if you want to restrict the screen back to sRGB to work more accurately with standard gamut and SDR content. It would have been good to see at least an sRGB mode provided here when the screen has an extended native gamut.

The spectral distribution at a calibrated 6500k is shown above, with the blue peak measured at 447 nm wavelength. This means it is not part of the Eyesafe certified range of products, as it does not have a blue peak that is outside of the supposed harmful range according to Eyesafe which is 415 – 455nm. There is a ‘Low Blue Light’ setting in the OSD menu which can be accessed via the color section. This is a slider from 0 (off) to 10, and makes the image progressively warmer, but then also gets very yellow in colour by the higher settings. It’s usable up to about a setting of 5 or 6 which measured 5260K (setting 5), but if you go as high as the maximum 10 setting the image gets too yellow (4545K measured).

The screen has a decent range of ergonomic adjustments with tilt, height and swivel available. Connectivity is limited in todays monitor market with only 1x DisplayPort 1.4 and 2x HDMI 2.0 offered. There is no USB type-C here which is becoming very common on monitors, and can be useful for single cable connectivity and device charging from compatible systems and laptops. There isn’t any KVM support or any PiP/ PbP modes here either, again often found on modern monitors. There aren’t even any USB ports which is almost unheard of nowadays! ASRock do provide some very basic 2x 2W speakers which are probably ok for the odd sound or YouTube clip but lacking any punch for anything more. There’s a headphone connection too for audio passthrough which is handy though. We felt the connectivity and feature set was lacking compared with many modern screens, although it is aimed primarily at gaming so some of this is probably to be expected. But when many other gamer-focused screens do add these features, it feels a bit left behind.
Gaming
The PG34WQ15R3A is based on an VA-type panel and has a quoted 1ms MPRT spec (Moving Picture Response Time). This is relevant to the blur reduction mode operation which we will test in a moment, but ASRock have avoided providing a G2G response time figure here for normal non-blur reduction operation. There is an ‘OD’ (overdrive) control in the OSD menu with a simple on/off setting but no other modes, although oddly this gets disabled when you switch on the MPRT blur reduction mode. Not that it really matters as you will see in a moment.

The screen is a bit lacking in gaming “extras” with no real preset modes available (other than defined brightness levels), and no features like FPS counters, crosshairs, black equalizers etc. For a gamer-focused screen, this is a shame and feels quite limited.
There is a pretty high 165Hz native panel refresh rate and the screen features adaptive-sync for variable refresh rates (VRR) from both AMD and NVIDIA systems. The screen has been certified under the AMD ‘FreeSync Premium’ scheme as well, but not under NVIDIA’s ‘G-sync Compatible’ scheme at this time.
We will briefly mention HDR as well here. The screen is advertised with the lowly VESA DisplayHDR 400 certification. There is no backlight dimming at all, so no monitor backlight technology to actually improve the contrast / dynamic range beyond the panel’s native. Admittedly the native contrast of the panel is very good at ~4000:1, so this is certainly one of the benefits of the VA technology here compared with IPS panel equivalents. It’s just frustrating to see the continued promotion of “HDR” under this HDR 400 certification when the vast majority of screens lack any means to actually offer an improved dynamic range with no local dimming available. Aside from that, the screen does at least have an extended colour gamut offering some boost in colours for HDR content and stretching a bit beyond the SDR colour gamut (sRGB). It’s not as wide as some screens on the market, but there is at least a bit of a boost in that area. The screen only supports 8-bit colour depth though, not the 10-bit depth that HDR content is mastered in, not that you are likely to see much real difference in practice between the two. Overall the VA panel does reasonably well for HDR content thanks to its native panel contrast and extended colour gamut, but don’t expect any further enhancements as the backlight technology simply isn’t there.
Response Times and Motion Clarity
As discussed in our detailed article about Response Time Testing – Pitfalls, Improvements and Updating Our Methodology we are using an improved and more accurate method for capturing G2G response times and overshoot, based on figures that are more reflective to what you see visually on the screen in real-World usage. Our article linked above talks through why this is better and how we arrived at this improved method in much more detail.

We first of all tested the screen at the maximum 165Hz refresh rate, switching between the OD on and off modes in a range of visual tests as well as response time measurements. As you can see, in our testing there is no difference in performance between the OD on and off modes at all, both having basically the exact same response time performance with an average ~9.3ms G2G. Visually the two modes look identical as well, the OD setting seems to do absolutely nothing. We tried a range of different refresh rates, and with adaptive-sync enabled and disabled, and at no point did the OD mode offer any change to performance.
In case this was an isolated issue with our sample (a final retail unit by the way), we reached out to ASRock for investigation and comment. Their internal product testing during development suggested there should be a change in response times with OD enabled, and they shared the figures they had obtained in their testing. In case it was an issue with our sample, ASRock sent us a second sample to test. Unfortunately this had the exact same issue with the OD mode not doing anything in visual tests or measurements. We have suggested to ASRock that they investigate this issue further and look to issue some kind of firmware update to fix it, preferably one that can be user-updated for any existing owners. If they do, then we will try and update this review at a later date. For now, all we can do is consider the current performance and our testing, now verified across two separate samples of the screen and surely indicative of a widespread problem with this screen.
If you own the screen we’d love to hear your feedback about performance with OD turned on and off – do you see a difference in simple tests like TestUFO.com?
Let’s consider the response time measurements a bit further based on what we’ve seen from this model. You may notice straight away that along the top row of the response time table above there are some particularly slow transitions from black to grey, reaching up to >21ms. This drags the average response time figure down by the way to that ~9.3ms. If we ignored the red particularly slow transitions the screen would have been more like 7.6ms G2G average, still not particularly good we should add. These slow transitions from black result in some noticeable and very familiar VA black smearing unfortunately. We have captured how that looks visually in our pursuit camera photos below. You can see this black smearing especially on darker backgrounds and it’s distracting and noticeable in real use.

The other issue is that only a third of the measured transitions were capable of keeping up with the 165Hz refresh rate of the screen, giving poor refresh rate compliance. This leads to added smearing and blurring in motion, which on top of the obvious black smearing results in a poor gaming experience. You can see pale smearing behind the yellow part of the UFO for instance in the pursuit camera photos above. At least there’s zero overshoot we suppose so no horrible pale halos, but the response times were too slow for a 165Hz refresh rate. Maybe if the OD mode worked properly this could be improved, but it does nothing to the response times and you’re left with a very slow panel for gaming.
This is disappointing for what is supposed to be a gaming screen. Most VA panels suffer from slow response times sadly, so this isn’t a huge surprise. But there are some decent faster options out there in the VA market, most notably models like Samsung’s Odyssey G7 and Odyssey Neo G8 series.

We also measured the response times across the refresh rate range in VRR situations. We left OD turned on, but it really makes no difference it seems. The G2G response times remain largely the same across the VRR range, and only at the bottom of the refresh rate range does a tiny amount of overshoot start to appear. Nothing that’s visible in practice at all, which means ASRock could definitely have been more aggressive with the overdrive impulse here, pushing for faster response times, as long as overshoot didn’t become too problematic at the lower end. For lower refresh rates like 60Hz the panel is better at keeping up with the frame rate (77% refresh rate compliance), which is good, but at the same time you’re then subjected to worse motion clarity due to the lower refresh rate. The black smearing caused by the slow black > grey transitions is still there too.
All in all we were very disappointed by the response times, motion clarity and gaming performance on this panel. Perhaps there’s a bug with the firmware resulting in the lack of any improvements when you enable OD but we tested two samples which were the same, suggesting this applies across all samples of this model. We have reported this to ASRock so will update this review if and when there’s any changes or improvements.
MPRT Blur Reduction Mode

The MPRT blur reduction mode is a simple on/off setting in the OSD menu. To make life simpler, you can enable this setting from the menu even if you had adaptive-sync enabled, and it will automatically turn off adaptive-sync for you – that’s useful and a nice touch. Note that you cannot use them both at the same time though like on some screens. This setting also disabled OD (not that it does anything as we’ve discussed above) when you enabled MPRT although if ASRock were to improve the OD behaviour and performance, we would definitely like to see OD being available in MPRT mode too.
This at least means that if you want to use this MPRT mode, you don’t need to turn a load of other things off first. Annoyingly when you want to turn MPRT off, it doesn’t remember that you previously had adaptive-sync enabled and OD enabled, so the best way to switch back would be to enable adaptive-sync in the OSD menu, which will also turn off MPRT for you.

With MPRT enabled, the backlight is strobed off and on in sync with the refresh rate. There’s no control over the pulse timing or length so you cannot control the behaviour of the strobing. The brightness control also becomes locked, and the screen delivers a fixed ~133 nits luminance in this mode. Moderate but perhaps limited for some gamers who might want a brighter screen. We would have liked to have seen a brighter performance and access to the brightness control so you could customise it further to your liking.

In practice the MPRT mode results were also poor. The response times of the panel are simply not fast enough to keep up with the refresh rate, and there are obvious visual issues. The black VA smearing is still there, and we now have obvious and distracting ghost images instead of smearing on other shades that you get with MPRT mode turned off. The image is clearest in the central area at least which means the strobe timing is decent, but with the response times being so slow, the MPRT performance isn’t very good.
Lag
We should note here that we measured a nice low input lag on the PG34WQ15R3A. There was a total display lag of only 4.57ms and with ~1.90ms of that accounted for by pixel response times, that leaves a signal processing lag of only ~2.67ms which is very good. As a result the screen is fine for fast paced competitive games if you need from that point of view.

Conclusion
ASRock are new to the monitor market and have entered a super-competitive and pretty saturated segment in the gaming niche. Their 34″ ultrawide PG34WQ15R3A offered some interesting and different features, and performed well in some areas; but unfortunately also fell short in some important areas.
This is a gaming screen and to be frank, it was disappointing in many areas for these uses. The response times were poor and with the overdrive mode seemingly not working at all, we had poor motion clarity and lots of smearing in practice. There’s the familiar VA black smearing too, which is going to be hard to avoid on a VA panel (although a few do exist), but we would have at least hoped for better response times elsewhere, and a better refresh rate compliance. At the moment, with OD not working at all, the panel simply isn’t fast enough to keep up with the 165Hz refresh rate, and the gaming experience is overall poor. This also has a knock on impact to the MPRT mode which is too inflexible, and has poor motion quality anyway because of the black smearing and slow panel response times. Related to gaming uses, we were also disappointed by the lack of extra features with largely pointless “preset modes”, and no additional gaming options in the OSD menu. In fact the OSD menu overall was pretty basic and limited. It’s good to see features like adaptive-sync available, and a fairly low input lag at least, but considering this is supposed to be a gaming screen, we were disappointed.
Away from gaming the screen faired better. The default setup was good, and was nice and accurate. There’s a very high contrast ratio which is excellent and definitely a benefit of the VA panel technology. It was a shame that no sRGB emulation mode was available, and that the extended colour gamut wasn’t sufficiently wide to offer support for DCI-P3 and Adobe RGB content fully. Brightness range was good and the use of a flicker free backlight was of course welcome.
| Check pricing and availability in your region |
| |
|
The stand provides a decent range of adjustments and a stable design although again the screen felt lacking, with connectivity being limited to only simple video connections. There’s no USB-C, no KVM function….not even any USB data ports. The addition of the Wi-Fi antenna feature is interesting, and could be of value to some people – perhaps a wider audience that we initially expected. It’s always nice to see something new and different in this space. The mini OLED display in the stand is ok, but a bit gimmicky for our liking. Those who like RGB lighting on their screens will probably also like this feature, and at least you can customise it a bit.
The PG34WQ15R3A is expected to be released during February in USA, Europe, Asia and Brazil at a retail price of $499 USD. It’s available in some regions now via Amazon and in the UK also from Overclockers.
| Pros | Cons |
| Decent setup including a high VA contrast ratio | Poor pixel response times and motion clarity with OD mode not working at all. Knock on impact to MPRT mode too |
| Wi-Fi antenna may be useful to some users | No sRGB emulation mode and limited colour space coverage for wide gamut spaces |
| Decent stand and adjustments | Limited OSD menu, options and gaming extras |
We may earn a commission if you purchase from our affiliate links in this review – TFTCentral is a participant in the Amazon Services LLC Associates Programme, an affiliate advertising programme designed to provide a means for sites to earn advertising fees by advertising and linking to Amazon.com, Amazon.co.uk, Amazon.de, Amazon.ca and other Amazon stores worldwide. We also participate in a similar scheme for Overclockers.co.uk, Newegg, Bestbuy and some manufacturers.
Stay Up to Date
 |  |  | |
| Browser Alerts | Follow us on X (Twitter) | Subscribe | Support Us |
Popular Trending Reviews
 Dell Alienware AW3225QF February 29, 2024 The new 32″ 4K QD-OLED monitor from Dell, with a 240Hz refresh rate, Dolby Vision HDR and even eARC sound support
- Asus ROG Swift PG32UCDM February 14, 2024 One of the first 32″ 4K 240Hz OLED monitors released to market featuring a 3rd gen QD-OLED panel, USB type-C, KVM, and many Asus extras
- Dell Alienware AW2725DF February 17, 2024 Dell’s new 27″ QD-OLED gaming monitor, offering 2560 x 1440 resolution and the fastest current OLED refresh rate of 360Hz. Is this the new 27″ OLED king?
- MSI MPG 321URX February 23, 2024 The brand new and very competitively priced 32” 4K 240Hz OLED monitor from MSI. Offering an extremely impressive spec and set of features, at an attractive price point.
- MSI MPG 271QRX March 8, 2024 The new 27″ QD-OLED monitor from MSI with 1440p resolution and 360Hz refresh rate. Is this the best 27″ OLED monitor to buy now?


